使用源码实现lamp的搭建
用源代码安装时一种相对复杂的方法,相比于使用绿色软件包安装,它的过程更加的复杂,也更加的容易出错,但是它也有着别的安装方法所不具备的优点:
它可以自然随意的安装各种最新的版本,可以定义各种自定义参数,实用性更高,性能也更加强大。所以本次试验是使用源代码安装实现lamp环境的搭建:
所使用到的源码包下载地址:
mysql-5.6.15.tar.gz http://pan.baidu.com/s/1hqBRgCO
cmake-2.8.10.2.tar.gz http://pan.baidu.com/s/1gdC9hIV
apr-1.4.6.tar.gz http://pan.baidu.com/s/1dDBXq2d
apr-util-1.5.1.tar.gz http://pan.baidu.com/s/1qWEYCw8
httpd-2.4.4.tar.bz2 http://pan.baidu.com/s/1c01PTMo
wordpress-3.8-zh_CN.zip http://pan.baidu.com/s/1sjCoIDZ
php-5.5.8.tar.bz2 http://pan.baidu.com/s/1ntK4zrz
本次安装在CentOS-6.4-x86_64环境下,本机ip地址为192.168.80.10 ,客户机ip地址为192.168.80.1
所需要的开发环境:
Development tools
Additional Development
首先来安装mysql:
[root@localhost ~]# tar -zxvf mysql-5.6.15.tar.gz -C /usr/local
解压安装包至/usr/local/目录下
[root@localhost ~]# cd /usr/local/
[root@localhost local]# ln -s mysql-5.6.15/ mysql
进入安装好的目录,由于这个文件名字太长给它创建一个软连接
[root@localhost local]# cd mysql
[root@localhost mysql]# vim INSTALL-SOURCE
进入mysql目录,有一个INSTALL-SOURCE文件:
4702 # Preconfiguration setup
4703 shell> groupadd mysql
4704 shell> useradd -r -g mysql mysql
4705 # Beginning of source-build specific instructions
4706 shell> tar zxvf mysql-VERSION.tar.gz
4707 shell> cd mysql-VERSION
4708 shell> cmake .
4709 shell> make
4710 shell> make install
4711 # End of source-build specific instructions
4712 # Postinstallation setup
4713 shell> cd /usr/local/mysql
4714 shell> chown -R mysql .
4715 shell> chgrp -R mysql .
4716 shell> scripts/mysql_install_db --user=mysql
4717 shell> chown -R root .
4718 shell> chown -R mysql data
4719 shell> bin/mysqld_safe --user=mysql &
4720 # Next command is optional
4721 shell> cp support-files/mysql.server /etc/init.d/mysql.server
在其中第4702至4721行可以看到以上内容,这就是基于源码安装的步骤:
由以上步骤可以看出,执行过程中需要一个cmake工具:
[root@localhost mysql]# rpm -qa |grep cmake
查看到系统中并未安装cmake所以要自行安装:
当然系统光盘上是有这个安装包的,不过那个版本比较低,所以我用了一个版本较高的:
[root@localhost ~]# tar -zxvf cmake-2.8.10.2.tar.gz -C /usr/local/
然后进入安装后的目录,可以看到目录下有一个Read.txt文件
[root@localhost cmake-2.8.10.2]# vim Read.txt
在其中36行可以看到如下所述,即cmake的安装过程:
36 $ ./bootstrap; make; make install
接下来直接执行这两条命令即可:
[root@localhost cmake-2.8.10.2]# ./bootstrap
[root@localhost cmake-2.8.10.2]# make && make install
执行完毕之后继续来到mysql目录下,根本帮助文件中的描述来进行如下操作:
[root@localhost mysql]# groupadd mysql
[root@localhost mysql]# useradd -r -g mysql mysql
[root@localhost mysql]# cmake .
[root@localhost mysql]# make && make install
(这个过程极为缓慢,大概需要半个小时到一个小时之间,需要点耐心,多等一会)
[root@localhost mysql]# chown -R mysql .
[root@localhost mysql]# chgrp -R mysql .改变所有者和所有组
[root@localhost mysql]# scripts/mysql_install_db --user=mysql 根据 scripts/下的一个mysql_install_db文件来创建基本的数据库,用户是mysql
完成之后可以查看当前目录下有一个date目录,其中已经产生了一些mysql文件

根据帮助文件中的步骤,继续往下做,
[root@localhost mysql]# chown -R root .
[root@localhost mysql]# chown -R mysql data
把除了data/以外所有文件的所有者都改回来,改为root
[root@localhost mysql]# cp my.cnf /etc/my.cnf
将当前目录下的my.cnf文件拷到/etc/下,名称也为my.cnf
[root@localhost mysql]# cp support-files/mysql.server /etc/init.d/mysqld
把support-files/mysql.server文件拷到/etc/init.d/名字为mysqld,这是个控制脚本。
[root@localhost mysql]# chmod a+x /etc/init.d/mysqld
[root@localhost mysql]# chkconfig --add mysqld
[root@localhost mysql]# chkconfig mysqld on
给它可执行权限以及开机自动开启。
[root@localhost mysql]# vim /etc/profile
到系统环境变量文件/etc/profile文件中修改一下它的搜索路径,可以更加方便的使用mysqld服务:
在54行加入一句:
PATH=$PATH:/usr/local/mysql/bin
完成后重新读取此文件,也可重启系统:
[root@localhost mysql]# . /etc/profile
然后启动mysqld服务
[root@localhost bin]# service mysqld start
此时在任何位置执行mysql命令都可进入数据库。
到这里,mysql安装完成!
然后开始安装apache:
安装apache一共需要安装三个包:
apr-1.4.6.tar.gz
apr-util-1.5.1.tar.gz
-axvf httpd-2.4.4.tar.bz2
[root@localhost ~]# tar -axvf apr-1.4.6.tar.gz -C /usr/local/src
[root@localhost ~]# tar -axvf apr-util-1.5.1.tar.gz -C /usr/local/src
[root@localhost ~]# tar -axvf httpd-2.4.4.tar.bz2 -C /usr/local/src
将三个包都解压。
[root@localhost ~]# cd /usr/local/src/apr-1.4.6/
进入/usr/local/src/apr-1.4.6/先来安装apr,其目录下也有README,不会安装的可以看一下,根据里边的指示进行安装:
[root@localhost apr-1.4.6]# vim README
[root@localhost apr-1.4.6]# ./configure --prefix=/usr/local/apr 指定安装目录为/usr/local/apr
[root@localhost apr-1.4.6]# make && make install
接下来安装apr-util:
[root@localhost apr-1.4.6]# cd ../apr-util-1.5.1/
[root@localhost apr-util-1.5.1]# ./configure --prefix=/usr/local/apr-util --with-apr=/usr/local/apr/bin/apr-1-config
指明安装路径以及apr-config的完全路径。
[root@localhost apr-util-1.5.1]# make && make install
接下来安装httpd:
[root@localhost httpd-2.4.4]# ./configure --prefix=/usr/local/apache --sysconfdir=/etc/httpd --enable-so --enable-rewrite --with-apr=/usr/local/apr/bin/apr-1-config --with-apr-util=/usr/local/apr-util/bin/apu-1-config --with-prce -with-z
安装过程中发现一个错误:
configure: error: pcre-config for libpcre not found. PCRE is required and available from http://pcre.org/
少了一个pcre库文件:
此时查看我的系统中已经安装的与pcre相关的包,发现只有一个pcre-7.8-6.el6.x86_64,所以我需要再安装一个pcre-devel
[root@localhost httpd-2.4.4]# rpm -qa |grep pcre
pcre-7.8-6.el6.x86_64
[root@localhost httpd-2.4.4]# yum --disablerepo=* --enablerepo=c6-media install pcre-devel
再次执行
[root@localhost httpd-2.4.4]# ./configure --prefix=/usr/local/apache --sysconfdir=/etc/httpd --enable-so --enable-rewrite --with-apr=/usr/local/apr/bin/apr-1-config --with-apr-util=/usr/local/apr-util/bin/apu-1-config --with-prce -with-z
这一次执行成功了,接下来执行make和make install :
[root@localhost httpd-2.4.4]# make && make install执行完毕后来到apache目录:
[root@localhost httpd-2.4.4]# cd /usr/local/apache/
执行如下命令开启httpd服务:
[root@localhost apache]# bin/httpd -k start
服务开启!
可以执行如下命令来查看httpd端口是否打开:
[root@localhost apache]# netstat -tupln |grep httpd
接下来给httpd服务做一个控制脚本:
在/etc/init.d/下创建一个httpd文件,并且给它执行权限:
[root@localhost php-5.5.8]# cd /etc/init.d/
[root@localhost init.d]# touch httpd
[root@localhost init.d]# chmod a+x httpd
[root@localhost init.d]# vim httpd
脚本内容如下:
#!/bin/bash
prog=/usr/local/apache/bin/httpd
lockfile=/var/lock/subsys/httpd
start () {
if [ -e $lockfile ];then
echo "the httpd is started"
else
echo "the httpd is starting......"
sleep 1
$prog -k start &>/dev/null && echo "[ok]" && touch $lockfile || echo "fail"
fi
}
stop () {
if [ ! -e $lockfile ];then
echo " the httpd is stoped"
else
echo "the httpd is stopping......"
sleep 1
$prog -k stop &>/dev/null && echo "[ok]" && rm -rf $lockfile || echo "fail"
fi
}
status () {
if [ -e $lockfile ];then
echo " the httpd is started"
else
echo " the httpd is stoped"
fi
}
case "$1" in
start)
start
;;
stop)
stop
;;
status)
status
;;
restart)
stop
start
;;
*)
echo "USAGE:start|stop|status|restart"
esac
然后使用脚本开始httpd服务:
[root@localhost init.d]# service httpd start
接下来安装php:
[root@localhost ~]# tar -jxvf php-5.5.8.tar.bz2 -C /usr/local/src/
解压完成后进入解压好的目录:
[root@localhost ~]# cd /usr/local/src/php-5.5.8/
目录下有一个INSTALL文件,可以查看一下:
[root@localhost php-5.5.8]# vim INSTALL
然后执行:
[root@localhost php-5.5.8]# ./configure --prefix=/usr/local/php
--with-apxs2=/usr/local/apache/bin/apxs --with-mysql=/usr/local/mysql --with-mysqli=/usr/local/mysql/bin/mysql_config --enable-mbstring=all
#--with-apxs2=/usr/local/apache/bin/apxs
#将php编译成apache的模块,允许apache的apxx调用该模块
#--with-mysql=/usr/local/mysql 指明mysql的安装位置
#--with-mysqli=/usr/local/mysql/bin/mysql_config调用myql接口
[root@localhost php-5.5.8]# make && make install
完成后,在httpd的配置文件中会多出一些内容:

还需要手动添加一条命令:AddType application/x-httpd-php .php 这样apache才能准确的处理php的请求

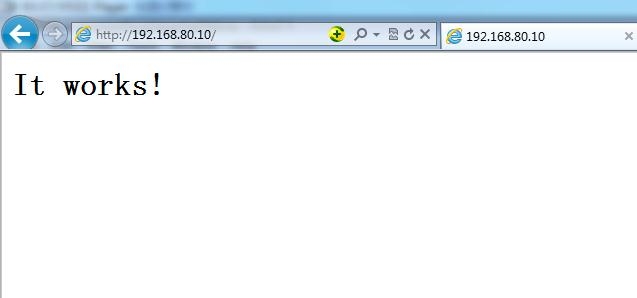
此时访问http://192.168.80.10 发现已经可以访问!

给数据库创建一个管理员root,密码为123
[root@localhost ~]# mysqladmin -u root -p password 123
在[root@localhost ~]# cd /usr/local/apache/htdocs目录下创建一个测试文件index.php,来测试php是否和mysql连接成功:
$LINK=mysql_connect('127.0.0.1','root','123');
if ($LINK)
echo "ok";
else
echo "no";
把目录中原来的文件php.html删除。
来到httpd的配置文件中:
[root@localhost apache]# vim /etc/httpd/httpd.conf
修改如下图所示:

然后重启httpd服务,并重新访问httpd://192.168.80.10
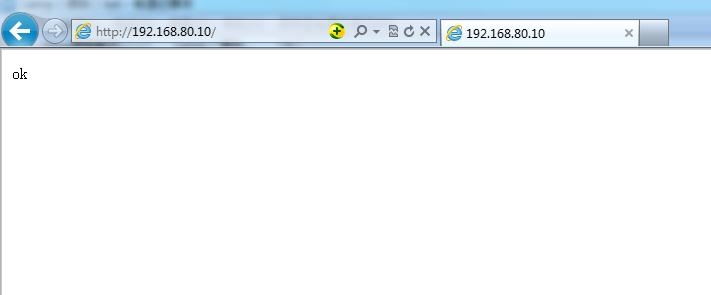
如果连接成功显示ok,否则显示no;
由下图可知连接成功:

接下来安装wordpress:
[root@localhost ~]# unzip wordpress-3.8-zh_CN.zip 解压安装包
[root@localhost ~]# mv wordpress /usr/local/apache/htdocs/
将解压后的文件移动到/usr/local/apache/htdocs/目录下;
然后以管理员身份登陆数据库,并创建一个wordpress数据库:
[root@localhost wordpress]# mysql -u root -p
mysql> create database wordpress;
接下来的安装就十分容易了,不需要多余解释。


创建一个wp-config.php文件
[root@localhost wordpress]# vim wp-config.php
将拷贝的文件拷到这个文件里,注意不要漏掉字符。


然后完成后登陆就行了,到这里已经结束!