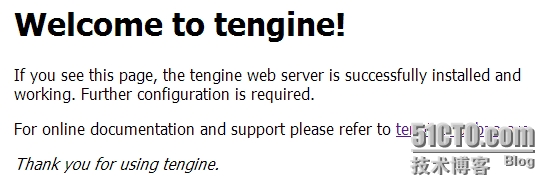
tengine+uwsgi+django
系统:2.6.32-358.el6.x86_64
软件版本:
Python-2.7.6.tgz
tengine-2.0.0.tar.gz
ez_setup.py
【注释】:红色字体部分使用root操作,绿色字体部分使用nginx用户操作。
环境需求:
python安装:
#
yum install gcc gcc-c++ make pcre-devel openssl-devel sqlite3-devel ncurses-devel
libxml2-devel
#
tar zxvf Python-2.7.6.tgz
#
cd Python-2.7.6
#
./configure --prefix=/usr/local/python
#
make && make install
添加环境变量
#
vi /etc/profile
更改下面的信息,这样python就加入到环境变量中:
export PATH=/usr/local/python/bin:$JAVA_HOME/bin:$PATH
#
source /etc/profile
#
python -V
Python 2.7.6
1)安装:uwsgi和django:
一,安装uwsgi:
uwsgi作为python的一个模块,需要用pip安装,
而pip需要setuptools,因此需要先安装setuptools,在此我们使用ez_setup.py安装:
#
python ez_setup.py
#
easy_install pip
#
pip install uwsgi
################# uWSGI configuration #################
pcre = True
kernel = Linux
malloc = libc
execinfo = False
ifaddrs = True
ssl = True
zlib = True
locking = pthread_mutex
plugin_dir = .
timer = timerfd
yaml = embedded
json = False
filemonitor = inotify
routing = True
debug = False
capabilities = False
xml = False
event = epoll
############## end of uWSGI configuration #############
total build time: 36 seconds
*** uWSGI is ready, launch it with /usr/local/python/bin/uwsgi ***
Successfully installed uwsgi
Cleaning up...
看到下面的信息就说明uwsgi安装完成了,同时我们也需要注意上面的配置中有很多的东西是false的,如果xml是false,那么在之后的配置中uwsgi是不能使用-x选项的。
这个时候需要安装:libxml2-devel,我们也可以在yum安装的时候,将这个rpm加上
如果要查询uwsgi的参数信息:可以运行下面的方法:
#
/usr/local/python/bin/uwsgi -h
我们可以做一下测试:
新建一个test.py文件:
内容如下:
def application(env, start_response):
start_response('200 OK', [('Content-Type','text/html')])
return "Hello World"
很短的几行。
之后运行服务:
#
uwsgi --http :8001 --wsgi-file test.py
返回下面的信息说明uwsgi运行成功:
二,安装django:
#
pip install django
#
django-admin.py startproject cuizz
#
python cuizz/manage.py runserver 8002
如果报告下面的错误,是因为我们没有安装sqlite-devel,需要我们重新rpm安装这个包,之后还需要重新编译python安装。
而且只需要编译安装python,之前pip安装的包是不会被覆盖或者删除的。
django.core.exceptions.ImproperlyConfigured: Error loading either pysqlite2 or sqlite3 modules (tried in that order): No module named _sqlite3
正常情况:
Validating models...
0 errors found
January 18, 2014 - 22:19:05
Django version 1.6.1, using settings 'cuizz.settings'
Starting development server at http://0.0.0.0:8002/
Quit the server with CONTROL-C.
我们可以打开浏览器,如果看到下面的信息,说明django已经正常配置好了。
三,结合使用:
在django的项目目录中新建文件:
django_uwsgi.py,加入下面的信息,注意修改字符集和项目的名称,在上面的django的测试中名称应该是cuizz:
#!/usr/bin/env python# coding: utf-8importosimportsys# 将系统的编码设置为UTF8reload(sys)sys.setdefaultencoding('utf8')os.environ.setdefault("DJANGO_SETTINGS_MODULE","cuizz.settings")fromdjango.core.handlers.wsgiimportWSGIHandlerapplication=WSGIHandler()
做完上面的操作后,目录结构是这样的:
/var/www/html/cuizz/
├── cuizz
│ ├── __init__.py
│ ├── __init__.pyc
│ ├── settings.py
│ ├── settings.pyc
│ ├── urls.py
│ ├── urls.pyc
│ └── wsgi.py
├── django_uwsgi.py
├── django_uwsgi.pyc
├── manage.py
└── uwsgi_django.xml
运行检测是否正常运行:

访问浏览器

显示上面的信息说明,uwsgi和django配合好了,所有的请求是通过uwsgi传递给django程序的。
【注意:】通常情况下,我们使用非root用户,来运行web服务,因此如果我们使用root来运行uwsgi的时候,会提示警告信息,通知我们不要使用root用户,因此在nginx的操作中,我们使用nginx使用。
2)
安装nginx
# useradd nginx
#
passwd nginx
#
chown -R nginx:nginx /usr/local/nginx/
#
chown -R nginx:nginx ../cuizz/
在此我们使用tengine来代替nginx
#
tar zxvf tengine-2.0.0.tar.gz
#
cd tengine-2.0.0
#
./configure
如果显示下面的信息,说明可以编译安装,如果出现问题,需要自行解决,如报告的perl的错误等等,百度都可以找到相应的解决办法:
Configuration summary
+ using system PCRE library
+ using system OpenSSL library
+ md5: using OpenSSL library
+ sha1: using OpenSSL library
+ using system zlib library
+ jemalloc library is disabled
nginx path prefix: "/usr/local/nginx"
nginx binary file: "/usr/local/nginx/sbin/nginx"
nginx configuration prefix: "/usr/local/nginx/conf"
nginx configuration file: "/usr/local/nginx/conf/nginx.conf"
nginx pid file: "/usr/local/nginx/logs/nginx.pid"
nginx error log file: "/usr/local/nginx/logs/error.log"
nginx http access log file: "/usr/local/nginx/logs/access.log"
nginx http client request body temporary files: "client_body_temp"
nginx dso module path: "/usr/local/nginx/modules/"
nginx http proxy temporary files: "proxy_temp"
nginx http fastcgi temporary files: "fastcgi_temp"
nginx http uwsgi temporary files: "uwsgi_temp"
nginx http scgi temporary files: "scgi_temp"
#
make &&make install
这个时候,我们可以测试一下nginx的启动情况,如果我们使用nginx用户来启动nginx,那么默认可能会报下面的错误:
$
/usr/local/nginx/sbin/nginx
nginx: [emerg] bind() to 0.0.0.0:80 failed (13: Permission denied)
因为linux系统不运行用普通用户进程占用小于1024的端口,因此要么设置端口端口大于1024要么使用root用户来运行nginx
,在此我们使用8080端口( 需要配置:/usr/local/nginx/conf/nginx.conf ),来运行nginx:
$
/usr/local/nginx/sbin/nginx

在/var/www/html下建立我们的django的项目,在里面包括之前
django_uwsgi.py,还包括一个uwsgi的配置文件:
uwsgi_django.xml这样uwsgi在启动的时候,只需要指定一下这个配置文件,那么就可以启动了。测试一下:
$
uwsgi -x /var/www/html/cuizz/uwsgi_django.xml
[uWSGI] parsing config file uwsgi_django.xml
之后查看状态:

这个时候,我们不能从浏览器来访问xml中设置的端口,如果访问,会报错的,这个设置,只能通过nginx来访问。

nginx配置:
默认配置情况【绿色的部分为修改的地方】:
worker_processes 1;
events {
worker_connections 1024;
}
http {
include mime.types;
default_type application/octet-stream;
sendfile on;
keepalive_timeout 65;
server {
listen 8080;
server_name localhost;
location / {
include uwsgi_params;
uwsgi_pass 127.0.0.1:8077;
}
error_page 500 502 503 504 /50x.html;
location = /50x.html {
root html;
}
}
}
之后重启nginx
启动nginx,之后打开浏览器,查看访问情况:

ok安装结束。
2014年01月24日
参考:http://django-china.cn/topic/101/