基于corosync+packmaker对http做高可用集群
前提:
1)本配置共有两个测试节点,分别node1.wangfeng7399.com和node2.wangfeng7399.com,相的IP地址分别为192.168.1.200和192.168.1.201;
2)集群服务为apache的httpd服务;
3)提供web服务的地址为192.168.1.240,即vip;
4)系统为CentOS 6.5 64bits
5)192.168.1.202提供nfs服务
1、准备工作
关于前期的准备工作,请移步至本人博客http://wangfeng7399.blog.51cto.com/3518031/1397530
2、安装配置corosync,(以下命令在node1.wangfeng7399.com上执行
[root@node1 ~]# yum -y install corosync pacemaker pcs
提供配置文件
[root@node1 ~]# cd /etc/corosync/
[root@node1 corosync]# cp corosync.conf.example corosync.conf
修改配置文件
totem { //定义通信的协议
        version: 2 //版本
        secauth: on  //安全认证是否开启
        threads: 0   //线程数
        interface {  //发送心跳的网卡
                ringnumber: 0 //环号码
                bindnetaddr: 192.168.1.0 //当前地址的网络地址
                mcastaddr: 226.94.73.99  //组播端口
                mcastport: 5405   //组播端口
                ttl: 1  //发送一次,不转发
        }
}
logging {
        fileline: off
        to_stderr: no //是否记入标准输出
        to_logfile: yes //是否使用自动的日志文件
        to_syslog: no  //是否使用syslog日志
        logfile: /var/log/cluster/corosync.log //日志的存放路径
        debug: off  //是否开启调试功能
        timestamp: on //是否开启时间戳
        logger_subsys {
                subsys: AMF
                debug: off
        }
}
添加以下内容
service {
  ver:  0
  name: pacemaker
  # use_mgmtd: yes
}
aisexec {
  user: root
  group:  root
}
生成节点间通信时用到的认证密钥文件:
[root@node1 corosync]# corosync-keygen
在node2上安装软件包
[root@node2 ~]# yum install corosync pacemaker pcs -y
将corosync和authkey复制至node2:
[root@node1 corosync]# scp -p authkey corosync.conf node2:/etc/corosync/
3、启动corosync(以下命令在node1上执行):
[root@node1 ~]# service corosync start
Starting Corosync Cluster Engine (corosync):               [  OK  ]
查看corosync引擎是否正常启动
[root@node1 ~]# grep -e "Corosync Cluster Engine" -e "configuration file" /var/log/cluster/corosync.log
Apr 20 23:48:45 corosync [MAIN  ] Corosync Cluster Engine ('1.4.1'): started and ready to provide service.
Apr 20 23:48:45 corosync [MAIN  ] Successfully read main configuration file '/etc/corosync/corosync.conf'.
Apr 20 23:48:45 corosync [MAIN  ] Corosync Cluster Engine exiting with status 8 at main.c:1797.
Apr 21 00:01:53 corosync [MAIN  ] Corosync Cluster Engine ('1.4.1'): started and ready to provide service.
Apr 21 00:01:53 corosync [MAIN  ] Successfully read main configuration file '/etc/corosync/corosync.conf'.
查看初始化成员节点通知是否正常
[root@node1 ~]# grep "TOTEM" /var/log/cluster/corosync.log
Apr 21 00:01:53 corosync [TOTEM ] Initializing transport (UDP/IP Multicast).
Apr 21 00:01:53 corosync [TOTEM ] Initializing transmit/receive security: libtomcrypt SOBER128/SHA1HMAC (mode 0).
Apr 21 00:01:53 corosync [TOTEM ] The network interface [192.168.1.200] is now up.
Apr 21 00:01:53 corosync [TOTEM ] A processor joined or left the membership and a new membership was formed.
查看启动过程中是否有错误产生,下面表示在以后pacemaker在以后将不再作为corosync的插件提供 ,建议使用cman作为集群的基础架构,可以安全忽略
[root@node1 ~]# grep "ERROR" /var/log/cluster/corosync.log
Apr 21 00:01:53 corosync [pcmk  ] ERROR: process_ais_conf: You have configured a cluster using the Pacemaker plugin for Corosync. The plugin is not supported in this environment and will be removed very soon.
Apr 21 00:01:53 corosync [pcmk  ] ERROR: process_ais_conf:  Please see Chapter 8 of 'Clusters from Scratch' (http://www.clusterlabs.org/doc) for details on using Pacemaker with CMAN
Apr 21 00:02:17 [2461] node1.wangfeng7399.com    pengine:   notice: process_pe_message:     Configuration ERRORs found during PE processing.  Please run "crm_verify -L" to identify issues
如果上面命令执行均没有问题,接着可以执行如下命令启动node2上的corosync
[root@node1 ~]# ssh node2 "service corosync start"
Starting Corosync Cluster Engine (corosync): [  OK  ]
注意:启动node2需要在node1上使用如上命令进行,不要在node2节点上直接启动。下面是node1上的相关日志。
Apr 21 00:10:44 [2462] node1.wangfeng7399.com       crmd:     info: do_te_invoke:   Processing graph 1 (ref=pe_calc-dc-1398010244-18) derived from /var/lib/pacemaker/pengine/pe-input-1.bz2
Apr 21 00:10:44 [2462] node1.wangfeng7399.com       crmd:   notice: te_rsc_command:     Initiating action 3: probe_complete probe_complete on node2.wangfeng7399.com - no waiting
Apr 21 00:10:44 [2462] node1.wangfeng7399.com       crmd:     info: te_rsc_command:     Action 3 confirmed - no wait
Apr 21 00:10:44 [2462] node1.wangfeng7399.com       crmd:   notice: run_graph:  Transition 1 (Complete=1, Pending=0, Fired=0, Skipped=0, Incomplete=0, Source=/var/lib/pacemaker/pengine/pe-input-1.bz2): Complete
Apr 21 00:10:44 [2462] node1.wangfeng7399.com       crmd:     info: do_log:     FSA: Input I_TE_SUCCESS from notify_crmd() received in state S_TRANSITION_ENGINE
Apr 21 00:10:44 [2462] node1.wangfeng7399.com       crmd:   notice: do_state_transition:    State transition S_TRANSITION_ENGINE -> S_IDLE [ input=I_TE_SUCCESS cause=C_FSA_INTERNAL origin=notify_crmd ]
Apr 21 00:10:44 [2457] node1.wangfeng7399.com        cib:     info: cib_process_request:    Completed cib_modify operation for section status: OK (rc=0, origin=local/attrd/6, version=0.5.6)
Apr 21 00:10:44 [2457] node1.wangfeng7399.com        cib:     info: cib_process_request:    Completed cib_query operation for section //cib/status//node_state[@id='node1.wangfeng7399.com']//transient_attributes//nvpair[@name='probe_complete']: OK (rc=0, origin=local/attrd/7, version=0.5.6)
Apr 21 00:10:44 [2457] node1.wangfeng7399.com        cib:     info: cib_process_request:    Completed cib_modify operation for section status: OK (rc=0, origin=local/attrd/8, version=0.5.6)
Apr 21 00:10:46 [2457] node1.wangfeng7399.com        cib:     info: cib_process_request:    Completed cib_modify operation for section status: OK (rc=0, origin=node2.wangfeng7399.com/attrd/6, version=0.5.7)
查看集群节点的启动状态:
[root@node1 ~]# pcs status
Cluster name:
WARNING: no stonith devices and stonith-enabled is not false
Last updated: Mon Apr 21 00:12:53 2014
Last change: Mon Apr 21 00:10:41 2014 via crmd on node1.wangfeng7399.com
Stack: classic openais (with plugin)
Current DC: node1.wangfeng7399.com - partition with quorum
Version: 1.1.10-14.el6_5.2-368c726
2 Nodes configured, 2 expected votes
0 Resources configured
Online: [ node1.wangfeng7399.com node2.wangfeng7399.com ]
Full list of resources:
我们已经看到我们的两个节点
4、配置集群的工作属性,禁用stonith(生产环境中应该提供stonith)
corosync默认启用了stonith,而当前集群并没有相应的stonith设备,因此此默认配置目前尚不可用,这可以通过如下命令验正:
[root@node1 ~]# crm_verify -L -V
   error: unpack_resources:     Resource start-up disabled since no STONITH resources have been defined
   error: unpack_resources:     Either configure some or disable STONITH with the stonith-enabled option
   error: unpack_resources:     NOTE: Clusters with shared data need STONITH to ensure data integrity
Errors found during check: config not valid
我们里可以通过如下命令先禁用stonith:
[root@node1 ~]# pcs property set stonith-enabled=false
使用如下命令查看当前的配置信息:
[root@node1 ~]# pcs cluster cib|grep stonith
        <nvpair id="cib-bootstrap-options-stonith-enabled" name="stonith-enabled" value="false"/>
或执行如下命令查看:
[root@node1 ~]# pcs config
Cluster Properties:
 cluster-infrastructure: classic openais (with plugin)
 dc-version: 1.1.10-14.el6_5.2-368c726
 expected-quorum-votes: 2
 stonith-enabled: false
5、为集群添加集群资源
corosync支持heartbeat,LSB和ocf等类型的资源代理,目前较为常用的类型为LSB和OCF两类,stonith类专为配置stonith设备而用;
可以通过如下命令查看当前集群系统所支持的类型:
[root@node1 ~]# pcs resource standards
ocf
lsb
service
stonith
查看资源代理的provider:
[root@node1 ~]# pcs resource providers
heartbeat
pacemaker
如果想要查看某种类别下的所用资源代理的列表,可以使用类似如下命令实现:
# pcs resource agents [standard[:provider]]
如果要查看某资源代理的可配置属性等信息,则使用如下命令:
# pcs resource describe <class:provider:type|type>
6、接下来要创建的web集群创建一个IP地址资源,以在通过集群提供web服务时使用;这可以通过如下方式实现:
语法:
create <resource id> <standard:provider:type|type> [resource options]
           [op <operation action> <operation options> [<operation action>
           <operation options>]...] [meta <meta options>...]
           [--clone <clone options> | --master <master options> |
           --group <group name>]
应用示例:为集群配置一个IP地址,用于实现提供高可用的web服务。
[root@node1 ~]# pcs resource create WebIP ocf:heartbeat:IPaddr2 ip=192.168.1.240 cidr_netmask=24 op moniter interval=30s
通过如下的命令执行结果可以看出此资源已经在node1.magedu.com上启动:
[root@node1 ~]# pcs status
Cluster name:
Last updated: Mon Apr 21 00:28:54 2014
Last change: Mon Apr 21 00:28:32 2014 via cibadmin on node1.wangfeng7399.com
Stack: classic openais (with plugin)
Current DC: node2.wangfeng7399.com - partition with quorum
Version: 1.1.10-14.el6_5.2-368c726
2 Nodes configured, 2 expected votes
1 Resources configured
Online: [ node1.wangfeng7399.com node2.wangfeng7399.com ]
Full list of resources:
 WebIP  (ocf::heartbeat:IPaddr2):   Started node1.wangfeng7399.com
当然,也可以在node1上执行ifconfig命令看到此地址已经在eth0的别名上生效:
[root@node1 ~]# ip add
1: lo: <LOOPBACK,UP,LOWER_UP> mtu 16436 qdisc noqueue state UNKNOWN
    link/loopback 00:00:00:00:00:00 brd 00:00:00:00:00:00
    inet 127.0.0.1/8 scope host lo
    inet6 ::1/128 scope host
       valid_lft forever preferred_lft forever
2: eth0: <BROADCAST,MULTICAST,UP,LOWER_UP> mtu 1500 qdisc pfifo_fast state UP qlen 1000
    link/ether 00:0c:29:4f:1c:52 brd ff:ff:ff:ff:ff:ff
    inet 192.168.1.200/24 brd 192.168.1.255 scope global eth0
    inet 192.168.1.240/24 brd 192.168.1.255 scope global secondary eth0
    inet6 fe80::20c:29ff:fe4f:1c52/64 scope link tentative dadfailed
       valid_lft forever preferred_lft forever
我们模拟node1坏掉,可以将corosync关掉,在node2上查看集群工作状态
[root@node2 ~]# pcs status
Cluster name:
Last updated: Mon Apr 21 00:31:59 2014
Last change: Mon Apr 21 00:28:32 2014 via cibadmin on node1.wangfeng7399.com
Stack: classic openais (with plugin)
Current DC: node2.wangfeng7399.com - partition WITHOUT quorum
Version: 1.1.10-14.el6_5.2-368c726
2 Nodes configured, 2 expected votes
1 Resources configured
Online: [ node2.wangfeng7399.com ]
OFFLINE: [ node1.wangfeng7399.com ]
Full list of resources:
 WebIP  (ocf::heartbeat:IPaddr2):   Stopped
上面的信息显示node1.wangfeng7399.com已经离线,但资源WebIP却没能在node2.wangfeng7399.com上启动。这是因为此时的集群状态为"WITHOUT quorum",即已经失去了quorum,此时集群服务本身已经不满足正常运行的条件,这对于只有两节点的集群来讲是不合理的。因此,我们可以通过如下的命令来修改忽略quorum不能满足的集群状态检查:
[root@node2 ~]# pcs property set no-quorum-policy="ignore"
片刻之后,集群就会在目前仍在运行中的节点node2上启动此资源了,如下所示:
[root@node2 ~]# ip add
1: lo: <LOOPBACK,UP,LOWER_UP> mtu 16436 qdisc noqueue state UNKNOWN
    link/loopback 00:00:00:00:00:00 brd 00:00:00:00:00:00
    inet 127.0.0.1/8 scope host lo
    inet6 ::1/128 scope host
       valid_lft forever preferred_lft forever
2: eth0: <BROADCAST,MULTICAST,UP,LOWER_UP> mtu 1500 qdisc pfifo_fast state UP qlen 1000
    link/ether 00:0c:29:ab:d1:9c brd ff:ff:ff:ff:ff:ff
    inet 192.168.1.201/24 brd 192.168.1.255 scope global eth0
    inet 192.168.1.240/24 brd 192.168.1.255 scope global secondary eth0
    inet6 fe80::20c:29ff:feab:d19c/64 scope link
       valid_lft forever preferred_lft forever
好了,验正完成后,我们正常启动node1上的corosync
正常启动node1.magedu.com后,集群资源WebIP很可能会重新从node2.magedu.com转移回node1.magedu.com。资源的这种在节点间每一次的来回流动都会造成那段时间内其无法正常被访问,所以,我们有时候需要在资源因为节点故障转移到其它节点后,即便原来的节点恢复正常也禁止资源再次流转回来。这可以通过定义资源的黏性(stickiness)来实现。在创建资源时或在创建资源后,都可以指定指定资源黏性。
资源黏性值范围及其作用:
0:这是默认选项。资源放置在系统中的最适合位置。这意味着当负载能力“较好”或较差的节点变得可用时才转移资源。此选项的作用基本等同于自动故障回复,只是资源可能会转移到非之前活动的节点上;
大于0:资源更愿意留在当前位置,但是如果有更合适的节点可用时会移动。值越高表示资源越愿意留在当前位置;
小于0:资源更愿意移离当前位置。绝对值越高表示资源越愿意离开当前位置;
INFINITY:如果不是因节点不适合运行资源(节点关机、节点待机、达到migration-threshold 或配置更改)而强制资源转移,资源总是留在当前位置。此选项的作用几乎等同于完全禁用自动故障回复;
-INFINITY:资源总是移离当前位置;
我们这里可以通过以下方式为资源指定默认黏性值:
# pcs resource rsc defaults resource-stickiness=100
7、结合上面已经配置好的IP地址资源,将此集群配置成为一个active/passive模型的web(httpd)服务集群
为了将此集群启用为web(httpd)服务器集群,我们得先在各节点上安装httpd,并配置其能在本地各自提供一个测试页面。
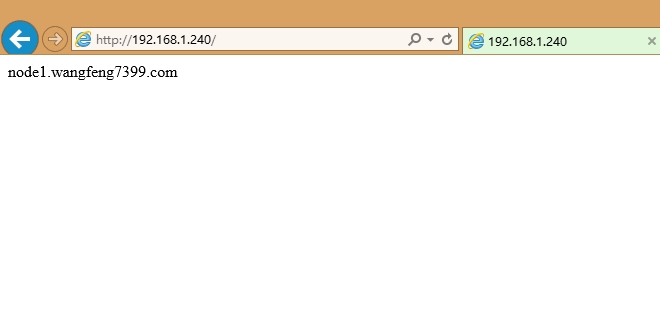
[root@node1 corosync]# echo "node1.wangfeng7399.com" > /var/www/html/index.html
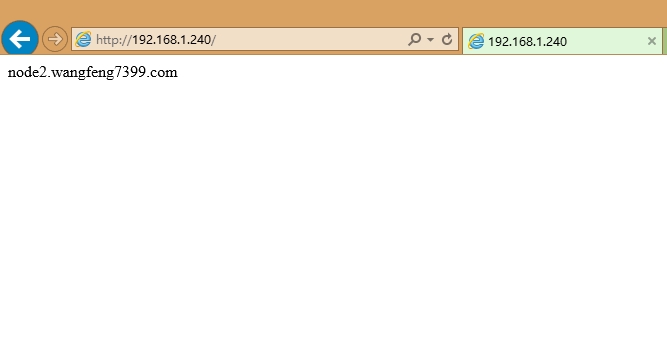
[root@node2 ~]# echo "node2.wangfeng7399.com" > /var/www/html/index.html
然后关闭httpd,并确保开机不能自启动
[root@node2 ~]# chkconfig httpd off
[root@node1 corosync]# chkconfig httpd off
接下来我们将此httpd服务添加为集群资源。将httpd添加为集群资源有两处资源代理可用:lsb和ocf:heartbeat,为了简单起见,我们这里使用lsb类型:
[root@node1 corosync]# pcs resource create webserver lsb:httpd
查看配置文件中生成的定义:
[root@node1 corosync]# pcs status
Cluster name:
Last updated: Mon Apr 21 00:46:15 2014
Last change: Mon Apr 21 00:45:53 2014 via cibadmin on node1.wangfeng7399.com
Stack: classic openais (with plugin)
Current DC: node2.wangfeng7399.com - partition with quorum
Version: 1.1.10-14.el6_5.2-368c726
2 Nodes configured, 2 expected votes
2 Resources configured
Online: [ node1.wangfeng7399.com node2.wangfeng7399.com ]
Full list of resources:
 WebIP  (ocf::heartbeat:IPaddr2):   Started node2.wangfeng7399.com
 webserver  (lsb:httpd):    Started node1.wangfeng7399.com
从上面的信息中可以看出WebIP和WebServer有可能会分别运行于两个节点上,这对于通过此IP提供Web服务的应用来说是不成立的,即此两者资源必须同时运行在某节点上。
7.1 资源约束
通过前面的描述可知,即便集群拥有所有必需资源,但它可能还无法进行正确处理。资源约束则用以指定在哪些群集节点上运行资源,以何种顺序装载资源,以及特定资源依赖于哪些其它资源。pacemaker共给我们提供了三种资源约束方法:
1)Resource Location(资源位置):定义资源可以、不可以或尽可能在哪些节点上运行;
2)Resource Collocation(资源排列):排列约束用以定义集群资源可以或不可以在某个节点上同时运行;
3)Resource Order(资源顺序):顺序约束定义集群资源在节点上启动的顺序;
定义约束时,还需要指定分数。各种分数是集群工作方式的重要组成部分。其实,从迁移资源到决定在已降级集群中停止哪些资源的整个过程是通过以某种方式修改分数来实现的。分数按每个资源来计算,资源分数为负的任何节点都无法运行该资源。在计算出资源分数后,集群选择分数最高的节点。INFINITY(无穷大)目前定义为 1,000,000。加减无穷大遵循以下3个基本规则:
1)任何值 + 无穷大 = 无穷大
2)任何值 - 无穷大 = -无穷大
3)无穷大 - 无穷大 = -无穷大
定义资源约束时,也可以指定每个约束的分数。分数表示指派给此资源约束的值。分数较高的约束先应用,分数较低的约束后应用。通过使用不同的分数为既定资源创建更多位置约束,可以指定资源要故障转移至的目标节点的顺序。
7.1.1 排列约束
使用pcs命令定义资源排列约束的语法:
location add <id> <resource name> <node> <score>
因此,对于前述的WebIP和WebServer可能会运行于不同节点的问题,可以通过以下命令来解决:
[root@node1 corosync]# pcs constraint colocation add webserver WebIP
INFINITY
如下的状态信息显示,两个资源已然运行于同一个节点。
[root@node1 corosync]# pcs status
Cluster name:
Last updated: Mon Apr 21 00:50:03 2014
Last change: Mon Apr 21 00:49:53 2014 via cibadmin on node1.wangfeng7399.com
Stack: classic openais (with plugin)
Current DC: node2.wangfeng7399.com - partition with quorum
Version: 1.1.10-14.el6_5.2-368c726
2 Nodes configured, 2 expected votes
2 Resources configured
Online: [ node1.wangfeng7399.com node2.wangfeng7399.com ]
Full list of resources:
 WebIP  (ocf::heartbeat:IPaddr2):   Started node2.wangfeng7399.com
 webserver  (lsb:httpd):    Started node2.wangfeng7399.com
7.1.2 顺序约束
通过pcs命令定义顺序约束的语法如下所示:
order [action] <resource id> then [action] <resource id> [options]
因此,要确保WebServer在某节点启动之前得先启动WebIP可以使用如下命令实现:
[root@node1 corosync]# pcs constraint order WebIP then webserver
Adding WebIP webserver (kind: Mandatory) (Options: first-action=start then-action=start)
查看定义的结果:
[root@node1 corosync]# pcs constraint order
Ordering Constraints:
  start WebIP then start webserver
7.1.3 位置约束
由于HA集群本身并不强制每个节点的性能相同或相近,所以,某些时候我们可能希望在正常时服务总能在某个性能较强的节点上运行,这可以通过位置约束来实现。通过pcs命令定义位置约束的语法略复杂些,如下所述。
倾向运行于某节点:
location <resource id> prefers <node[=score]>...
倾向离开某节点:
location <resource id> avoids <node[=score]>...
通过约束分数来定义其倾向运行的节点:
location add <id> <resource name> <node> <score>
例如:如果期望WebServer倾向运行于node1.wangfeng7399.com的分数为1000,则可以使用类似如下命令实现:
[root@node1 corosync]# pcs constraint location add webservce_on_node1 webserver node1.wangfeng7399.com 1000
可以看到我们的资源运行状态
[root@node1 corosync]# pcs status
Cluster name:
Last updated: Mon Apr 21 00:59:44 2014
Last change: Mon Apr 21 00:59:24 2014 via cibadmin on node1.wangfeng7399.com
Stack: classic openais (with plugin)
Current DC: node2.wangfeng7399.com - partition with quorum
Version: 1.1.10-14.el6_5.2-368c726
2 Nodes configured, 2 expected votes
2 Resources configured
Online: [ node1.wangfeng7399.com node2.wangfeng7399.com ]
Full list of resources:
 WebIP  (ocf::heartbeat:IPaddr2):   Started node1.wangfeng7399.com
 webserver  (lsb:httpd):    Started node1.wangfeng7399.com
最终的配置结果如下所示:
[root@node1 corosync]# pcs config
Cluster Name:
Corosync Nodes:

Pacemaker Nodes:
 node1.wangfeng7399.com node2.wangfeng7399.com
Resources:
 Resource: WebIP (class=ocf provider=heartbeat type=IPaddr2)
  Attributes: ip=192.168.1.240 cidr_netmask=24
  Operations: moniter interval=30s (WebIP-moniter-interval-30s)
              monitor interval=60s (WebIP-monitor-interval-60s)
 Resource: webserver (class=lsb type=httpd)
  Operations: monitor interval=60s (webserver-monitor-interval-60s)
Stonith Devices:
Fencing Levels:
Location Constraints:
  Resource: webserver
    Enabled on: node1.wangfeng7399.com (score:1000) (id:webservce_on_node1)
Ordering Constraints:
  start WebIP then start webserver (Mandatory) (id:order-WebIP-webserver-mandatory)
Colocation Constraints:
  webserver with WebIP (INFINITY) (id:colocation-webserver-WebIP-INFINITY)
Cluster Properties:
 cluster-infrastructure: classic openais (with plugin)
 dc-version: 1.1.10-14.el6_5.2-368c726
 expected-quorum-votes: 2
 no-quorum-policy: ignore
 stonith-enabled: false
8.测试

将node1停掉
