kernel自己特别定制
kernel有的时候需要我们自己动手去编译,得到自己量身定做的内核,其实它就是由一个Kernel+根文件系统+外围的一些模块组成,然后拼凑在一起,这样一个裸身的系统。好了,然后开始我们的编译之旅吧!
实现步骤:1,对磁盘分区格式化,并挂载 2,对Target磁盘安装grub程序 3,编译内核(选择一些必备的功能)提供bzImage 4,编译busybox应用程序(下面介绍)提供busybox应用程序 5,为init提供配置文件 6,配置主机名和banner 6,基本测试 7,提供dropbear应用程序(另外一种SSH服务程序) 8,提供nginx应用程序,基本是这些了~
1,检查包组
"Development tools" "Desktop Platform Development" "Server Platform Development"
如果没装 yum groupinstall -y 装上包组
2,解压kernel源码包
tar -xf linux-3.13.6.tar.xz -C /usr/src/
# cd /usr/src/
# ln -sv linux-3.13.6 linux
`linux' -> `linux-3.13.6'
#cd /linux
# make allnoconfig
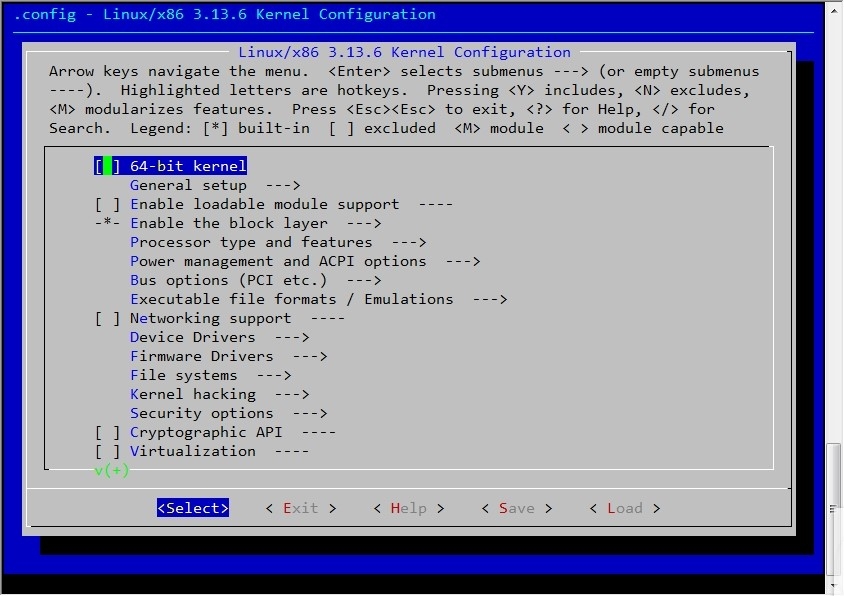
# make menuconfig

主要的配置选项
1,[*] 64-bit kernel //64位系统
2,General setup --->() Local version - csj01 //设置版本信息
3,Processor type and features --->Processor family (Generic-x86-64) --->(X) Core 2/newer Xeon //选择cpu
4,Processor type and features --->[*] Symmetric multi-processing support //支持多核心
5,[*] Enable loadable module support ---> //支持动态模块
6,Bus options (PCI etc.) --->[*] PCI support //支持PCI
7,Device Drivers ---> SCSI device support ---> <*> SCSI device supportà<*> SCSI disk support
另:Device Drivers ---> [*] Fusion MPT device support ---> <*> Fusion MPT ScsiHost drivers for SPI
<*> Fusion MPT misc device (ioctl) driver //scsi硬盘驱动
8,File systems ---> <*> The Extended 4 (ext4) filesystem //文件系统
9,Executable file formats / Emulations à [*] Kernel support for ELF binaries
<*> Kernel support for scripts starting with #! // 支持ELF
10,Device Drivers ---> Input device support ---> [*] Keyboards --->
[*] Mice --->
Device Drivers ---> [*] USB support ---> <*> Support for Host-side USB à <*> EHCI HCD (USB 2.0) support
<*> UHCI HCD (most Intel and VIA) support
<*> OHCI HCD (USB 1.1) support //I/O
11,Device Drivers ---> Generic Driver Options --> [*] Maintain a devtmpfs filesystem to mount at /dev //devtmfs
12,[*] Networking support ---> Networking options ---> [*] TCP/IP networking
<*> Unix domain sockets
Device Drivers ---> [*] Network device support ---> [*] Ethernet driver support (NEW) ---> <*> Intel(R) PRO/1000 Gigabit Ethernet support/ <*> Intel(R) PRO/1000 PCI-Express Gigabit Ethernet support //网卡驱动
3,编译bzImage
make bzImage
cp arch/x86_64/boot/bzImage /mnt/boot/
4,安装grub程序
mount /dev/sdb1 /mnt/boot
mount /dev/sdb2 /mnt/sysboot
grub-install--root-directory=/mnt /dev/sdb (分区提前准备好)
5,编译grub配置文件
#vim/mnt/boot/grub/grub.conf
timeout=5
default=0
title Customed Linux (3.13.6)
root (hd0,0)
kernel /bzImage ro root /dev/sdb2 init=/sbin/init
#cd /mnt/sysroot
#mkdir - pv proc dev tmp root etc/init.d var
#vim /sbin.init
#!bin/bash
echo -e "Welcome to linux"
mount -n -t proc proc /proc
mount -n -t sysfs sysfs /sysfs
mount -n -t devmntfs none /dev
mount -n -o remount ,rw /dev/sda2
/bin/bash
#chmod +x /sbin/init
6,编译bosybox
# tar -xf busybox-1.22.1.tar.bz2 -C /usr/src/
# cd /usr/src/busybox-1.22.1/
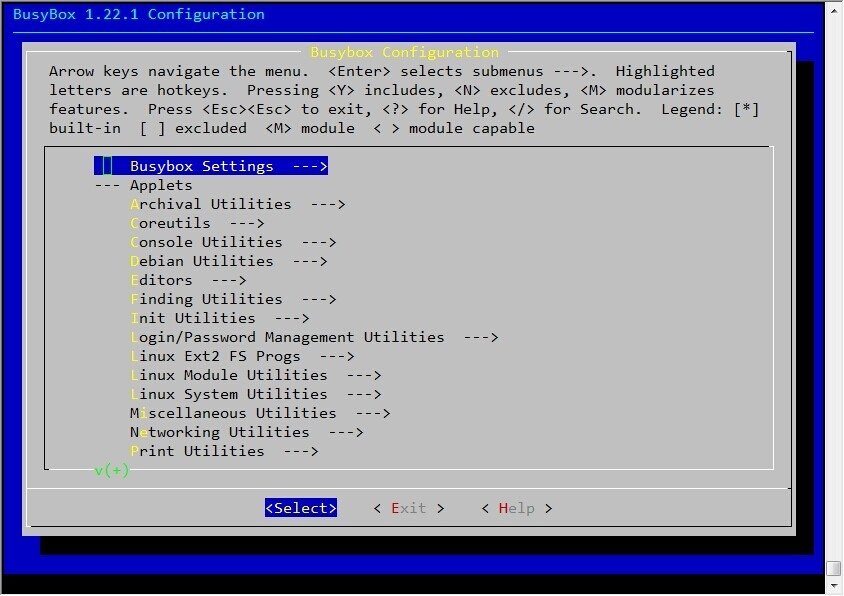
#make menuconfig

不过在编译之前要安装上glibc-static这个程序包
#yum install -y glibc-static
图中要选
Busybox Settings --->
General Configuration --->
[*] Build BusyBox as a static binary (no shared libs)
然后#make && make install
7,移植busybox应用程序
#cp -a _install/* /mnt/sysroot/
# ls /mnt/sysroot/
bin linuxrc lost+found sbin usr
在创建一些常用的目录
#mkdir -p etc/rc.d var/{log,run} root home lib64 dev proc sys boot mnt media tmp srv usr/lib64
8,创建/etc/inittab文件,提供虚拟终端
:sysinit:/etc/rc.d/rc.sysinit
::respawn:/sbin/getty 19200 tty1
::respawn:/sbin/getty 19200 tty2
::respawn:/sbin/getty 19200 tty3
::respawn:/sbin/getty 19200 tty4
::respawn:/sbin/getty 19200 tty5
::respawn:/sbin/getty 19200 tty6
::ctrlaltdel:/sbin/reboot
::shutdown:/bin/umount -a -r
9,提供虚拟控制台的inittab:
::sysinit:/etc/rc.d/rc.sysinit
tty1::askfirst:/bin/sh
tty2::askfirst:/bin/sh
tty3::askfirst:/bin/sh
tty4::askfirst:/bin/sh
tty5::askfirst:/bin/sh
tty6::askfirst:/bin/sh
::ctrlaltdel:/sbin/reboot
::shutdown:/bin/umount -a -r
10,只提供物理控制台的inittab:
::sysinit:/etc/rc.d/rc.sysinit
::console::respawn:-/bin/sh
::ctrlaltdel:/sbin/reboot
::shutdown:/bin/umount -a -r
11为定制版Linux定义主机名文件
[root@localhost etc]# mkdir sysconfig
[root@localhost etc]# vim sysconfig/network
HOSTNAME=CSJ
尝试启动一下
本文出自 “Linux” 博客,转载请与作者联系!