LANP+KEEPALIVED集群(二)
LANP+KEEPALIVED集群(二)
#基于不同域名
server
{
listen 80;
server_name nginx.postfix.local;
charset utf-8;
access_log logs/domain.log main;
location /
{
root html/domain;
index domain.html;
}
error_page 500 502 503 504 /50x.html;
location = /50x.html
{
root html;
}
}
#图示,访问nginx.postfix.local

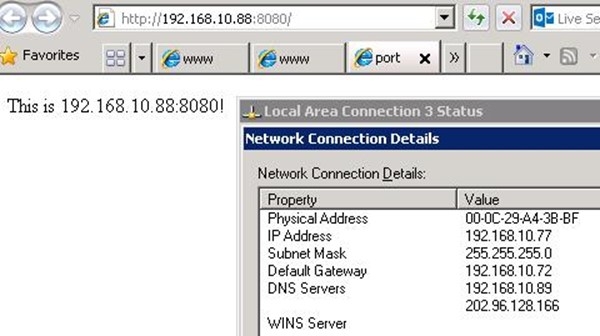
#基于不同端口
server
{
listen 8080;
server_name 192.168.10.88;
charset utf-8;
access_log logs/port.log main;
location /
{
root html/port;
index port.html;
}
}
#图示,访问192.168.10.88:8080
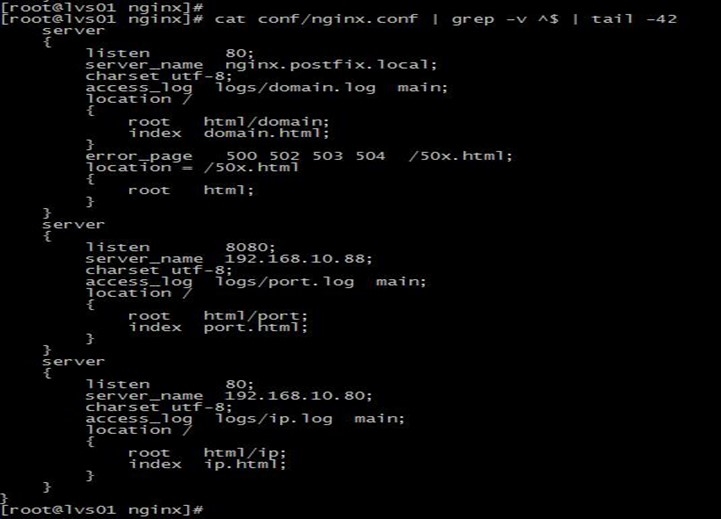
#nginx.conf配置,基于不同IP、不同域名和不同端口的完整配置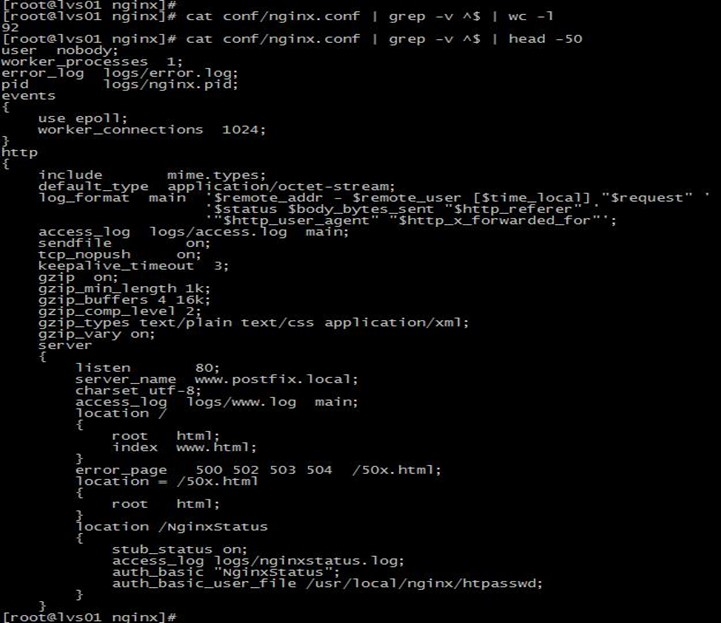
(3)负载均衡配置
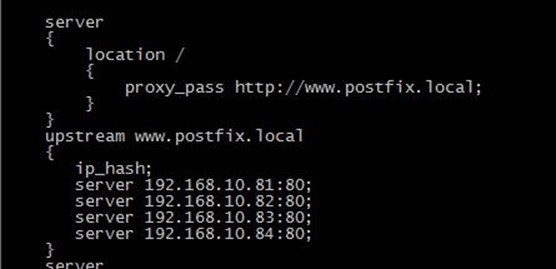
#将访问www.postfix.local请求负载到81-84这4台后端服务器
#负载使用ip_hash算法
(4)防盗链配置
#待补充
(5)日志分割配置
#利用信号控制功能来分割日志
#!/bin/sh
#nginx log cut every day
log_path=/home/logs
nginx_log=/usr/local/nginx/logs
mkdir -p $log_path/$(date +%Y)/$(date +%m)
mv $nginx_log/access.log $log_path/$(date +%Y)/$(date +%m)/access.$(date +%Y%m%d).log
mv $nginx_log/error.log $log_path/$(date +%Y)/$(date +%m)/error.$(date +%Y%m%d).log
kill -USR1 `cat /usr/local/nginx/logs/nginx.pid`
#日志分割效果
#设定每天23点开始执行

(6)nginx+ssl
#证书文件存放在/usr/local/nginx/ssl下
#生成1024位rsa密钥server.key
openssl genrsa -des3 -out server.key 1024
#生成server.csr文件
openssl req -new -key server.key -out server.csr
#生成server.crt证书文件
openssl req -new -x509 -days 3650 -key server.key -out server.crt
#配置nginx+ssl
server
{
listen 443 ssl;
ssl on;
server_name www.postfix.local;
ssl_certificate /usr/local/nginx/ssl/server.crt;
ssl_certificate_key /usr/local/nginx/ssl/server.key;
ssl_session_cache shared:SSL:1m;
ssl_session_timeout 5m;
ssl_ciphers HIGH:!aNULL:!MD5;
ssl_prefer_server_ciphers on;
access_log logs/443.log;
location / {
root html/443;
index 443.html;
}
}
#图示,nginx.conf配置和访问效果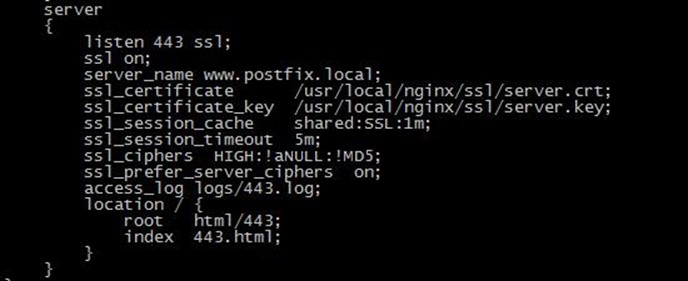


6、性能优化
(1)源码编译优化
#编译时取消开启debug
#在auto/cc/gcc文件中找到下面的语句,在最前加"#"注释
CFLAGS="$CFLAGS -g"
#对特定CPU类型编译优化
#查看CPU类型
cat /proc/cpuinfo | grep "model name"

#在编译时添加--with-cpu-opt

(2)TCMalloc优化nginx
#TCMalloc在内存分配效率和速度优化,提高服务器在高并发下性能
#安装libunwind-1.1和google-perftools-1.8.2
cd libunwind-1.1
./configure && make && make install
cd google-perftools-1.8.2
./configure && make && make install
echo "/usr/local/lib">/etc/ld.so.conf.d/user_local_lib.conf
#编译时添加选项 --with-google_perftools_module,重新编译nginx

./configure --prefix=/usr/local/nginx --with-pcre --with-http_stub_status_module --with-poll_module --with-http_ssl_module --with-google_perftools_module
make && make install
#在nginx.conf 全局配置添加,以便在nginx启动时加载google-perftools,
google_perftools_profiles /tmp/tcmalloc;
#重启nginx
kill HUP `cat /usr/local/nginx/logs/nginx.pid`
#查看是否已经加载google-perftools
lsof -n | grep tcmalloc
(3)内核优化
#待补充
7、lanp
(1)源码安装nginx
#先安装依赖包
yum -y install pcre-devel zlib-devel openssl-devel
./configure --prefix=/usr/local/nginx --with-pcre --with-http_stub_status_module --with-poll_module --with-http_ssl_module
make && make install
(2)源码安装php和php-fpm
#安装php-5.5.24
#--enable-fpm启用php-fpm,新版本的php已经将php-fpm加入到核心模块
./configure --prefix=/usr/local/php --with-config-file-path=/etc --with-mysql=/usr/local/mysql/ --enable-fpm
make && make install