基于PXE的linux系统的自动化安装部署(图文并茂,绝对详细)
基于PXE的linux系统的自动化安装部署
Linux PXE 网络安装拓扑图:
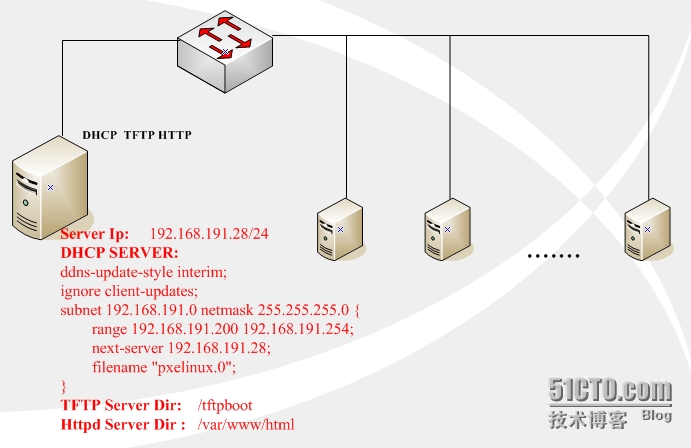
安装步骤:
一 基础网络建设--搭建dhcp服务器
可以参考:http://luzhi1024.blog.51cto.com/8845546/1655443
1 修改服务器的ip:/etc/sysconfig/network-scripts/ifcfg-eth0
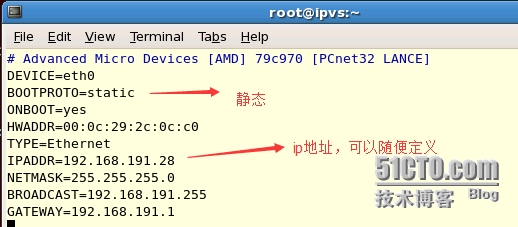
2 重启网络

3 查看eth0网卡信息

4 安装dhcp服务包

5 创建dhcp服务配置文件

6 设置dhcpd开机启动

7 查看是否开启udp 67端口

说明:dhcp服务占用67号端口,dhcp的前身是bootps这个协议
二 搭建tftp服务平台
1 安装tftp

2 编辑tftp配置文件
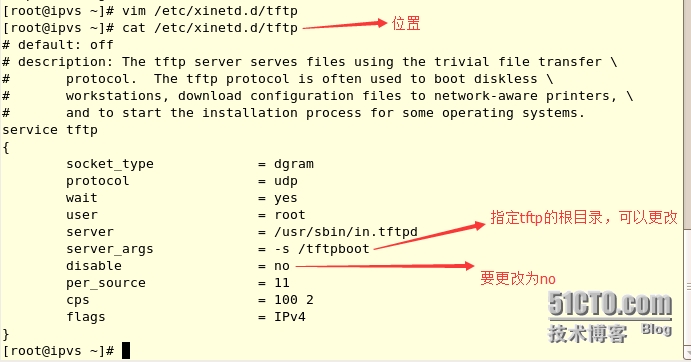
3 启动tftp服务

4 查看是否监听tftp服务,udp 69端口

说明:

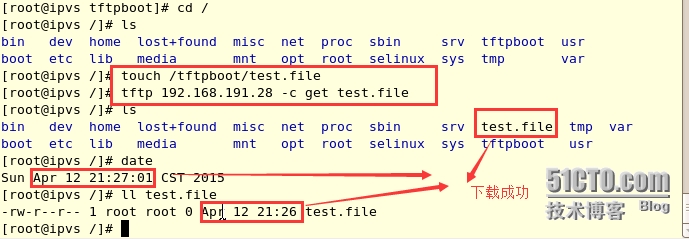
5 测试
在tftp-server的根目录下发布一个test.file文件并且下载
---END----
三 搭建http服务平台
1 安装httpd服务

2 设置开机启动

3 查看端口是否开启

4 验证
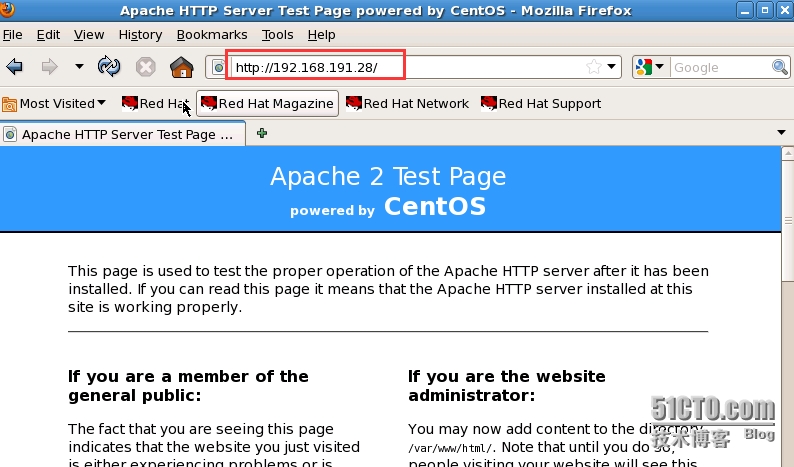
可以成功访问web服务,success。
四 组建PXE服务环境
1 安装syslinux包

2 找到pxelinux.0,menu.c32文件的路径,并复制到tftp-server的根目录,还要创建pxelinx.cfg目录

复制到/tfrpboot:

创建pxelinux.cfg目录:

3 将系统光盘isolinux目录中的所有文件复制到tftp-server的根目录
挂载系统光盘:

复制isolinux所有文件:

五 创建kickstart文件
1 安装system-config-kickstart

2 通过system-config-kickstart创建配置文件
启动:[root@ipvs /]# system-config-kickstart
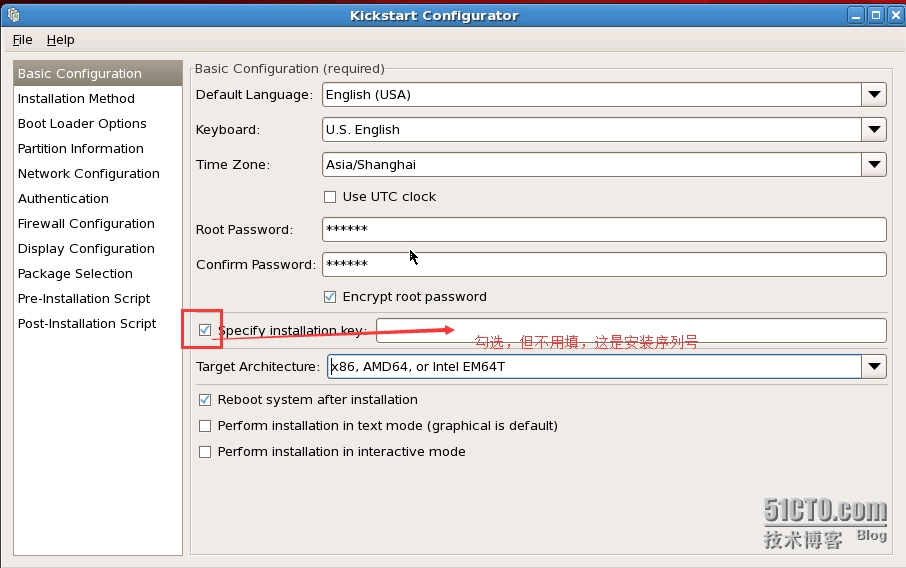
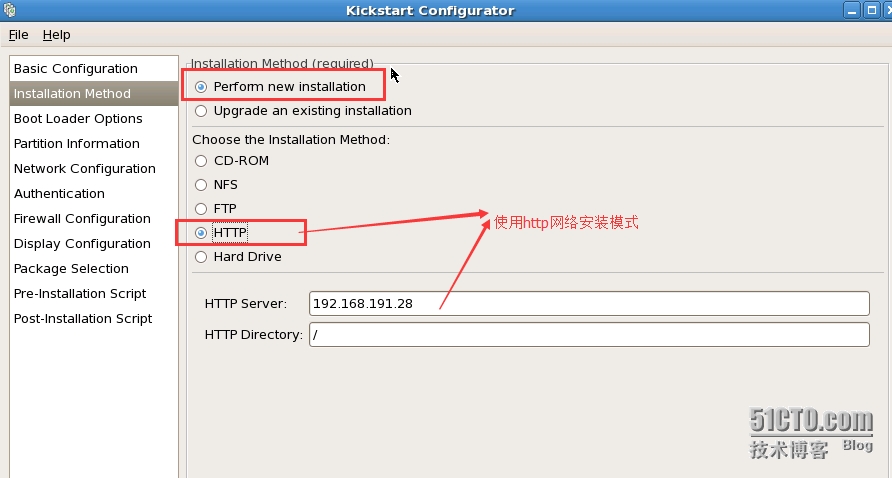
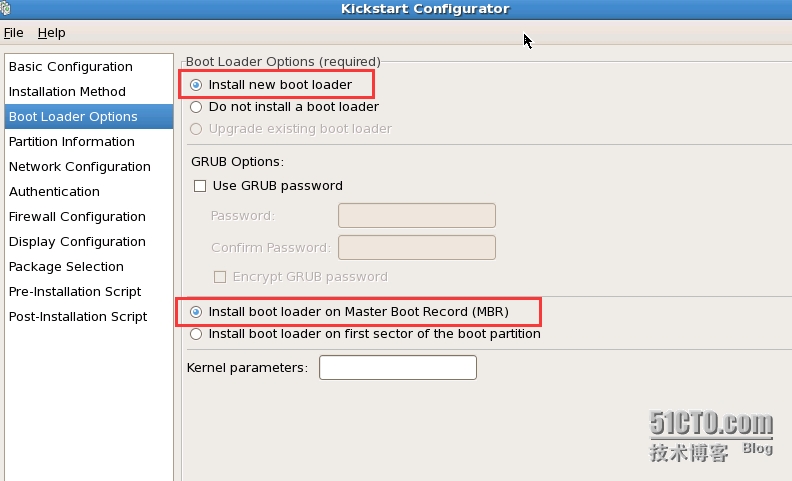
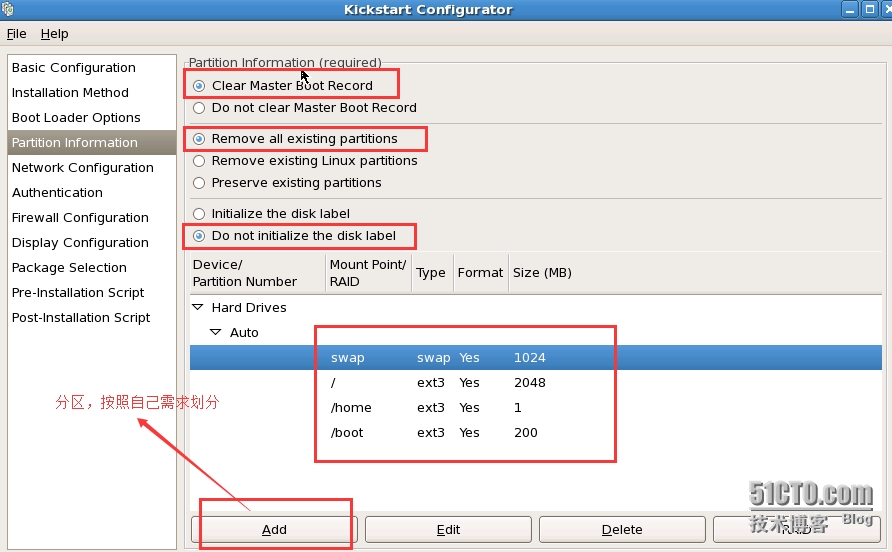
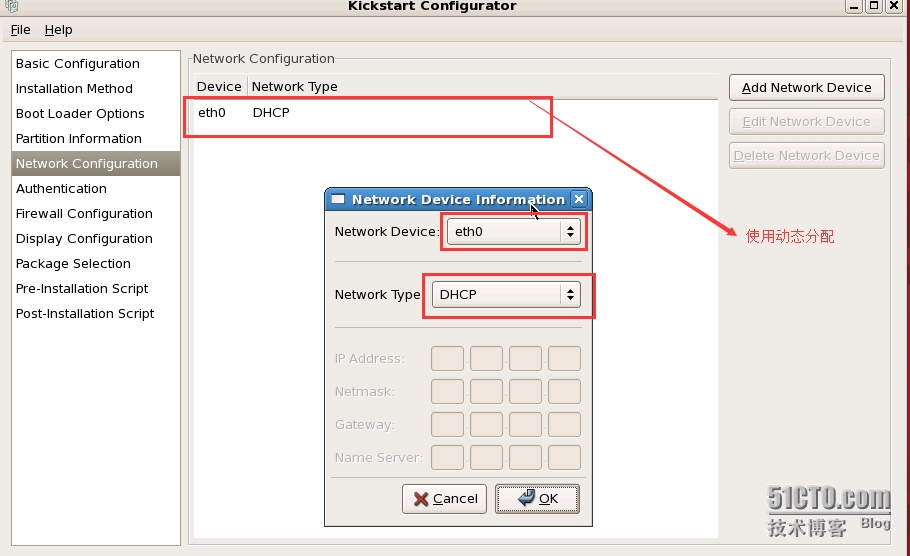
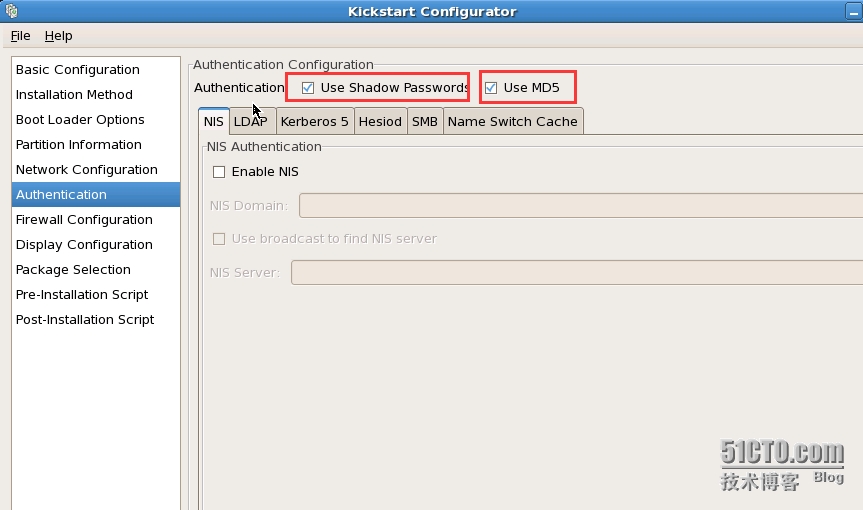
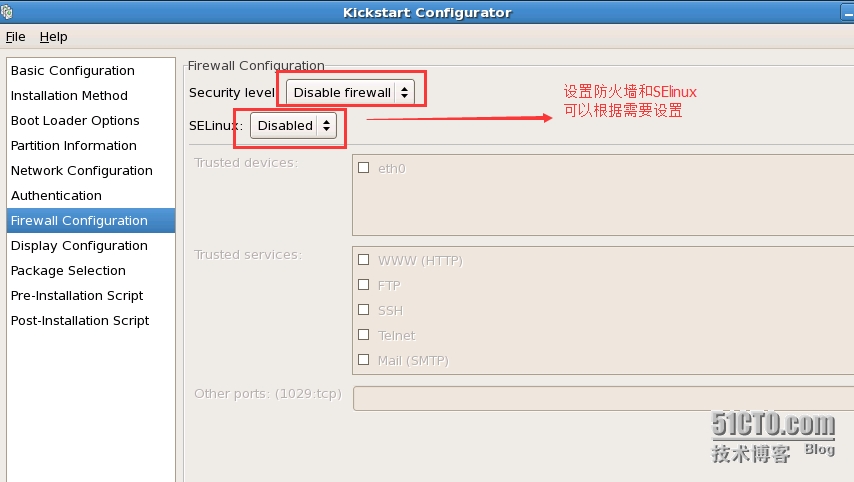
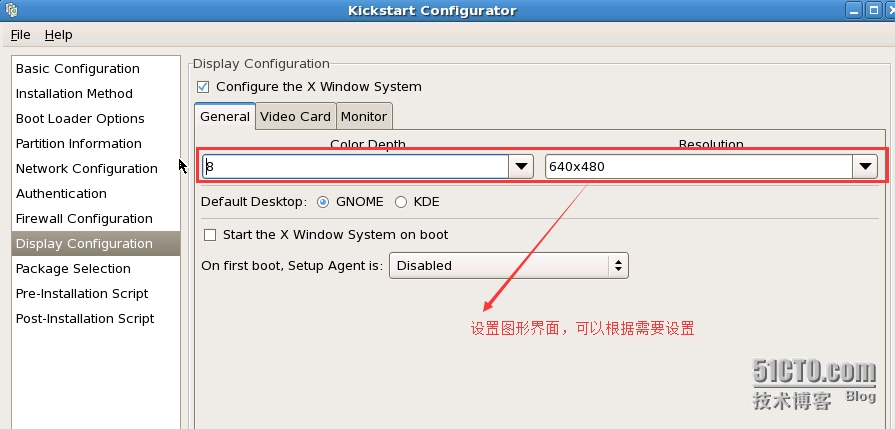
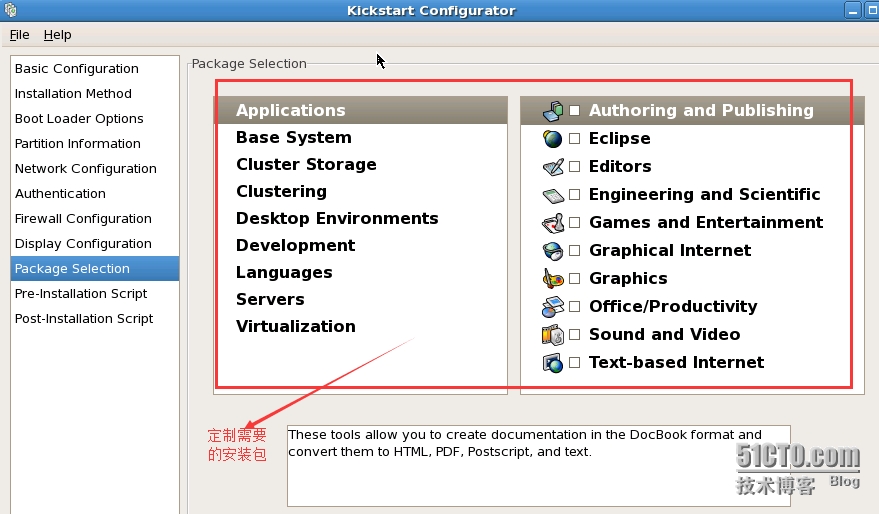
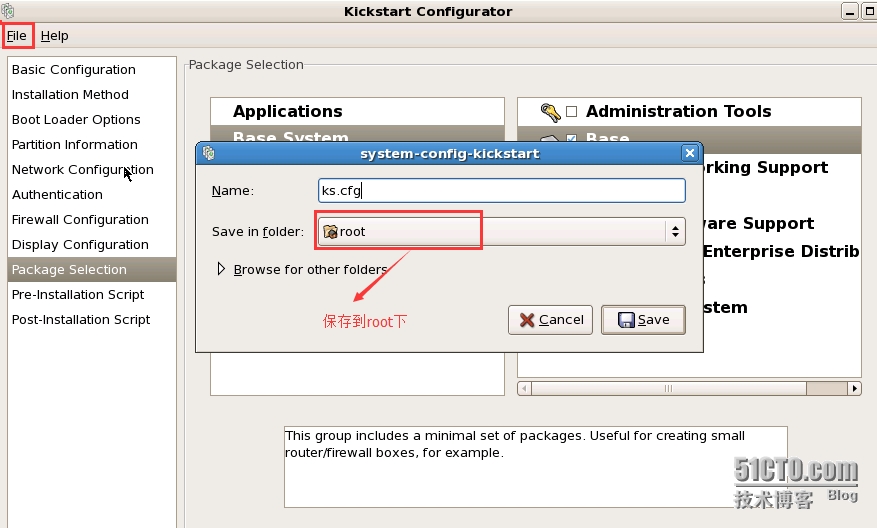
配置好kickstart文件后,到/root下查看:
 具体ks.cfg如下:
[root@ipvs ~]# cat ks.cfg
#platform=x86, AMD64, or Intel EM64T
# System authorization information
auth  --useshadow  --enablemd5
# System bootloader configuration
bootloader --location=mbr
# Clear the Master Boot Record
zerombr
# Partition clearing information
clearpart --all
# Use graphical install
graphical
# Firewall configuration
firewall --disabled
# Run the Setup Agent on first boot
firstboot --disable
key --skip
# System keyboard
keyboard us
# System language
lang en_US
# Installation logging level
logging --level=info
# Use network installation
url --url=http://192.168.191.28/
# Network information
network --bootproto=dhcp --device=eth0 --onboot=on
# Reboot after installation
reboot
#Root password
rootpw --iscrypted $1$mojC0qlK$EstHdCkMu3ybTu.03dc9G/
# SELinux configuration
selinux --disabled
# System timezone
timezone  Asia/Shanghai
# Install OS instead of upgrade
install
# X Window System configuration information
xconfig  --defaultdesktop=GNOME --depth=8 --resolution=640x480
# Disk partitioning information
part swap --bytes-per-inode=4096 --fstype="swap" --size=1024
part / --bytes-per-inode=4096 --fstype="ext3" --size=2048
part /home --bytes-per-inode=4096 --fstype="ext3" --grow --size=1
part /boot --bytes-per-inode=4096 --fstype="ext3" --size=200
%packages
@base
3 复制/root/ks.cfg文件到http服务器的根目录:/var/www/html/

更改ks.cfg的属主和属组

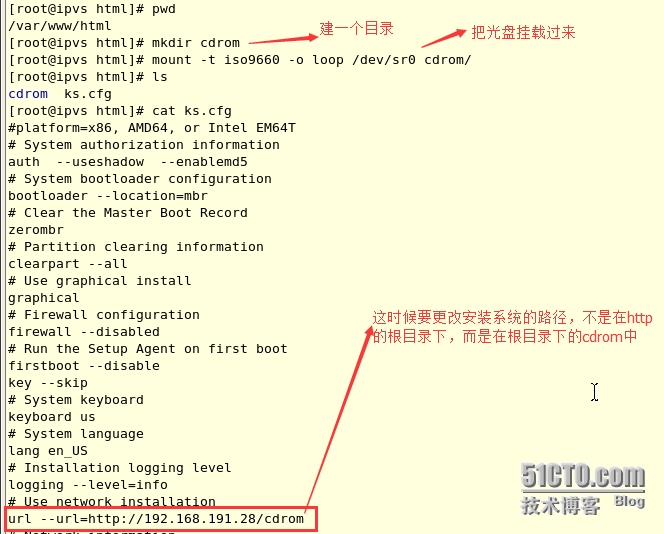
4 复制安装光盘所以文件到/var/www/html下
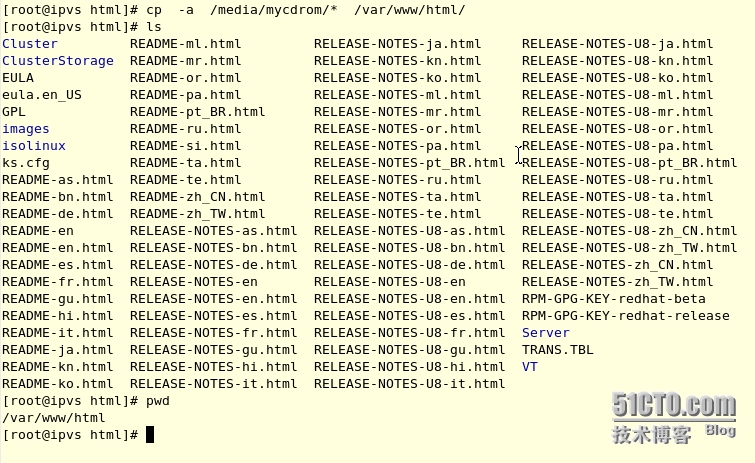
如果嫌复制比较麻烦的话,可以在/var/www/html目录中建一个目录,将系统光盘挂载过来:
六 创建启动菜单
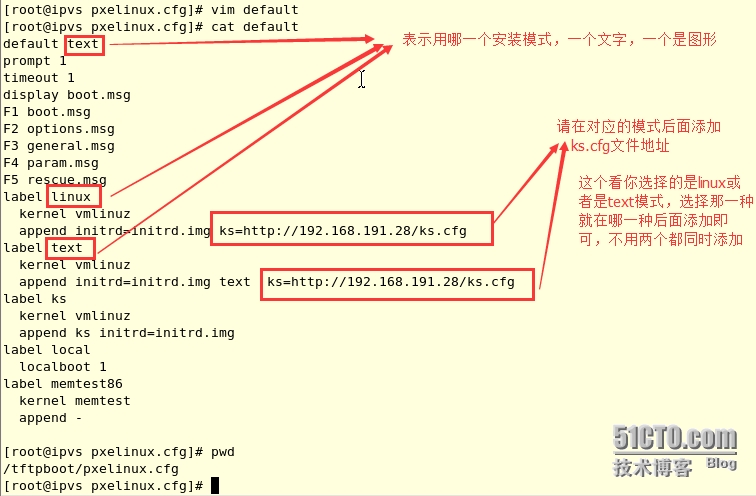
1 将系统光盘中的isolinux 目录的 isolinux.cfg 文件复制到 /tftpboot/pxelinux.cfg 目录中,然后将该文件重命名为 default
 2 对default进行如下的修改
七 启动客户机安装
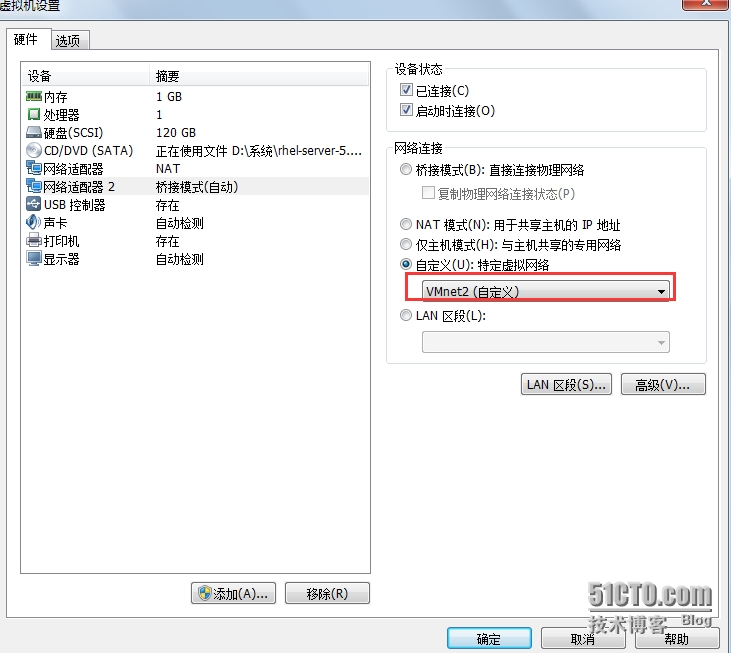
注意:客户机要和服务器在同一个交换机下
如果你是用vmware虚拟做的话,只要共用一种连接方式就可以:
启动:


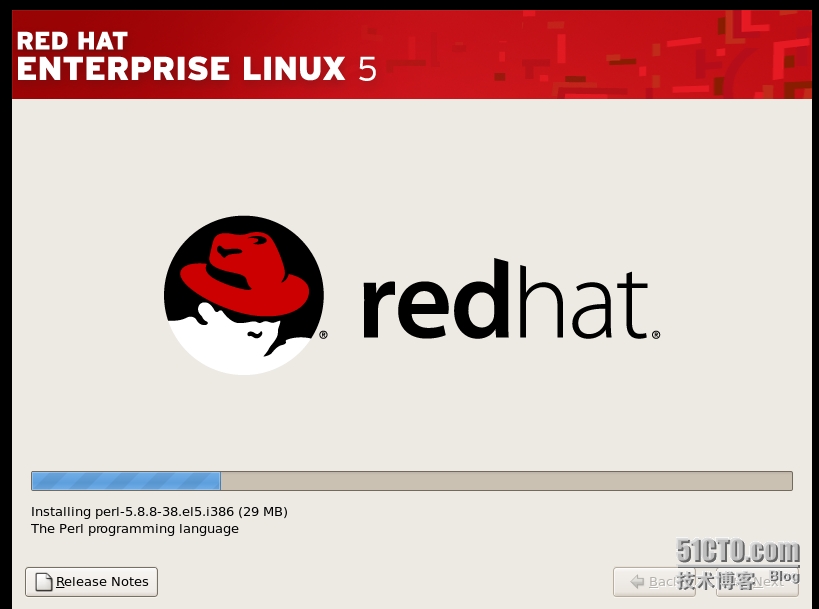
如果在/tftpboot/pxelinux.cfg/default配置文件中定义为linux模式,安装界面如下:
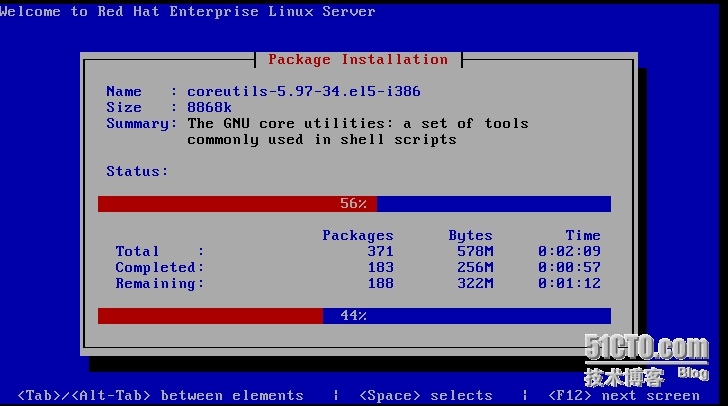
 如果是text模式,安装界面如下:
---------------------------------END------------------------
点个赞吧........
