redis-3.0.2集群部署
Redis 集群安装
集群搭建步骤
1、创建多个节点.
2、为每个节点指派槽,并将多个节点连接起来,组成一个集群.
3、当集群数据库的16384个槽都有节点在处理时,集群进入上线状态.
要求:搭建一个包含6个节点的Redis集群,其中三个主节点,三个从节点,每个主节点都有一个从节点
注:在极端情况下,如果将16384个槽都指派给一个主节点,那么只有一个主节点也可以让集群进入上线状态,但是要让集群的故障转移特性生效,最起码要有3个主节点,而要让故障转移真正有意义,至少要为三个主节点分别设置一个从节点,这也是本例子中使用6个节点的原因。
1. 下载安装:
redis install :
a) Wget http://download.redis.io/releases/redis-3.0.2.tar.gz
b) Tar xzvf redis-3.0.2.tar.gz
c) Make
d) Make install
ruby install:
a)yum install ruby
b)yum install rubygems
c)gem install -l redis-3.0.0.gem
2. 搭建集群:
为了让Redis服务器以集群模式运行,我们需要在启动服务器时,打开服务器的集群模式选项:
cluster-enabled yes
另外,如果有多个节点运行在同一台集群上,那么我们还需要为每个节点指定一个不同的端口号
port 7000
将如上的两个配置值写入redis.conf文件中,然后执行如下命令来启动一个Redis节点
redis-server redis.conf
redis.conf配置文件如下:
daemonize no tcp-backlog 511 timeout 0 tcp-keepalive 0 loglevel notice databases 32 save 900 1 save 300 10 save 60 10000 stop-writes-on-bgsave-error yes rdbcompression yes rdbchecksum yes dir "/usr/local/redis/var" slave-serve-stale-data yes slave-read-only yes repl-diskless-sync no repl-diskless-sync-delay 5 repl-disable-tcp-nodelay no slave-priority 100 appendonly no appendfsync everysec no-appendfsync-on-rewrite no auto-aof-rewrite-percentage 100 auto-aof-rewrite-min-size 64mb aof-load-truncated yes lua-time-limit 5000 slowlog-log-slower-than 10000 slowlog-max-len 128 latency-monitor-threshold 0 notify-keyspace-events "" hash-max-ziplist-entries 512 hash-max-ziplist-value 64 list-max-ziplist-entries 512 list-max-ziplist-value 64 set-max-intset-entries 512 zset-max-ziplist-entries 128 zset-max-ziplist-value 64 hll-sparse-max-bytes 3000 activerehashing yes client-output-buffer-limit normal 0 0 0 client-output-buffer-limit slave 256mb 64mb 60 client-output-buffer-limit pubsub 32mb 8mb 60 hz 10 aof-rewrite-incremental-fsync yes #打开redis集群 cluster-enabled yes #节点互连超时的阀值 cluster-node-timeout 15000 cluster-migration-barrier 1 #cluster配置文件 cluster-config-file /usr/local/redis/var/nodes-7000.conf #不同端口设置 pidfile /var/run/redis_7000.pid port 7000 logfile "/var/log/redis_7000.log" dbfilename dump-7000.rdb appendfilename "appendonly-7000.aof" |
a) 准备redis.conf ,使用以下脚本.
#!/bin/bash
FilePath="/etc/redis_cluster"
mkdir -p $FilePath
for i in `seq -w 0 5`
do
cp redis.conf $FilePath/700$i.conf
sed -i "s#port 7000#port 700$i#g" $FilePath/700$i.conf
sed -i "s#pidfile /var/run/redis_7000.pid#pidfile /var/run/redis_700$i.pid/g" $FilePath/700$i.conf
sed -i "s#logfile \"/var/log/redis_7000.log\"#logfile \"/var/log/redis_700$i.log/g\" $FilePath/700$i.conf
sed -i "s#cluster-config-file /usr/local/redis/var/nodes-7000.conf#cluster-config-file /usr/local/redis/var/nodes-700$i.conf/g" $FilePath/700$i.conf
sed -i "s#dbfilename dump-7000.rdb#dbfilename dump-700$i.rdb#g" $FilePath/700$i.conf
sed -i "s#appendfilename \"appendonly-7000.aof\"#appendfilename \"appendonly-700$i.aof\"#g" $FilePath/700$i.conf
Done
b) 启动 redis 节点
#!/bin/bash
FilePath="/etc/redis_cluster"
for i in `seq -w 0 5`;do
redis-server $FilePath/700$i.conf
done
c) 判断各个节点的Redis服务是否启动成功:

d) 创建Redis Cluster

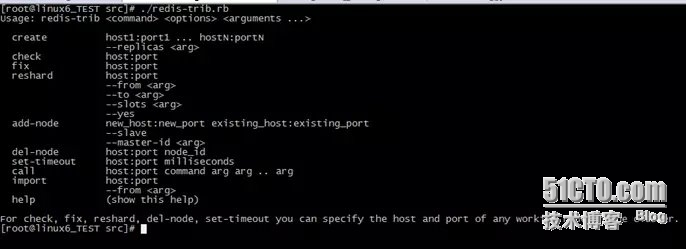
[root@linux6_TEST src]# ./redis-trib.rb create --replicas 1 127.0.0.1:7000 127.0.0.1:7001 127.0.0.1:7002 127.0.0.1:7003 127.0.0.1:7004 127.0.0.1:7005
>>> Creating cluster
Connecting to node 127.0.0.1:7000: OK
Connecting to node 127.0.0.1:7001: OK
Connecting to node 127.0.0.1:7002: OK
Connecting to node 127.0.0.1:7003: OK
Connecting to node 127.0.0.1:7004: OK
Connecting to node 127.0.0.1:7005: OK
>>> Performing hash slots allocation on 6 nodes...
Using 3 masters:
127.0.0.1:7000
127.0.0.1:7001
127.0.0.1:7002
Adding replica 127.0.0.1:7003 to 127.0.0.1:7000
Adding replica 127.0.0.1:7004 to 127.0.0.1:7001
Adding replica 127.0.0.1:7005 to 127.0.0.1:7002
M: 8bd14c65c633af4ddc52a8c254f4ae16ecc1445d 127.0.0.1:7000
slots:0-5460 (5461 slots) master
M: a39f2fb7b03f3cb95bfefb52a40003f5d3514b94 127.0.0.1:7001
slots:5461-10922 (5462 slots) master
M: e2683986eb936f09265059b24422d23e97123467 127.0.0.1:7002
slots:10923-16383 (5461 slots) master
S: 446fbf7cabb22d920478f17490af8bf938ed27a3 127.0.0.1:7003
replicates 8bd14c65c633af4ddc52a8c254f4ae16ecc1445d
S: 4f8a7495220047080f557e64f1a5f1ef2e34c13d 127.0.0.1:7004
replicates a39f2fb7b03f3cb95bfefb52a40003f5d3514b94
S: 595c7b7971059cb204c28a5df729e5c7b3e39346 127.0.0.1:7005
replicates e2683986eb936f09265059b24422d23e97123467
Can I set the above configuration? (type 'yes' to accept): yes
>>> Nodes configuration updated
>>> Assign a different config epoch to each node
>>> Sending CLUSTER MEET messages to join the cluster
Waiting for the cluster to join..
>>> Performing Cluster Check (using node 127.0.0.1:7000)
M: 8bd14c65c633af4ddc52a8c254f4ae16ecc1445d 127.0.0.1:7000
slots:0-5460 (5461 slots) master
M: a39f2fb7b03f3cb95bfefb52a40003f5d3514b94 127.0.0.1:7001
slots:5461-10922 (5462 slots) master
M: e2683986eb936f09265059b24422d23e97123467 127.0.0.1:7002
slots:10923-16383 (5461 slots) master
M: 446fbf7cabb22d920478f17490af8bf938ed27a3 127.0.0.1:7003
slots: (0 slots) master
replicates 8bd14c65c633af4ddc52a8c254f4ae16ecc1445d
M: 4f8a7495220047080f557e64f1a5f1ef2e34c13d 127.0.0.1:7004
slots: (0 slots) master
replicates a39f2fb7b03f3cb95bfefb52a40003f5d3514b94
M: 595c7b7971059cb204c28a5df729e5c7b3e39346 127.0.0.1:7005
slots: (0 slots) master
replicates e2683986eb936f09265059b24422d23e97123467
[OK] All nodes agree about slots configuration.
>>> Check for open slots...
>>> Check slots coverage...
[OK] All 16384 slots covered.
###如果整个集群数据库的16384个槽都有节点在处理,那么集群就会进入上线状态,之后用户就可以开始向集群发送命令请求了
集群访问
使用集群客户端向集群发送命令请求
目前主要的 Redis 集群客户端(或者说,支持集群功能的 Redis 客户端)有以下这些:
1、redis-rb-cluster:antirez 使用 Ruby 编写的 Redis 集群客户端,集群客户端的官方实现;
2、predis:Redis 的 PHP 客户端,支持集群功能;
3、jedis:Redis 的 JAVA 客户端,支持集群功能;
4、StackExchange.Redis:Redis 的 C# 客户端,支持集群功能;
5、内置的 redis-cli :在启动时给定 -c 参数即可进入集群模式,支持部分集群功能;
数据备份:
注意备份每个实例的 dump.rdb 和 cluster 配置文件 cluster-config-file