How to run Juniper Firefly Perimeter vSRX on GNS3
Firefly Perimeter is a virtual security appliance that provides security and networking services at the perimeter in virtualized private or public cloud environments. It runs as a virtual machine (VM) on a standard x86 server and delivers similar security and networking features available on branch SRX Series devices.
However not all the features that are supported by SRX hardware devices are supported. Here is the list of features supported by current firefly 12.1x46-d10 release.
Firefly Perimeter Hardware Specifications
- Memory 2 GB
- Disk space 2 GB
- vCPUs 2
- vNICs Up to 10
- Virtual Network Interface Card type (NIC) E1000
Thanks to Juniper’s software evaluation program we can download the Firefly Perimeter security solution for free and test it out for 60 days. In this tutorial we are going to connect Firefly Perimeter to GNS3 and create a simple lab to test connectivity between two vSRX instances. Even GNS3 has built-in support for VirtualBox, only Qemu / KVM will be used as hypervisor as I wasn't successful with running Firefly vSRX virtual on VirtualBox.
Firefly Perimeter virtual machines can be download here. You have to use your Juniper account to proceed the download but a valid service contract is not required to to download Firefly Perimeter virtual machine.
Picture 1 - Juniper Login Window
Notice that they are both JVA and OVA files available for download. We will download the OVA file archive that contains vmdk vSRX image and other files required for running vSRX on VMware appliance.
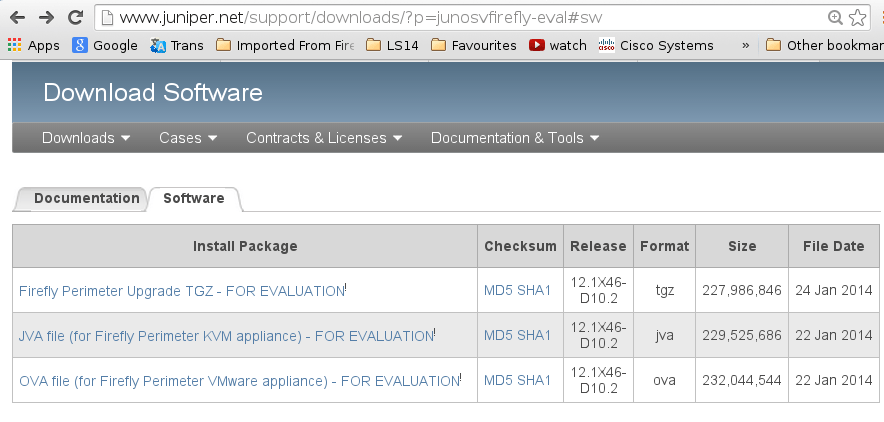
Picture 2 - Firefly Perimeter Download Page
Part 1 Running Firefly Perimeter as Qemu Appliance
This part discuss how to convert Firefly Perimeter installed on VMware image to qcow2 disk format that is recognized by Qemu and explains GNS3 Qemu settings configuration. As the current GNS3 1.0 beta2 does not have Qemu support included yet we will use the most latest GNS3 0.8.7 version with Qemu support.
1.1. Extract vmdk Virtual Disk from OVA File
$ tar xvf junos-vsrx-12.1X46-D10.2-domestic.ova

Picture 3 - Extracting OVA File
Starting at version 0.12, Qemu-kvm has native support for VMware virtual machines disks. When we have a closer look at the virtual disk we will find that the disk type is streamOptimized read only disk.
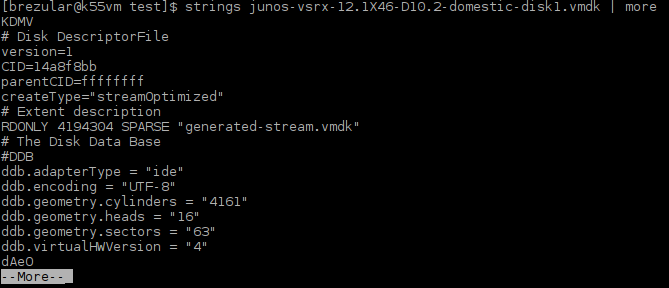
Picture 4 - StreamOptimized Virtual Machine Disk
As you can see, Qemu refuses to open streamOptimized virtual disks complaining that VMDK version 3 must be read only.

Picture 5 - Qemu fails to open StreamOptimized Virtual Machine Disk
A workaround consists of the conversion from streamOptimized vmdk disk to the copy and writeqcow2 virtual machine disk type tha is recognized by Qemu.
$ qemu-img convert -O qcow2 junos-vsrx-12.1X46-D10.2-domestic-disk1.vmdk junos-vsrx-12.1X46-D10.2-domestic.img
![]()
Picture 6 - Converting from VMDK to QCOW2 Virtual Machine Disk
Part 1.2 GNS3 Qemu General and Guest Settings Configuration for Firefly Permiter
Start GNS3 0.8.7 and create a new project. Navigate to Edit -> Preferences -> Qemu -> Qemu General Settings. Configure Qemu general parameters and click test button.
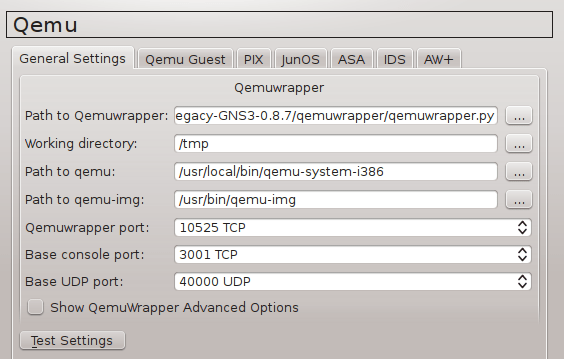
Picture 7 - GNS3 General Qemu Settings
Go ahead and configure GNS3 Guest settings. Navigate to Edit -> Preferences -> Qemu -> Qemu Guest. Configure vSRX parameters according to the picture below.
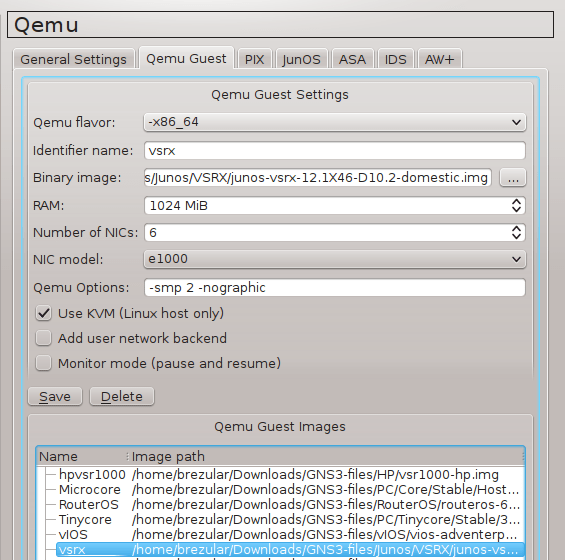
Picture 8 - Qemu Guest Settings
Note Do not omit Qemu option -smp 2. According to my test, it is required to configuretwo CPUs for VM otherwise all Gigabit Ethernet interfaces are not recognized.
Part 2 Running Firefly Perimeter as VirtualBox Appliance
In this part we are going to convert Firefly Perimeter installed on VMware virtual machine disk (VMDK) to the native Virtualbox disk format - Virtual Disk Image (VDI). Then we will create a VirtualBox Firefly Perimeter VM and attach a virtual disk with installed Firefly Perimeter to this machine. At the end, we will configure GNS3 VirtualBox General Settings and VirtualBox VMs Settings to support our newly created Firefly Perimeter Vm.
Note As the new GNS3 1.0 version supports VirtualBox we will use it.
2.1. Extract Vmdk Virtual Disk from OVA File
$ tar xvf junos-vsrx-12.1X46-D10.2-domestic.ova
Convert VMware VMDK disk to VirtualBox disk VDI.
$ vboxmanage clonehd -format VDI junos-vsrx-12.1X46-D10.2-domestic-disk1.vmdk junos-vsrx-12.1X46-D10.2-domestic.vdi
Start VirtualBox Manager with the command below.
$ sudo virtualbox
Navigate to Machine-> New and select Type and Version as it is shown on the picture below.
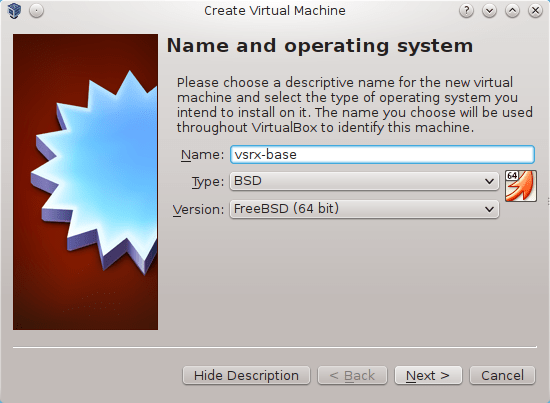
Picture 9 - Creating New VirtualBox VM
Assign at least 1024 MB RAM to our VM. Continue to the Hard Drive window and select path to VDI disk.
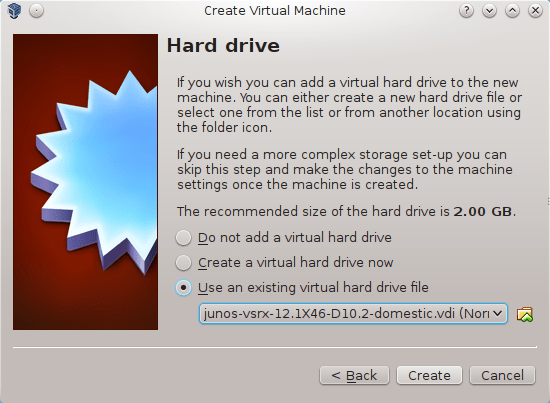
Picture 10 - Selecting Hard Drive for VM
Left click on Firefly Perimeter VM and press Ctrl-S to open VM settings window. Navigate to System-> Processor and increase number of CPU to 2. This is need otherwise Junos fails to recognize Gigabit Ethernet interfaces.
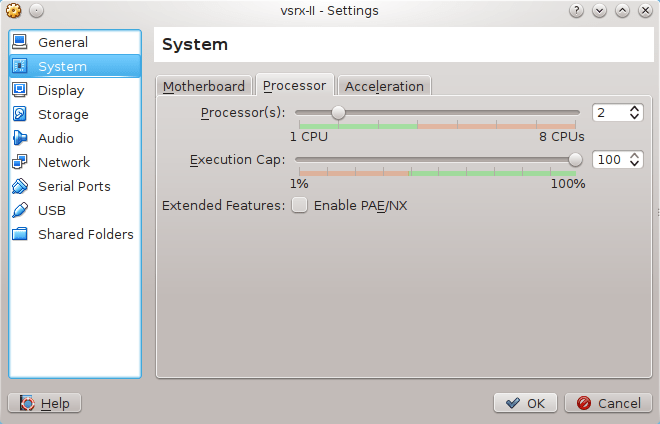
Picture 11 - Increasing Number of CPU to 2
Note For each Firefly Perimeter network device inside GNS3 project, VirtualBox VM must be created first. For this reason we consider the Firefly Perimeter VM we have just created as the base image and we will used for cloning any other Firefly Perimeter VMs. Left click on Firefly Perimeter VM and press Ctrl-O.
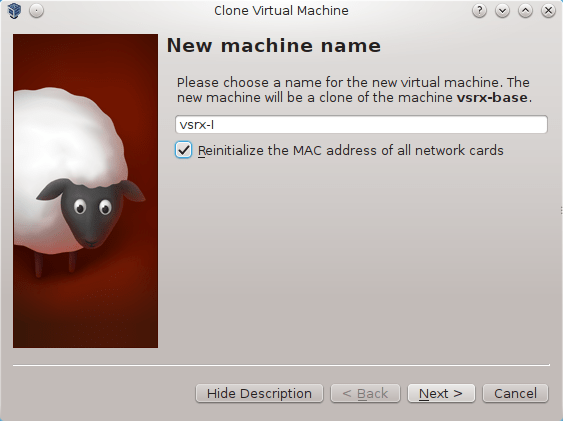
Picture 12 - Cloning Firefly Perimeter Base VM
Select the Full Clone option a continue with pressing Clone button.
2.2 GNS3 VirtualBox General and Guest Settings Configuration for Firefly Permiter
Start GNS3 1.x and create a new project. If you run GNS3 on Linux, navigate to Edit -> Preferences -> VirtualBox -> General Settings. Configure path to VirtualBox wrapper.

Picture 13 - VirtualBox General Settings
Switch to VirtualBox VMs menu. Click on Refresh VM List button an select our virtual machine from the list. Change the default NIC type from Automatic to Paravirtualized (virtio-net) type otherwise connection will not be working.
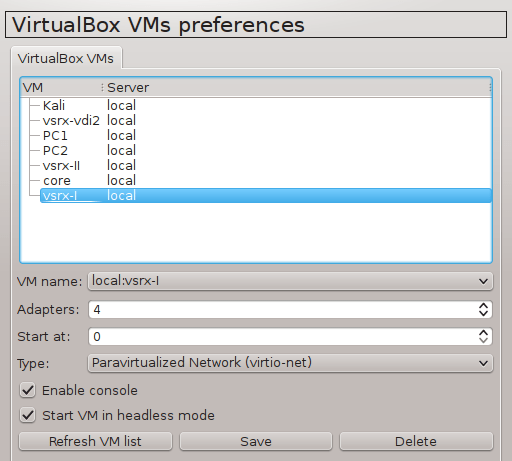
Picture 14 - VirtualBox VMs Preferences
3. Testing Connectivity between Firefly Perimeter vSRX Instances
We are going to connect two instances of Firefly Perimeter vSRX routers via Gigabit Ethernet interfaces em0. The interface em0 represents an interface GigabiEthernet 0/0/0 in vSRX cli. We will assign IP address to the interfaces and issue the ping command on the vSRX-I router pinging the IP address 192.168.1.2 of the second router.

Picture 15 - Testing Topology
Start the routers and login as root without the blank password. Type the command cli to enter vSRX CLI. Check the available GigabitEthernet interfaces with the command:
root> show interfaces ge-0/0/* terse
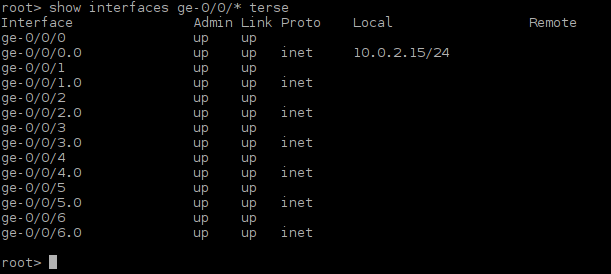
Picture 16 - Firefly Perimeter Gigabit Ethernet Interfaces
They are seven GigabitEthernet interfaces presented in CLI output. Now assign particular IP address to the interface ge-0/0/0 on both routers.
vSRX-I Configuration
root@%
root@% cli
root> configure
[edit]
root# set system host-name vSRX-I
root# set system root-authentication plain-text-password
root# set interfaces ge-0/0/0 unit 0 family inet address 192.168.1.1/24
root# set security zones security-zone untrust interfaces ge-0/0/0 host-inbound-traffic system-services ping
root# commit
root@vSRX-I> exit
vSRX-II Configuration
root@%
root@% cli
root> configure
[edit]
root# set system host-name vSRX-II
root# set system root-authentication plain-text-password
root# set interfaces ge-0/0/0 unit 0 family inet address 192.168.1.2/24
root# set security zones security-zone untrust interfaces ge-0/0/0 host-inbound-traffic system-services ping
root# commit
root@vSRX-II> exit
To test connectivity between router, ping IP address 192.168.1.2 from the router vSRX-I.

Picture 17 - Successful Ping Between Routers
End.