subversion1.6.12+httpd2.2.16编译安装并整合
一、关于mod_dav_svn模块
由于Subversion需要版本化的控制,因此标准的HTTP协议不能满足需求。要让Apache与Subversion协同工作,就要使用WebDAV(Web-based Distributed Authoring and Versiong)Web分布式创作和版本控制协议。WebDAV是HTTP 1.1的扩展,关于WebDAV的规范和工作原理,可以参考IETF RFC 2518。
mod_dav_san模块就是作为Subversion与Apache之间的接口,通过它,Apache就可以访问版本库,并且可以让客户端也使用HTTP的扩展协议WebDAV/DeltaV进行访问。
实验环境:CentOS6.5-x86-64-minimal
所需软件包:
apr-1.2.12.tar.gz
apr-util-1.2.12.tar.gz
httpd-2.2.16.tar.gz
neon-0.30.1.tar.gz
subversion-1.6.12.tar.gz
subversion-deps-1.6.12.tar.gz
本次实验关闭防火墙及selinux、yum安装过Development tools包
1、编译安装apr、apr-util
[root@test1 src]# pwd
/usr/local/src
[root@test1 src] tar zxvf apr-1.2.12.tar.gz
[root@test1 src] cd apr-1.2.12
[root@test1 apr-1.2.12]# ./configure
[root@test1 apr-1.2.12]# make && make install
[root@test1 apr-1.2.12]# cd ..
[root@test1 src]# tar zxvf apr-util-1.2.12.tar.gz
[root@test1 src]# cd apr-util-1.2.12
[root@test1 apr-util-1.2.12]# ./configure --with-apr=/usr/local/apr
[root@test1 apr-util-1.2.12]# make && make install
[root@test1 apr-util-1.2.12]# cd ..
[root@test1 src] tar zxvf httpd-2.2.16.tar.gz
2、编译安装httpd
[root@test1 src] cd httpd-2.2.16
[root@test1 httpd-2.2.16]# ./configure --prefix=/usr/local/apache --with-apr=/usr/local/apr/bin/apr-1-config --with-apr-util=/usr/local/apr/bin/apu-1-config --enable-so --enable-dav --enable-mainta --enable-iner-mode --enable-rewrite
[root@test1 httpd-2.2.16]# make && make install
[root@test1 httpd-2.2.16]# ps aux |grep httpd
[root@test1 httpd-2.2.16]# /usr/local/apache/bin/apachectl start
3、编译安装subversion
[root@test1 httpd-2.2.16]# cd ..
[root@test1 src]# tar zxvf subversion-1.6.12.tar.gz
[root@test1 src]# tar zxvf subversion-deps-1.6.12.tar.gz //两个包解压到一个目录
[root@test1 src]# cd subversion-1.6.12
[root@test1 subversion-1.6.12]# ./configure --prefix=/usr/local/svn --with-apxs=/usr/local/apache/bin/apxs --with-apr=/usr/local/apr/bin/apr-1-config --with-apr-util=/usr/local/apr/bin/apu-1-config --with-ssl --with-zlib=/usr/share/doc/zlib-1.2.3 --enable-maintainer-mode
1> configure: error: could not find library containing RSA_new
解决方法: # yum install openssl-devel
2> configure: error: no XML parser was found: expat or libxml 2.x required
解决方法: # yum install expat-devel
[root@test1 subversion-1.6.12]# make && make install
3> make的时候出现 undefined reference to `SSL_SESSION_cmp’
安装subversion.1.6.11时,如果对应的neon版本为 neon-0.25.5.tar.gz,就会出现这个错误,根据网上的资料得知,在neon的高版本上已经修复这个错误,于是到其官方网站http://www.webdav.org/neon/下载最新版的neon-0.29.3,将其解压到subversion的源码目录中,并改名为neon,再次编译,成功!
[root@test1 subversion-1.6.12]# /usr/local/svn/bin/svnserve --version

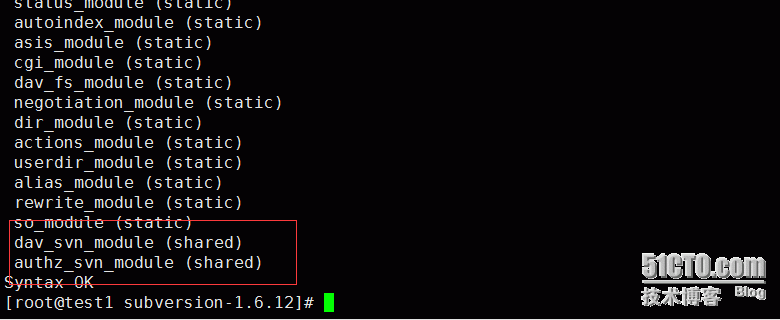
[root@test1 subversion-1.6.12]# /usr/local/apache/bin/apachectl -M

[root@test1 subversion-1.6.12]# cd /usr/local/svn/bin
4、建立版本仓库
[root@test1 bin]# mkdir /svn //为了好区分目录、创建了一个svn的目录
[root@test1 bin]# svnadmin create /svn/repos //创建一个仓库名字为repos
[root@test1 bin]# ll /svn/repos/ //如果多了一些文件则说明版本库已经创建好

导入项目文件到版本库
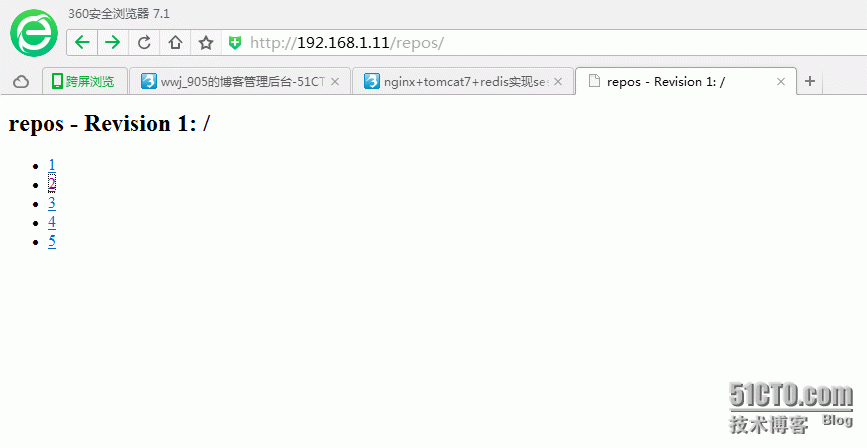
#把路径/test下的测试项目文件导入到你创建的/svn/repos仓库中去,提交后的修订版为1
#建立/test/1到5个测试文件
[root@test1 bin]# mkdir /test
[root@test1 bin]# touch /test/1 2 3 4 5
[root@test1 svn]# svn import /test/ file:///svn/repos -m "testzhushi" 图44

5、创建用户账号并分配权限
#创建svn账户user1 -c 表示创建文件 第二个用户取消-c 否则覆盖之前的用户 文件名自定义
[root@test1 bin]# /usr/local/apache/bin/htpasswd -c /svn/passwd user1
[root@test1 bin]# /usr/local/apache/bin/htpasswd /svn/passwd user2
#创建svn权限配置文件 文件名自定义
[root@test1 bin]# vim /svn/authz
----------------------------------------------------------
[groups]
admin = user1,user2
user = user3,user4
[/]
* = rw //全部用户在仓库的根目录具有读写权限
@admin = rw //admin组在仓库的根目录具有读写权限
[repos:/] //定义仓库下repos目录的权限
user3 = rw user3具有读写权限
@user = w
----------------------------------------------------------
6、配置apache支持svn
[root@test1 bin]# vim /usr/local/apache/conf/httpd.conf
----------------------------------------------------------
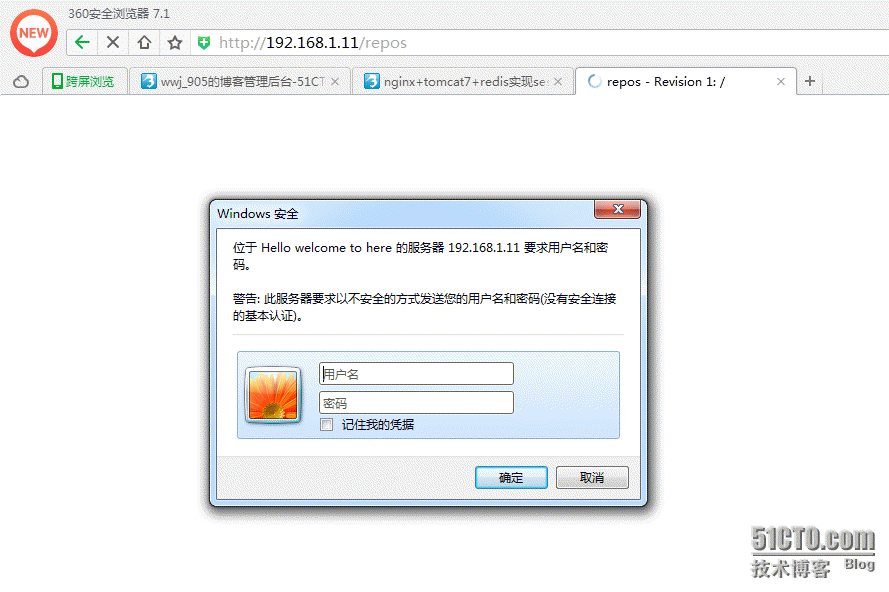
<Location /repos> //指定访问svn仓库的路径
DAV svn //定义标签
SVNPath /svn/repos //仓库的真实路径
AuthType Basic //认证方式为基本认证
AuthName "Hello welcome to here" //访问提示语
AuthUserFile /svn/passwd //用户文件位置
AuthzSVNAccessFile /svn/authz //权限文件位置
Require valid-user //设置需要认证才能访问
</Location>
----------------------------------------------------------
7、为svn目录分配适合的权限、启动并测试
#源码编译的httpd默认用户为daemon、yum的默认为apache、为了安全可以自行更改
[root@test1 bin]# chown -R daemon:daemon /svn/
[root@test1 bin]# chmod -R 700 /svn
[root@test1 bin]# /usr/local/svn/bin/svnserve -d -r /svn/repos
[root@test1 bin]# /usr/local/apache/bin/apachetcl restart
[root@test1 bin]# ps aux |grep svn
root 129174 0.0 0.0 138860 632 ? Ss 04:54 0:00 /usr/local/svn/bin/svnserve -d -r /svn/repos/
root 129212 0.0 0.0 103248 884 pts/1 S+ 05:14 0:00 grep svn

