Javaweb和spring和springmvc和maven使用记录
一、java项目使用spring框架
新建一个java项目,名为spring01
在项目新建一个libs文件夹来存放所有的第三方jar
把spring相关的jar拷贝到该目录
然后设置buildpath --> config build path -->libraries --> add library 名称自己定为userlib也行。
然后再在该library 添加 jars,选中该项目下的libs文件夹下所有文件,添加即可。
新建一个com.spring01.action包
在该包下建一个Action的接口
package com.spring.action;
public interface Action {
	public String execute(String str);
}
在该包下建一个名为UpperAction的实现
package com.spring.action;
public class UpperAction implements Action {
	private String message;
	public String getMessage() {
		return message;
	}
	public void setMessage(String str) {
		this.message = str;
	}
	public String execute(String str) {
		return (getMessage() + str).toUpperCase();
	}
}
再建一个名为LowerAction的实现
package com.spring.action;
public class LowerAction implements Action {
	private String message;
	public String getMessage() {
		return message;
	}
	public void setMessage(String str) {
		this.message = str;
	}
	public String execute(String str) {
		return (getMessage() + str).toLowerCase();
	}
}
在项目根目下建一个bean.xml的spring框架配置文件
<?xml version="1.0" encoding="UTF-8"?>
<beans xmlns="http://www.springframework.org/schema/beans"
	xmlns:xsi="http://www.w3.org/2001/XMLSchema-instance"
	xsi:schemaLocation="http://www.springframework.org/schema/beans http://www.springframework.org/schema/beans/spring-beans.xsd">
	<bean id="theAction" class="com.spring.action.LowerAction">
		<property name="message">
			<value>HeLlo</value>
		</property>
	</bean>
</beans>
再新建一个com.spring01.test包,再建一个名为ActionTest的测试类
package com.spring01.test;
import org.springframework.context.ApplicationContext;
import org.springframework.context.support.FileSystemXmlApplicationContext;
import com.spring.action.Action;
public class ActionTest {
	public static void main(String[] args) {
		ApplicationContext ctx = new FileSystemXmlApplicationContext("bean.xml");
		Action action = (Action) ctx.getBean("theAction");
		System.out.println(action.execute("Rod Johnson"));
	}
}
然后运行该类就执行输出:
hellorod johnson
把bean.xml中的<bean id="theAction" class="com.spring.action.LowerAction">
替换成<bean id="theAction" class="com.spring.action.UpperAction">再次执行输出:
HELLOROD JOHNSON
二、javaweb项目使用spring框架
新建一个javaweb(Dynamic web project),项目,名为springweb01
然后把所有第三方包拷贝到WebContent下的WEB-INF目录下的lib目录
然后就可以在该项目录引用这些第三方包了。
在 java 项目中有个程序入口(即main函数来调用执行spring配置文件)
在WEB项目上
我们需要web.xml来配置
我们先建立三个包
Com.springweb01.action
Com.springweb01.controller
Com.springweb01.test
我们这里使用了spring mvc 框架,全部都记下来方便以后了查找。
在action包中文件同上一个Action接口
package com.springweb01.action;

public interface Action {

	public String execute(String str);

}
package com.springweb01.action;

public class UpperAction implements Action {

	private String message;

	public String getMessage() {
		return message;
	}

	public void setMessage(String str) {
		this.message = str;
	}

	public String execute(String str) {
		return (getMessage() + str).toUpperCase();
	}

}
一个LowerAction实现
package com.springweb01.action;

public class LowerAction implements Action {

	private String message;

	public String getMessage() {
		return message;
	}

	public void setMessage(String str) {
		this.message = str;
	}

	public String execute(String str) {
		return (getMessage() + str).toLowerCase();
	}

}
然后在src下新建spring框架的bean配置文件bean.xml
<?xml version="1.0" encoding="UTF-8"?>
<beans xmlns="http://www.springframework.org/schema/beans"
	xmlns:xsi="http://www.w3.org/2001/XMLSchema-instance"
	xsi:schemaLocation="http://www.springframework.org/schema/beans http://www.springframework.org/schema/beans/spring-beans.xsd">

	<bean id="theAction" class="com.springweb01.action.UpperAction">
		<property name="message">
			<value>HeLlo</value>
		</property>
	</bean>

</beans>
然后test包中写一个ActionTest的测试类:
package com.springweb01.test;

import org.springframework.context.ApplicationContext;
import org.springframework.context.support.ClassPathXmlApplicationContext;
import org.springframework.context.support.FileSystemXmlApplicationContext;

import com.springweb01.action.Action;

public class ActionTest {

	public static void main(String[] args) {
		//ApplicationContext ctx = new FileSystemXmlApplicationContext("bean.xml");
		ApplicationContext ctx = new ClassPathXmlApplicationContext("bean.xml");
		Action action = (Action) ctx.getBean("theAction");

		System.out.println(action.execute("Rod Johnson"));

	}

}
执行结果为:
HELLOROD JOHNSON
此时结构如图:
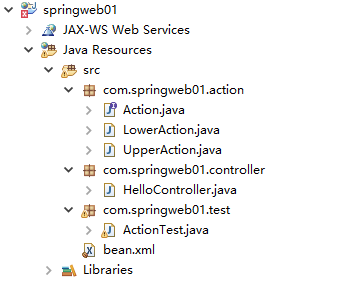
其实以上和第一个java项目类似,只是把测试类由FileSystemXmlApplicationContext改成了ClassPathXmlApplicationContext这就为在web项目加载文件做好铺定,因为WEB项目放在容器中不再能使用FileSystemxml来找而该由ClassPathXml来获得该配置文件。
我们使用了spring MVC
Web.xml中的配置解读:
<servlet>
<servlet-name>dispatcher</servlet-name>
<servlet-class>org.springframework.web.servlet.DispatcherServlet</servlet-class>
<init-param>
<param-name>contextConfigLocation</param-name>
<param-value>/WEB-INF/dispatcher-servlet.xml</param-value>
</init-param>
<load-on-startup>1</load-on-startup>
</servlet>
<servlet-mapping>
<servlet-name>dispatcher</servlet-name>
<url-pattern>/</url-pattern>
</servlet-mapping>
这个是 spring MVC相关的配置
下面这个是web中使用spring框架的配置
<listener>
<listener-class>org.springframework.web.context.ContextLoaderListener</listener-class>
</listener>
<!-- 默认配置在WEB-INF目录下 -->
<context-param>
<param-name>contextConfigLocation</param-name>
<param-value>classpath:bean.xml</param-value>
<!-- <param-value>/WEB-INF/spring*.xml</param-value> -->
</context-param>
现在我们编写我们的controller
package com.springweb01.controller;
import org.springframework.stereotype.Controller;
import org.springframework.web.bind.annotation.RequestMapping;
import org.springframework.web.bind.annotation.RequestMethod;
import com.springweb01.action.Action;
import org.springframework.ui.ModelMap;
import org.springframework.context.ApplicationContext;
import org.springframework.context.support.ClassPathXmlApplicationContext;
@Controller
@RequestMapping("/welcome")
public class HelloController {
@RequestMapping(method=RequestMethod.GET)
public String printWelcome(ModelMap model){
@SuppressWarnings("resource")
ApplicationContext ctx = new ClassPathXmlApplicationContext("bean.xml");
Action action = (Action) ctx.getBean("theAction");
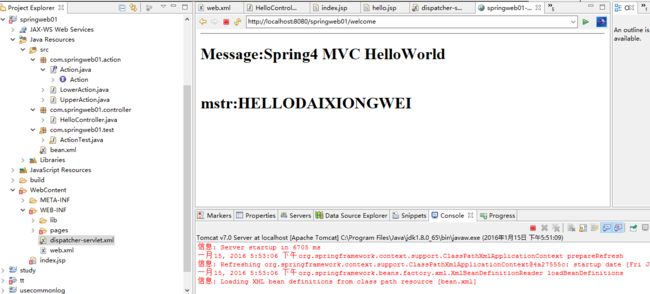
model.addAttribute("message","Spring4 MVC HelloWorld");
model.addAttribute("mstr", action.execute("DaiXiongWei"));
return "hello";
}
}
这里看得到和前面的ActionTest测试类一样使用,当然,项目肯定不会这样使用了。
写一下index.jsp
<%@ page language="java" contentType="text/html; charset=UTF-8" pageEncoding="UTF-8"%>
<!DOCTYPE html>
<html>
<head>
<meta charset="utf-8">
</head>
<body>
<h2>Hello World!</h2>
<hr>
点击welcome测试:<a href="welcome">welcome</a>
</body>
</html>
然后再去写一下hello.jsp
<%@ page language="java" contentType="text/html; charset=UTF-8" pageEncoding="UTF-8"%>
<%@ taglib uri="http://java.sun.com/jsp/jstl/core" prefix="c"%>
<%@ page isELIgnored="false" %>

<!DOCTYPE html PUBLIC "-//W3C//DTD HTML 4.01 Transitional//EN" "http://www.w3.org/TR/html4/loose.dtd">
<html>
<head>
<meta http-equiv="Content-Type" content="text/html; charset=UTF-8">
<title>springweb01-hello</title>
</head>
<body>
<hr>
<h1>Message:${message}</h1> <br>
<h1>mstr:${mstr}</h1> <br>
</body>
</html>
最后我们再来看我们的springMVC他的配置文件
?xml version="1.0" encoding="UTF-8"?>
<beans xmlns="http://www.springframework.org/schema/beans"
	xmlns:xsi="http://www.w3.org/2001/XMLSchema-instance"
	xmlns:aop="http://www.springframework.org/schema/aop"
	xmlns:c="http://www.springframework.org/schema/c"
	xmlns:cache="http://www.springframework.org/schema/cache"
	xmlns:context="http://www.springframework.org/schema/context"
	xmlns:jdbc="http://www.springframework.org/schema/jdbc"
	xmlns:jee="http://www.springframework.org/schema/jee"
	xmlns:mvc="http://www.springframework.org/schema/mvc"
	xmlns:p="http://www.springframework.org/schema/p"
	xmlns:util="http://www.springframework.org/schema/util"
	xsi:schemaLocation="http://www.springframework.org/schema/beans http://www.springframework.org/schema/beans/spring-beans.xsd
		http://www.springframework.org/schema/aop http://www.springframework.org/schema/aop/spring-aop-4.2.xsd
		http://www.springframework.org/schema/cache http://www.springframework.org/schema/cache/spring-cache-4.2.xsd
		http://www.springframework.org/schema/context http://www.springframework.org/schema/context/spring-context-4.2.xsd
		http://www.springframework.org/schema/jdbc http://www.springframework.org/schema/jdbc/spring-jdbc-4.2.xsd
		http://www.springframework.org/schema/jee http://www.springframework.org/schema/jee/spring-jee-4.2.xsd
		http://www.springframework.org/schema/mvc http://www.springframework.org/schema/mvc/spring-mvc-4.2.xsd
		http://www.springframework.org/schema/util http://www.springframework.org/schema/util/spring-util-4.2.xsd">

	<context:component-scan base-package ="com.springweb01.controller" />

	<bean
		class="org.springframework.web.servlet.view.InternalResourceViewResolver">
		<property name="prefix">
			<value>/WEB-INF/pages/</value>
		</property>
		<property name="suffix">
			<value>.jsp</value>
		</property>
	</bean>

</beans>
它的位置应该是web.xml中指定的位置。我们这里是WEB-INF文件夹里。
这里其实指定的返回hello这个视图的位置,我们这里是放在WEB-INF目录下的一个pages目录。
做完了以上几步。我们就可以运行我们的项目了。

写都到这里了,我们说一下maven
三、maven的安装
安装就不用说了,选择好目录直接下一步
安装后如图

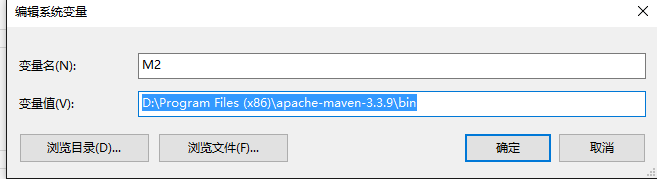
设置M2:
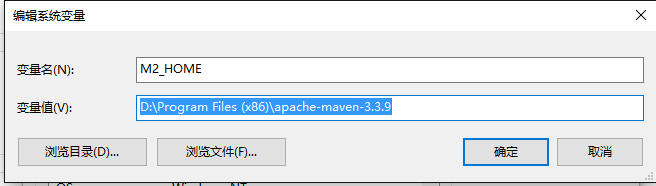
设置M2_HOME:
添加到PATH:
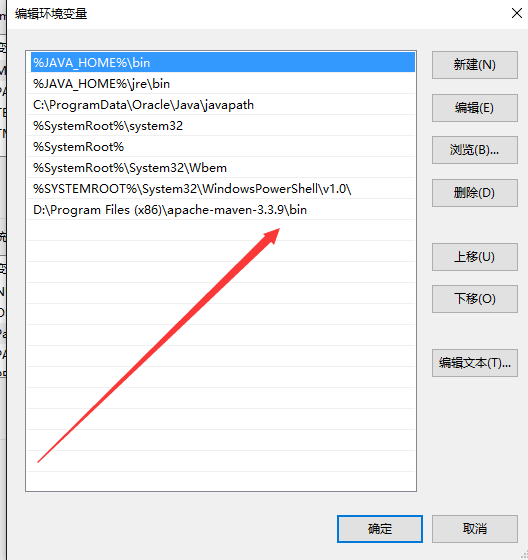
最后就可以直接在eclipse中使用,说到eclipse,我们就说说eclipse.
四、eclipse安装
先装JDK1.8,也是直接下一步。最后如图:
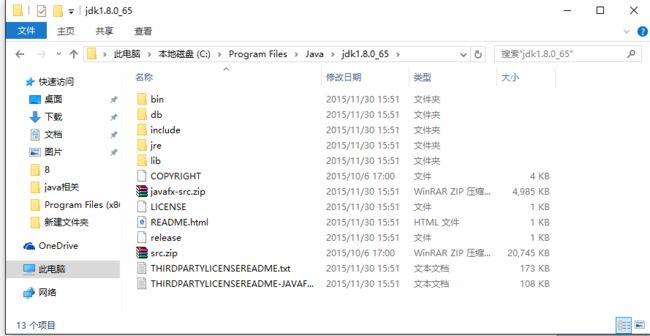
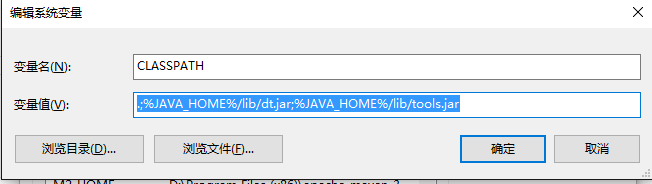
设置JAVA_HOME, CLASSPATH, PATH


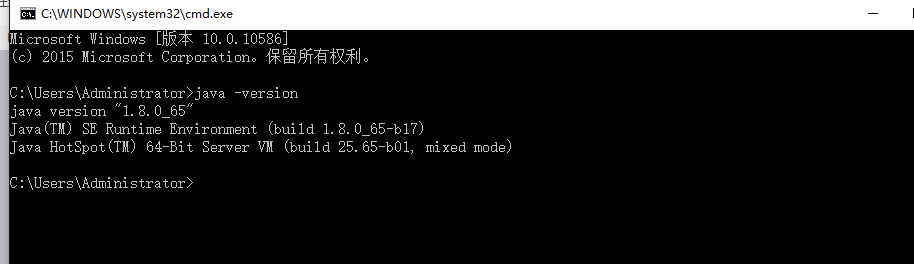
运行java -version测试安装是否成功
去官网下载eclipse4.5.1是目前最先版本。 解压后就可以使用。
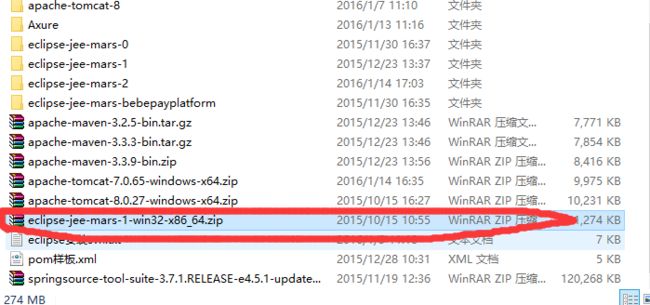
同样也是这图大家看到eclipse开发spring的一个工具包了springsource-tool-suite我下的是3.7.1然后再eclipse中help-->install 然后选择springsource-tool-suite-3.7.1-RELEASE-e4.5.1-update.zip包安装好后你的eclipse就会多一个的spring的图标,你在开发spring时就会方便许多。
这里也可以安装svn工具最先的安装地址是:
最近版本是1.12.x
http://subclipse.tigris.org/update_1.12.x
然后直接网络安装,完成后就可以在eclipse直接使用svn了。
五、使用maven创建javaweb项目
打开新建项目选择maven project在选择类型时选择webapp
填好groupID和ArtifactID

再然在main目录下新建一个java文件夹用来存放java代码,完成后如图:

因为这些插件都是以前,所以我们需要去改一些东西,不然该项目是一个servlet2.3的版本的项目。我们去工作目录
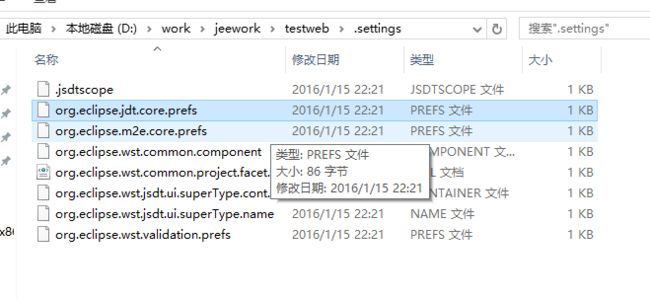
把org.eclipse.jdt.core.prefs.xml里的东西由1.5改成1.8,指java1.8。
同时把org.eclipse.wst.common.project.facet.core.xml中的1.5和2.3改成1.8和3.0
说明是由原来的jdk1.5,servlet2.3版本变成jdk1.8和servlet3.0版本。
同时把org.eclipse.wst.common.project.facet.core.xml中的1.5和2.3改成1.8和3.0
说明是由原来的jdk1.5,servlet2.3版本变成jdk1.8和servlet3.0版本。
然后再来查看项目的project Facets,就以经变成1.8和3.0了。
我们这里再把web.xml里的由2.3的头变居3.0 的头吧。这个可以不改。理解了就行。
这样我们一个maven的javaweb项目就完成了,我们现在就主要关心我们pom.xml解决依赖问题。
最后再附上一个完格的pom.xml,引入了spring和jstl库的。
<project xmlns="http://maven.apache.org/POM/4.0.0" xmlns:xsi="http://www.w3.org/2001/XMLSchema-instance"
	xsi:schemaLocation="http://maven.apache.org/POM/4.0.0 http://maven.apache.org/maven-v4_0_0.xsd">
	<modelVersion>4.0.0</modelVersion>
	<groupId>com.text</groupId>
	<artifactId>test</artifactId>
	<packaging>war</packaging>
	<version>0.0.1-SNAPSHOT</version>
	<name>test</name>
	<url>http://maven.apache.org</url>

	<properties>
		<project.build.sourceEncoding>UTF-8</project.build.sourceEncoding>
		<springversion>4.2.4.RELEASE</springversion>
	</properties>

	<dependencies>
		<dependency>
			<groupId>junit</groupId>
			<artifactId>junit</artifactId>
			<version>3.8.1</version>
			<scope>test</scope>
		</dependency>

		<dependency>
			<groupId>jstl</groupId>
			<artifactId>jstl</artifactId>
			<version>1.2</version>
		</dependency>
		<dependency>
			<groupId>taglibs</groupId>
			<artifactId>standard</artifactId>
			<version>1.1.2</version>
		</dependency>

		<dependency>
			<groupId>org.springframework</groupId>
			<artifactId>spring-aop</artifactId>
			<version>${springversion}</version>
			<type>jar</type>
			<scope>compile</scope>
		</dependency>
		<dependency>
			<groupId>org.springframework</groupId>
			<artifactId>spring-aspects</artifactId>
			<version>${springversion}</version>
			<type>jar</type>
			<scope>compile</scope>
		</dependency>
		<dependency>
			<groupId>org.springframework</groupId>
			<artifactId>spring-beans</artifactId>
			<version>${springversion}</version>
			<type>jar</type>
			<scope>compile</scope>
		</dependency>
		<dependency>
			<groupId>org.springframework</groupId>
			<artifactId>spring-context</artifactId>
			<version>${springversion}</version>
			<type>jar</type>
			<scope>compile</scope>
		</dependency>
		<dependency>
			<groupId>org.springframework</groupId>
			<artifactId>spring-context-support</artifactId>
			<version>${springversion}</version>
			<type>jar</type>
			<scope>compile</scope>
		</dependency>
		<dependency>
			<groupId>org.springframework</groupId>
			<artifactId>spring-core</artifactId>
			<version>${springversion}</version>
			<type>jar</type>
			<scope>compile</scope>
		</dependency>
		<dependency>
			<groupId>org.springframework</groupId>
			<artifactId>spring-expression</artifactId>
			<version>${springversion}</version>
			<type>jar</type>
			<scope>compile</scope>
		</dependency>
		<dependency>
			<groupId>org.springframework</groupId>
			<artifactId>spring-jdbc</artifactId>
			<version>${springversion}</version>
			<type>jar</type>
			<scope>compile</scope>
		</dependency>
		<dependency>
			<groupId>org.springframework</groupId>
			<artifactId>spring-jms</artifactId>
			<version>${springversion}</version>
			<type>jar</type>
			<scope>compile</scope>
		</dependency>
		<dependency>
			<groupId>org.springframework</groupId>
			<artifactId>spring-orm</artifactId>
			<version>${springversion}</version>
			<type>jar</type>
			<scope>compile</scope>
		</dependency>
		<dependency>
			<groupId>org.springframework</groupId>
			<artifactId>spring-oxm</artifactId>
			<version>${springversion}</version>
			<type>jar</type>
			<scope>compile</scope>
		</dependency>
		<dependency>
			<groupId>org.springframework</groupId>
			<artifactId>spring-tx</artifactId>
			<version>${springversion}</version>
			<type>jar</type>
			<scope>compile</scope>
		</dependency>
		<dependency>
			<groupId>org.springframework</groupId>
			<artifactId>spring-web</artifactId>
			<version>${springversion}</version>
			<type>jar</type>
			<scope>compile</scope>
		</dependency>
		<dependency>
			<groupId>org.springframework</groupId>
			<artifactId>spring-webmvc</artifactId>
			<version>${springversion}</version>
			<type>jar</type>
			<scope>compile</scope>
		</dependency>
		<dependency>
			<groupId>org.springframework</groupId>
			<artifactId>spring-test</artifactId>
			<version>${springversion}</version>
			<type>jar</type>
			<scope>compile</scope>
		</dependency>

	</dependencies>


	<build>
		<finalName>test</finalName>
	</build>


</project>