了解了二者之间的区别于应用场景,对Nginx产生浓厚的兴趣,阅读张宴的<实战Nginx>(这个85年的小伙子年轻有为羡慕+妒忌),搞 明白了大致原理和配置,Ubuntu10.10,window下对Nginx+tomcat负载均衡做了配置尝试,将全部请求转发到tomcat,并未做 静态,动态分开,图片防盗链等配置。
Nginx 介绍
Nginx (发音同 engine x)是一款轻量级的Web 服务器/反向代理服务器及电子邮件(IMAP/POP3)代理服务器,并在一个BSD-like 协议下发行。 其特点是占有内存少,并发能力强,事实上nginx的并发能力确实在同类型的网页伺服器中表现较好.目前中国大陆使用nginx网站用户有:新浪、网易、 腾讯,另外知名的微网志Plurk也使用nginx。
上面的全是Nginx介绍基本上是废话,下面转入正题,图文结合展示基本配置,首先是window环境、其次是Ubuntu环境(Vbox虚拟)。本文主要基于Nginx下配置两台tomcat,结构如下图:
Window xp环境:Nginx+Tomcat6
1、下载地址
http://nginx.org/en/download.html ,这里我们推荐下载稳定版(stable versions),本文采用nginx-0.8.20。
2、目录结构
Nginx-
|_ conf 配置目录
|_ contrib
|_ docs 文档目录
|_ logs 日志目录
|_ temp 临时文件目录
|_ html 静态页面目录
|_ nginx.exe 主程序
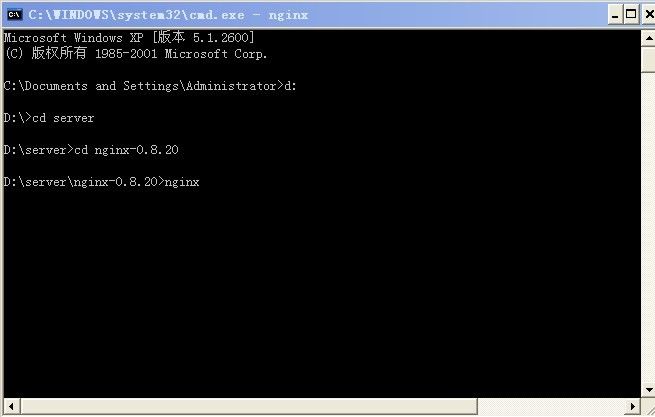
window下安装Nginx极其简单,解压缩到一个无空格的英文目录即可(个人习惯,担心中文出问题),双击nginx启动,这里我安装到:D:\server目录,下面涉及到的tomcat也安装在此目录。
DOS环境启动
若果想停止nginx,dos环境运行命令:nginx -s stop
3、nginx.conf配置
Nginx配置文件默认在conf目录,主要配置文件为nginx.conf,我们安装在D:\server\nginx-0.8.20、默认主配置文件 为D:\server\nginx-0.8.20\nginx.conf。下面是nginx作为前端反向代理服务器的配置。
#user niumd niumd;
#工作的子进程数量(通常等于CPU数量或者2倍于CPU)
worker_processes 2;
#错误日志存放路径
#error_log logs/error.log;
#error_log logs/error.log notice;
error_log logs/error.log info;
#指定pid存放文件
pid logs/nginx.pid;
events {
#使用网络IO模型linux建议epoll,FreeBSD建议采用kqueue,window下不指定。
#use epoll;
#允许最大连接数
worker_connections 2048;
}
http {
include mime.types;
default_type application/octet-stream;
#定义日志格式
#log_format main '$remote_addr - $remote_user [$time_local] $request '
# '"$status" $body_bytes_sent "$http_referer" '
# '"$http_user_agent" "$http_x_forwarded_for"';
#access_log off;
access_log logs/access.log;
client_header_timeout 3m;
client_body_timeout 3m;
send_timeout 3m;
client_header_buffer_size 1k;
large_client_header_buffers 4 4k;
sendfile on;
tcp_nopush on;
tcp_nodelay on;
#keepalive_timeout 75 20;
include gzip.conf;
upstream localhost {
#根据ip计算将请求分配各那个后端tomcat,许多人误认为可以解决session问题,其实并不能。
#同一机器在多网情况下,路由切换,ip可能不同
#ip_hash;
server localhost:18081;
server localhost:18080;
}
server {
listen 80;
server_name localhost;
location / {
proxy_connect_timeout 3;
proxy_send_timeout 30;
proxy_read_timeout 30;
proxy_pass http://localhost;
}
}
}
Proxy.conf代码:
proxy_set_header Host $host;
proxy_set_header X-Real-IP $remote_addr;
proxy_set_header X-Forwarded-For $proxy_add_x_forwarded_for;
client_max_body_size 10m;
client_body_buffer_size 128k;
proxy_connect_timeout 300;
proxy_send_timeout 300;
proxy_read_timeout 300;
proxy_buffer_size 4k;
proxy_buffers 4 32k;
proxy_busy_buffers_size 64k;
proxy_temp_file_write_size 64k;
gzip_min_length 1000;
gzip_types text/plain text/css application/x-javascript;
对于tomcat大家都很熟悉,只需要修改server.xml配置文件即可,这里我们以apache-tomcat-6.0.14为例,分别在 server目录,解压缩并命名为:apache-tomcat-6.0.14_1、apache-tomcat-6.0.14_2。
第一处端口修改:Xml代码
< Server port ="18006" shutdown ="SHUTDOWN" >
< Connector port ="18081" protocol ="HTTP/1.1"
connectionTimeout ="20000"
redirectPort ="8443" />
5、验证配置与测试负载均衡
首先测试nginx配置是否正确,测试命令:nginx -t (默认验证:conf\nginx.conf),也可以指定配置文件路径。
此例nginx安装目录:D:\server\nginx-0.8.20,dos环境下图画面成功示例:
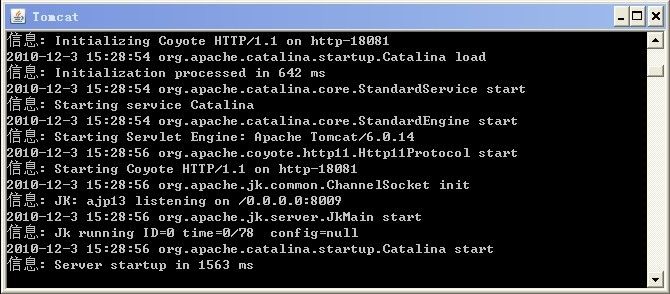
其次验证tomcat,启动两个tomcat,不出现端口冲突即为成功(tomcat依赖的java等搞“挨踢”的就废话不说了);
最后验证配置负载均衡设置,http://localhost/ 或http://localhost/index.jsp 。我修改了index.jsp页面,增加日志输出信息,便于观察。注意:左上角小猫头上的:access tomcat2、access tomcat1。说明访问了不同的tomcat。

至此window下nginx+tomcat负载均衡配置结束,关于tomcat Session的问题通常是采用memcached,或者采用nginx_upstream_jvm_route ,他是一个 Nginx 的扩展模块,用来实现基于 Cookie 的 Session Sticky 的功能。如果tomcat过多不建议session同步,server间相互同步session很耗资源,高并发环境容易引起Session风暴。请根据 自己应用情况合理采纳session解决方案。
======================================================================================================
Ubuntu10.10环境:Nginx+Tomcat6
我们下面简单说下ubuntu10.10下如何安装配置,主要以图片为主,简单解释。
1、下载Nginx
地址:http://nginx.org/en/download.html ,linux版本:nginx-0.8.20.tar.。解压缩命令:
tar -zxvf nginx-0.8.20.tar.gz
2、编译安装Nginx
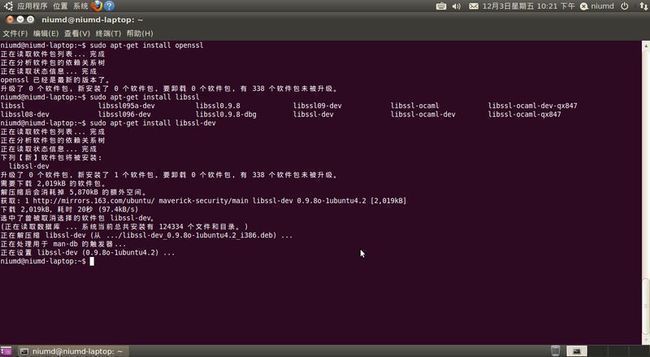
Nginx依赖一些其他PCRE、openssl(依赖libssl-dev),本人笔记本Ubuntu环境已经安装PCRE,仅需安装依赖的openssl,下面我们简单说下如何安装PCRE和openssl等
PCRE下载地址:ftp://ftp.csx.cam.ac.uk/pub/software/programming/pcre/
cd pcre- 8.01
sudo ./configure
sodu make
sodu make install
sudo apt-get install libssl-dev
//如缺少其他包,请采用此方法安装,ubuntu有依赖提示
cp /mnt/fileshare/nginx- 0.8.20 .tar.gz ./
#解压缩软件包
tar zxvf nginx- 0.8.20 .tar.gz
cd nginx- 0.8.20
//编译源码 , 默认使用nobody,指定本机已存在的用户,组,启用nginx-status功能,监控nginx状态。启动debug
sudo ./configure --user = niumd --group = niumd --with-debug --with-http_stub_status_module
sudo make
sudo make install
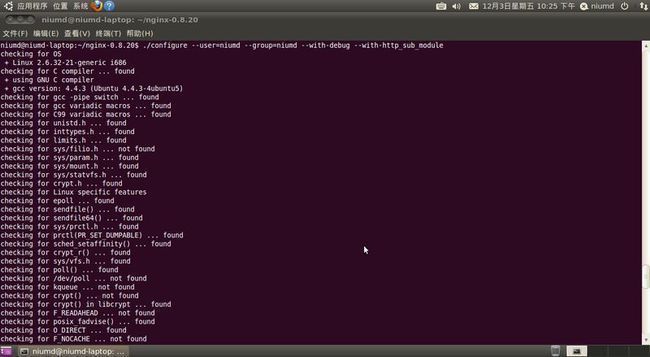
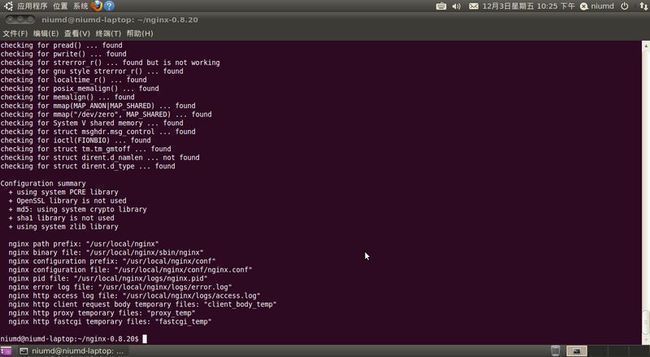
安装结果截图如下:
编译安装正确结束,按照上述window下方法检查默认配置,然后在默认配置下启动nginx,访问http://127.0.0.1 ,如下图说明成功
Nginx配置成功后我们对window下nginx.conf少做修改,如下:
user niumd niumd;
#工作的子进程数量(通常等于CPU数量或者2倍于CPU)
worker_processes 2;
#错误日志存放路径
#error_log logs/error.log;
#error_log logs/error.log notice;
error_log logs/error.log info;
#指定pid存放文件
pid logs/nginx.pid;
events {
#使用网络IO模型linux建议epoll,FreeBSD建议采用kqueue
use epoll;
#允许最大连接数
worker_connections 2048;
}
http {
include mime.types;
default_type application/octet-stream;
#定义日志格式
#log_format main '$remote_addr - $remote_user [$time_local] $request '
# '"$status" $body_bytes_sent "$http_referer" '
# '"$http_user_agent" "$http_x_forwarded_for"';
#access_log off;
access_log logs/access.log;
client_header_timeout 3m;
client_body_timeout 3m;
send_timeout 3m;
client_header_buffer_size 1k;
large_client_header_buffers 4 4k;
sendfile on;
tcp_nopush on;
tcp_nodelay on;
#keepalive_timeout 75 20;
include gzip.conf;
upstream localhost {
#ip_hash
#ip_hash;
server localhost:18081;
server localhost:18080;
}
server {
listen 80;
server_name localhost;
location / {
proxy_connect_timeout 3;
proxy_send_timeout 30;
proxy_read_timeout 30;
proxy_pass http://localhost;
}
}
}
3、配置tomcat
请参考window下配置,完全相同。
4、启动停止nginx
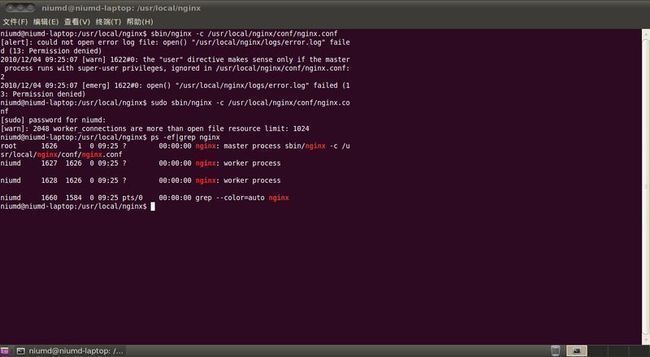
ubuntu下启动nginx与window稍有不同,大致启动停止方法如下。
sbin / nginx
或通过 - c 指定配置文件
sbin / nginx - c usr / local / nginx8 . 20 / conf / nginx / conf
/ usr / local / nginx
niumd @niumd - laptop :/ usr / local / nginx$ sudo sbin / nginx - t
the configuration file / usr / local / nginx / conf / nginx . conf syntax is ok
configuration file / usr / local / nginx / conf / nginx . conf test is successful
niumd @niumd - laptop :/ usr / local / nginx$ sudo sbin / nginx - v
nginx version : nginx / 0.8 . 20
niumd @niumd - laptop :/ usr / local / nginx$ sudo sbin / nginx - V
nginx version : nginx / 0.8 . 20
built by gcc 4.4 . 3 (Ubuntu 4.4 . 3 - 4ubuntu5)
configure arguments : -- user = niumd -- group = niumd -- with - debug -- with - http_sub_module
niumd @niumd - laptop :/ usr / local / nginx$ sudo sbin / nginx
niumd @niumd - laptop :/ usr / local / nginx$ ps - ef | grep nginx
root 5158 1 0 22 : 32 ? 00 : 00 : 00 nginx : master process sbin / nginx
niumd 5159 5158 0 22 : 32 ? 00 : 00 : 00 nginx : worker process
niumd 5161 1577 0 22 : 32 pts / 0 00 : 00 : 00 grep -- color = auto nginx
niumd @niumd - laptop :/ usr / local / nginx$
注意:在启动时linux提示一句警告【warn】……,是因为我们设置的 #允许最大连接数 worker_connections 2048,超过linux默认1024的限制。
停止:kill -信号类型 pid
nginx/logs目录下有个nginx。pid的文件,此文件记录了每次运行的pid,也可以通过ps命令查询。
信号类型如下:
信号控制
| 信号类型 | 描述 |
| RERM.INT | 快速关闭 |
| HUP | 平滑重启,加载配置 |
| USR1 | 重新加载日志 |
| USER2 | 平滑升级执行程序 |
| WINCH | 从容关闭工作进程 |
| QUIT | 从容关闭 |
参考资料:
http://www.oschina.net/bbs/thread/9301
oschina.net 生产配置,此网站采用java语言,nginx,tomcat服务器。
http://nginx.org/
张宴:<<实战Nginx>>

