七 手游开发神器 cocos2d-x editor 之图片字体(LabelBMFont)
我们平时玩游戏时候看到很多超炫的字体效果,大部分都是用了自定义图片, cocos2dx里面叫做LabelBMFont;
运行效果如下;
代码下载:http://share.weiyun.com/c3f24a752d5e6f26ca3e1e97855807f6 (snow-font)
首先在Resources目录下新建一个fonts目录存放字体
fonts目录成功后,右击,新建BMFont
命名后发现fonts目录下有了 score.fnt文件,把准备好的字体图片复制到fonts目录,然后把图片拖动到指定区域
接着一张一张的截取图片,对应好名称,完成后别忘记点击保存
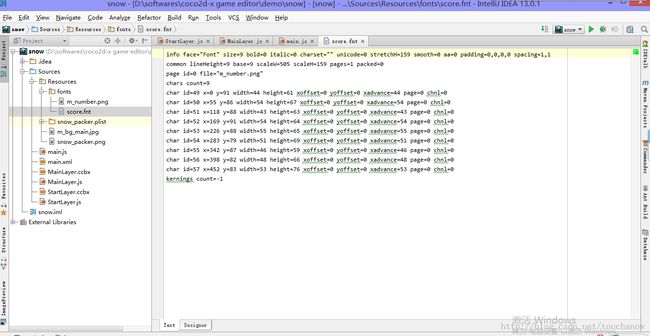
保存好了后查看Text可以看到已经对应好了,到这里图片字体创建成功
接下来我们要使用score.fnt,打开MainLayer.ccbx,先创建一个普通的LabelTTF,调节参数,命名“分数”;
然后创建一个LabelBMFont,指定src为score.fnf,设置text值,只能是score.fnt里面的名称,如果没有实时刷新,关闭后打开;
我们要实现分数随时间增加而变化的功能,打开MainLayer,js,修改代码如下:
//
// CleanerScoreScene class
//
var MainLayer = function () {
    cc.log("MainLayer")
    this.scoreLabel = this.scoreLabel || {};
    this.score = 123;
};

MainLayer.prototype.onDidLoadFromCCB = function () {
    if (sys.platform == 'browser') {
        this.onEnter();
    }
    else {
        this.rootNode.onEnter = function () {
            this.controller.onEnter();
        };
    }

    this.rootNode.schedule(function (dt) {
        this.controller.onUpdate(dt);
    });

    this.rootNode.onExit = function () {
        this.controller.onExit();
    };
};

MainLayer.prototype.onEnter = function () {
}

MainLayer.prototype.onUpdate = function (dt) {
    this.score += dt;
    this.scoreLabel.setString(Math.floor(this.score));
}

MainLayer.prototype.onExitClicked = function () {
    cc.log("onExitClicked");
}


MainLayer.prototype.onExit = function () {
    cc.log("onExit");
}
最后点击运行,分数不停的刷新变化
下一篇文章 我会介绍cocos2d-x editor的动画和帧动画 笔者(李元友)
资料来源:cocos2d-x editor


