斯坦福大学IOS开发课程笔记(第九课)
转载请注明出处
http://blog.csdn.net/pony_maggie/article/details/37939697
作者:小马
这节课主要是讲table view的用法,其实我前面有篇文章已经详细讲解了tableview的一些知识点,这节课就当复习吧。
在IOS里tableview有两种风格,一种叫plain,一种叫group,风格如上图所示。Iphone里的设置菜单就是很典型的一种group风格。
这里讲到的是tableview的各个组成元素,注意看上图,理解section,cell, header,footer这些概念。分不清楚这些概念的话你根本无法写程序,因为很多api就是用这些名字来体现它们的功能,下面会看到。
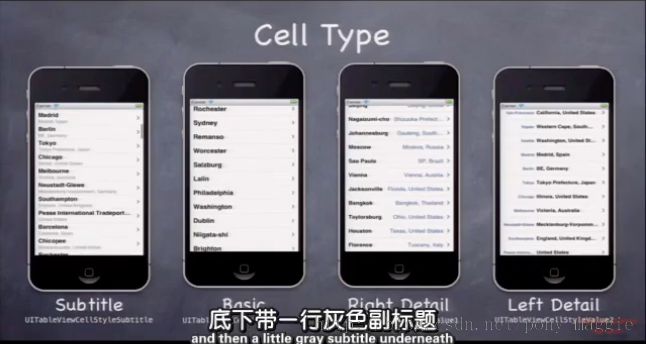
这张图是单独讲cell的类型,有subtitle,basic ,right detail, left detail四种,从效果图上也很容易辨别。在创建cell实例的时候可以指定上面的任何一种属性。
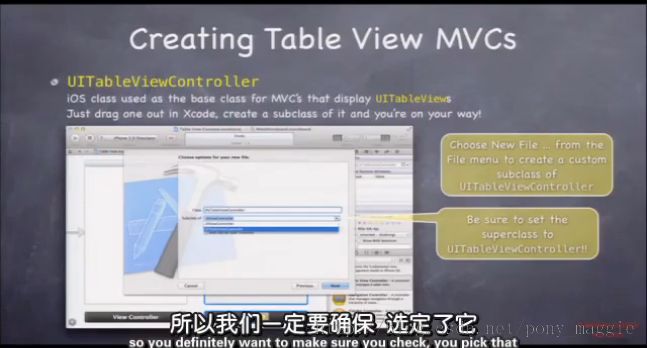
上图两张图其实是说明了在storyboard里如何创建tableview controller, 首先拖一个tableview controller的控件,然后新建一个类并关联,这样就可以实现各种操作了。
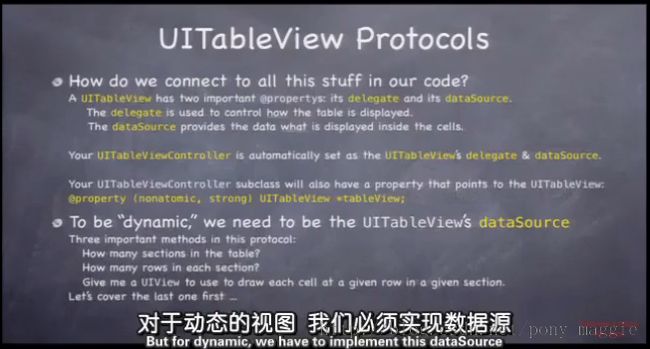
又是协议,代理,亘古不变的话题。Tableview要显示数据,数据从哪里来,dataSource,显示的动作谁来处理,delegate。 一般情况下tableview controller就是当前tableview的datasource和delegate,所以我们的controller肯定要实现这两个协议,像下面的代码这样:
@interface ViewController : UIViewController<UITableViewDelegate, UITableViewDataSource>
{
    UITableView * m_tableView;
    NSMutableArray *arrayList;
}
然后通过在xcode里拖拽,把controller本身设为它的属性tableview的datasource和delegate(听起来有点费劲)。这个步骤以前的博文有提到。通过实现协议里的一些方法,告诉tableview一些创建自己的信息,比如有多少个section,有多少个cell等。
这里就讲到了datasource协议里的一个方法,tableview可以通过这个方法获取到cell的实例显示出来。给一个代码示例:
- (UITableViewCell *)tableView:(UITableView *)tableView
         cellForRowAtIndexPath:(NSIndexPath *)indexPath
{
    static NSString *CellIdentifier = @"Cell";

    UITableViewCell *cell = [tableView dequeueReusableCellWithIdentifier:CellIdentifier];
    if (cell == nil)
    {
        cell = [[UITableViewCell alloc] initWithStyle:UITableViewCellStyleDefault reuseIdentifier:CellIdentifier];
    }

    NSLog(@"%d",[arrayList count]);

    if ([indexPath row] <= [arrayList count] - 1)
    {
        cell.textLabel.textColor  =[UIColor orangeColor];
        cell.textLabel.text = [arrayList objectAtIndex:indexPath.row];
    }
    else
    {
        cell.textLabel.textColor  =[UIColor blueColor];
        cell.textLabel.text = @"点击加载更多";
    }
    return cell;
}
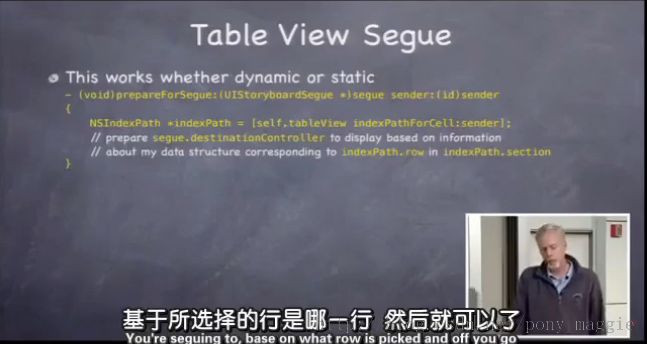
这个方法其实前面在segue知识点那篇讲过,它会在push到下一个view之前调用,通过实现这个方法可以做一些像数据传递之类的事情。


