六 手游开发神器 cocos2d-x editor 之场景切换
基础教程所有代码地址在:https://github.com/makeapp/cocoseditor-samples
接着上一节,我们已经创建了一个主游戏场景MainLayer,现在我们需要创建一个开始场景StartLayer,包括StartLayer.ccbx和StartLayer.js两个文件,点击StartLayer上的开始按钮,游戏切换到主游戏场景。
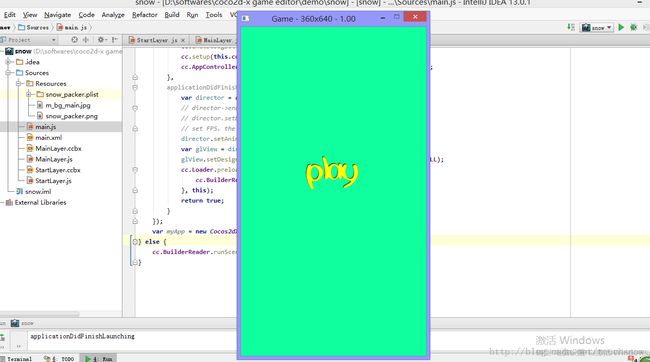
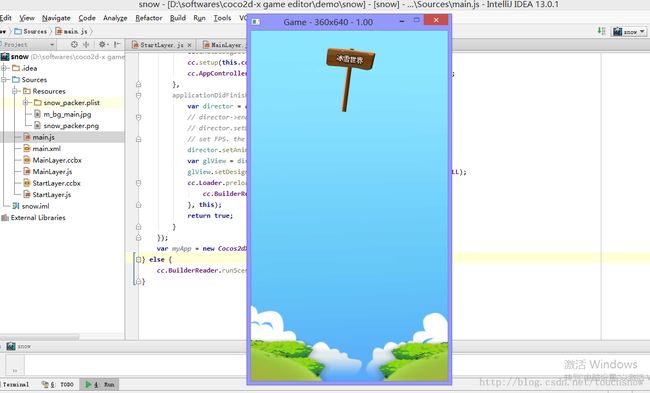
先看运行效果;
代码下载地址:http://www.kuaipan.cn/file/id_25348935635744469.htm?source=1
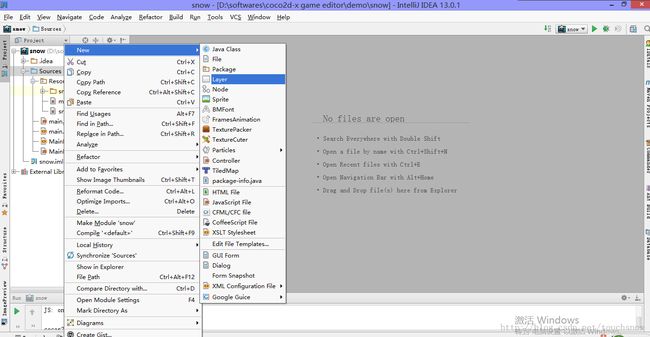
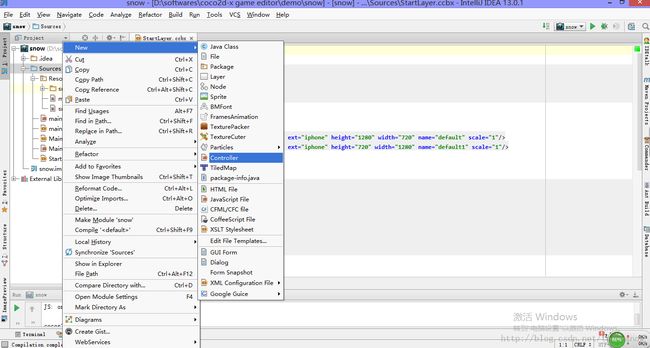
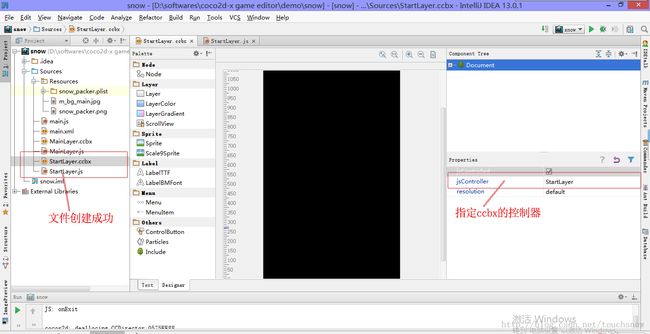
首先创建StartLayer.ccbx和StartLayer.js文件,如下图操作(sources右击----new---layer)(sources右击---new---controller)
创建成功后,指定控制器;
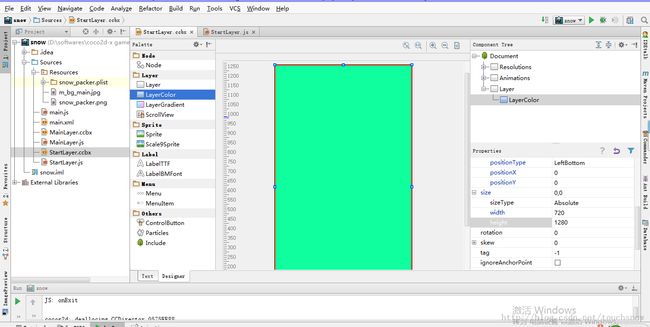
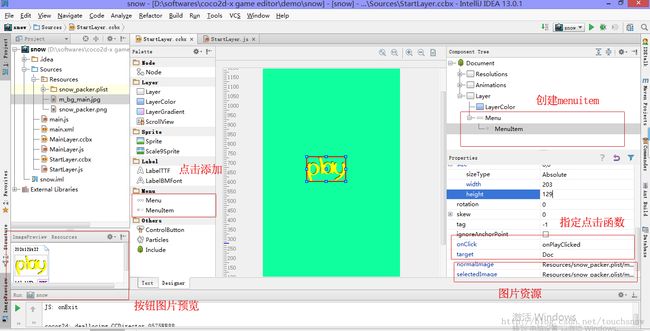
我们设计开始场景,一个颜色背景层,一个MenuItem按钮;
添加MenuItem时候主要把参数target=doc选上
场景设计完毕,我们开始编程StartLayer.js ,只需要加入一个函数onPlayClicked(),点击player后跳转到MainLayer.js;
//
// CleanerScoreScene class
//
var StartLayer = function () {
    cc.log("StartLayer")
};

StartLayer.prototype.onDidLoadFromCCB = function () {
//    this.rootNode.onUpdate = function (dt)
//    {
//        this.controller.onUpdate();
//    };
//    this.rootNode.schedule(this.rootNode.onUpdate);

    if (sys.platform == 'browser') {
        this.onEnter();
    }
    else {
        this.rootNode.onEnter = function () {
            this.controller.onEnter();
        };
    }

    this.rootNode.onExit = function () {
        this.controller.onExit();
    };
};

StartLayer.prototype.onEnter = function () {
}

StartLayer.prototype.onUpdate = function () {

}

StartLayer.prototype.onPlayClicked = function () {
    cc.BuilderReader.runScene("", "MainLayer");
}

StartLayer.prototype.onExit = function () {

}
然后再去设置Main.js,让主函数先启动StartLayer; 也别忘记加入这行代码require("StartLayer.js");
if (sys.platform == 'browser') {
    var require = function (file) {
        var d = document;
        var s = d.createElement('script');
        s.src = file;
        d.body.appendChild(s);
    }
} else {
    require("jsb.js");
}

cc.debug = function (msg) {
    cc.log(msg);
}

cc.BuilderReader.replaceScene = function (path, ccbName) {
    var scene = cc.BuilderReader.loadAsSceneFrom(path, ccbName);
    cc.Director.getInstance().replaceScene(scene);
    return scene;
}

cc.BuilderReader.loadAsScene = function (file, owner, parentSize) {
    var node = cc.BuilderReader.load(file, owner, parentSize);
    var scene = cc.Scene.create();
    scene.addChild(node);
    return scene;
};

cc.BuilderReader.loadAsSceneFrom = function (path, ccbName) {
    cc.BuilderReader.setResourcePath(path + "/");
    return cc.BuilderReader.loadAsScene(path + "/" + ccbName);
}

cc.BuilderReader.loadAsNodeFrom = function (path, ccbName, owner) {
    cc.BuilderReader.setResourcePath(path + "/");
    return cc.BuilderReader.load(path + "/" + ccbName, owner);
}

cc.BuilderReader.runScene = function (module, name) {
    var director = cc.Director.getInstance();
    var scene = cc.BuilderReader.loadAsSceneFrom(module, name);
    var runningScene = director.getRunningScene();
    if (runningScene === null) {
        cc.log("runWithScene");
        director.runWithScene(scene);
    }
    else {
        cc.log("replaceScene");
        director.replaceScene(scene);
    }
}

var ccb_resources = [
    {type: 'image', src: "Resources/HelloWorld.png"},
    {type: 'image', src: "Resources/CloseNormal.png"},
    {type: 'image', src: "Resources/CloseSelected.png"}
];

require("MainLayer.js");
require("StartLayer.js");

if (sys.platform == 'browser') {

    var Cocos2dXApplication = cc.Application.extend({
        config: document['ccConfig'],
        ctor: function () {
            this._super();
            cc.COCOS2D_DEBUG = this.config['COCOS2D_DEBUG'];
            cc.initDebugSetting();
            cc.setup(this.config['tag']);
            cc.AppController.shareAppController().didFinishLaunchingWithOptions();
        },
        applicationDidFinishLaunching: function () {
            var director = cc.Director.getInstance();
            // director->enableRetinaDisplay(true);
            // director.setDisplayStats(this.config['showFPS']);
            // set FPS. the default value is 1.0/60 if you don't call this
            director.setAnimationInterval(1.0 / this.config['frameRate']);
            var glView = director.getOpenGLView();
            glView.setDesignResolutionSize(1280, 720, cc.RESOLUTION_POLICY.SHOW_ALL);
            cc.Loader.preload(ccb_resources, function () {
                cc.BuilderReader.runScene("", "StartLayer");
            }, this);
            return true;
        }
    });
    var myApp = new Cocos2dXApplication();
} else {
    cc.BuilderReader.runScene("", "StartLayer");
}
一切都好了,点击运行;先进入开始界面,点击play跳入游戏主界面
下一篇文章 我会介绍cocos2d-x editor的字体设计 笔者(李元友)
资料来源:cocos2d-x editor
