Android学习之 Notification
Notification 是显示在手机状态栏的通知,Notification所代表的是一种具有全局效果的通知,通知一般通过 NotificationManager服务来发送Notification。
NotificationManager对象获得方法:
NotificationManager nm = (NotificationManager)getSystemService(NOTIFICATION_SERVICE);
在 Android 3.0版本增加了Notification.Builder类 <Added in API level 11>,因此在3.0之上的版本中我们可以通过Notification.Builder 类来创建Notification对象,如果是在3.0之下的版本中使用Notification.Builder 类 将会在编译中报错:E/AndroidRuntime(6443): java.lang.NoClassDefFoundError: android.app.Notification$Builder。
开发发送Notification的过程很简单、按如下步骤进行即可:
一、调用 getSystemService(NOTIFICATION_SERVICE); 方法获取系统的NotificationManager 服务对象。
二、通过构造器或Notification.Builder 类创建Notification对象。
三、为Notification设置各种属性(设置通知LED灯、音乐、振动、设置通知图标、设置通知标题、设置通知内容、设置状态栏提示文本等下属性)。
四、通过NotificationManager 对象发送Notification。
下面通过一个简单的demo来介绍Notification功能的开发。
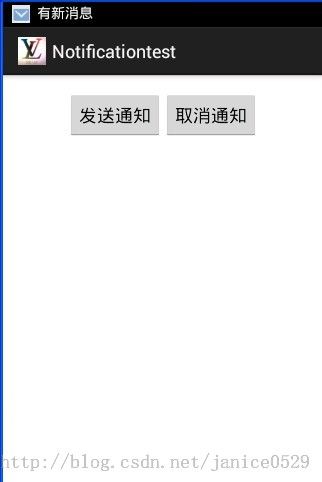
一、/Notificationtest/res/layout/main.xml 该布局只有两个按钮 发送通知按钮点击发送通知/ 取消通知按钮点击取消通知
<LinearLayout xmlns:android="http://schemas.android.com/apk/res/android"
    xmlns:tools="http://schemas.android.com/tools"
    android:id="@+id/LinearLayout1"
    android:layout_width="match_parent"
    android:layout_height="match_parent"
    android:paddingBottom="@dimen/activity_vertical_margin"
    android:paddingLeft="@dimen/activity_horizontal_margin"
    android:paddingRight="@dimen/activity_horizontal_margin"
    android:paddingTop="@dimen/activity_vertical_margin"
    android:gravity="center_horizontal"
    tools:context=".MainActivity" >

    <Button android:id="@+id/send"
        android:layout_width="wrap_content"
        android:layout_height="wrap_content"
        android:text="发送通知"/>

    <Button android:id="@+id/cancel"
        android:layout_width="wrap_content"
        android:layout_height="wrap_content"
        android:text="取消通知"/>

</LinearLayout>
二、/Notificationtest/src/com/ice/notification/MainActivity.java
package com.ice.notification;

import android.annotation.SuppressLint;
import android.app.Activity;
import android.app.Notification;
import android.app.NotificationManager;
import android.app.PendingIntent;
import android.content.Intent;
import android.os.Bundle;
import android.view.View;
import android.view.View.OnClickListener;
import android.widget.Button;

@SuppressLint("NewApi")
public class MainActivity extends Activity {

	// 定义通知服务对象
	private NotificationManager nm;
	private static final int NOTIFICATION_ID = 0x123;

	private Button send;
	private Button cancel;
	@Override
	protected void onCreate(Bundle savedInstanceState) {
		super.onCreate(savedInstanceState);
		setContentView(R.layout.main);
		// 获得系统的NotificationManager 服务
		nm = (NotificationManager)getSystemService(NOTIFICATION_SERVICE);
		send = (Button) findViewById(R.id.send);
		cancel = (Button)findViewById(R.id.cancel);

		send.setOnClickListener(new MyOnClickListener());
		cancel.setOnClickListener(new MyOnClickListener());
	}


	class MyOnClickListener implements OnClickListener{

		@Override
		public void onClick(View view) {
			switch (view.getId()) {
			case R.id.send:
				Intent intent = new Intent(MainActivity.this, OtherActivity.class);
				PendingIntent pi = PendingIntent.getActivity(MainActivity.this, 0, intent, 0);
				Notification notification = new Notification.Builder(MainActivity.this)
				// 设置打开该通知,该通知自动消失
				.setAutoCancel(true)
				// 设置显示在状态栏的通知提示信息
				.setTicker("有新消息")
				// 设置通知的图标
				.setSmallIcon(R.drawable.message_notification)
				// 设置通知内容的标题
				.setContentTitle("加薪通知")
				// 设置通知内容
				.setContentText("恭喜你,你加薪了,工资增加了20%")
				// 设置使用系统默认的声音、默认LED灯
				.setDefaults(Notification.DEFAULT_ALL)
				.setWhen(System.currentTimeMillis())
				// 设置 点击通知 将要启动程序的Intent
				.setContentIntent(pi)
				.build();

				// 发送通知
				nm.notify(NOTIFICATION_ID, notification);
				break;

			case R.id.cancel:
				nm.cancel(NOTIFICATION_ID);
				break;
			}
		}
	}
}
三、OtherActivity.java 就是当点击通知后,跳转到的那个Activity、(这里内容我就省略啦。。。)
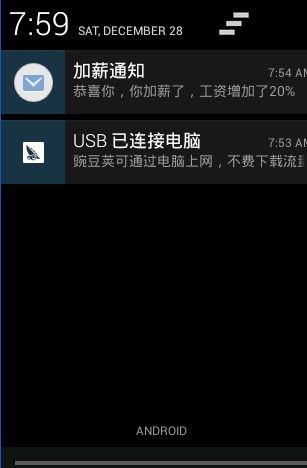
最后看下程序运行的效果:

