【SpringMVC整合MyBatis】springmvc上传图片
上传图片
1.需求
在修改商品页面,添加上传商品图片功能。
2.springmvc中对多部件类型解析
在页面form中提交enctype="multipart/form-data"的数据时,需要springmvc对multipart类型的数据进行解析。
在springmvc.xml中配置multipart类型解析器。
注:在电商企业开发的时候,是需要单独建立图片服务器的,这里我们仅仅在tomcat服务器的本工厂下使用一个文件夹来存放图片
3.加入上传图片的jar
上边的解析内部使用下边的jar进行图片上传。
commons-fileupload-1.2.2.jar
commons-io-2.4.jar
4.创建图片虚拟 目录 存储图片
通过图形界面配置:

也可以直接修改tomcat的配置:
在conf/server.xml文件,添加虚拟目录(注意是在最下方的Host标签对中添加):
测试:我们在F:\develop\upload\temp下放置一个名为yuanchuanggongzuoshi.png的图片,重启服务器后直接访问http://localhost:8080/pic/yuanchuanggongzuoshi.png路径就可以直接看到图片,所以我们的配置是成功的。(以后我们上传数据往物理路径F:\develop\upload\temp下去上传,查看图片往/pic下去查)
注意:在图片虚拟目录 中,一定将图片目录分级创建(提高i/o性能),一般我们采用按日期(年、月、日)进行分级创建。
5.上传图片代码
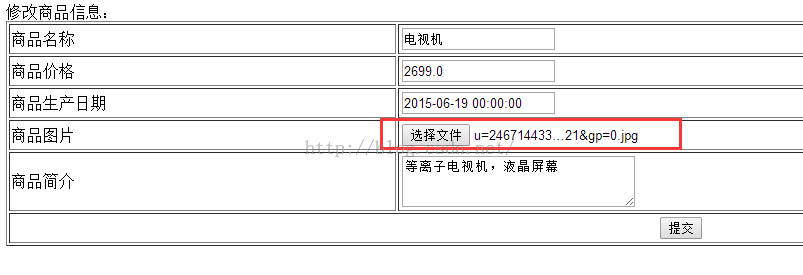
5.1页面
5.2controller方法
修改:商品修改controller方法:
测试:

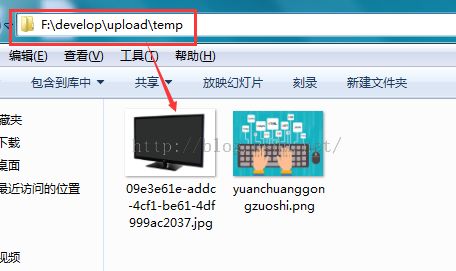
在硬盘中:

在数据库中:

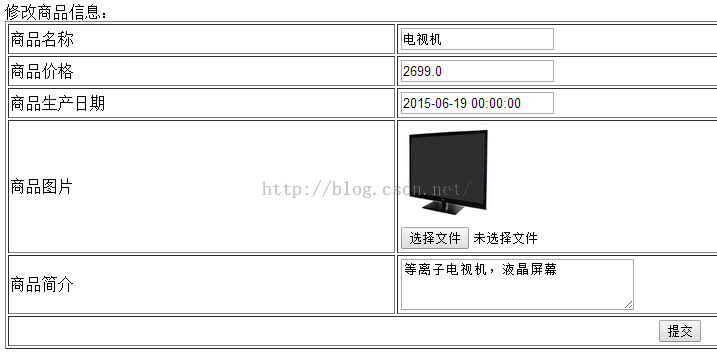
再次点击修改,就可以看到上次上传的图片了
1.需求
在修改商品页面,添加上传商品图片功能。
2.springmvc中对多部件类型解析
在页面form中提交enctype="multipart/form-data"的数据时,需要springmvc对multipart类型的数据进行解析。
在springmvc.xml中配置multipart类型解析器。
<!-- 文件上传 -->
<bean id="multipartResolver" class="org.springframework.web.multipart.commons.CommonsMultipartResolver">
	<!-- 设置上传文件的最大尺寸为5MB -->
	<property name="maxUploadSize">
		<value>5242880</value>
	</property>
</bean>
注:在电商企业开发的时候,是需要单独建立图片服务器的,这里我们仅仅在tomcat服务器的本工厂下使用一个文件夹来存放图片
3.加入上传图片的jar
上边的解析内部使用下边的jar进行图片上传。
commons-fileupload-1.2.2.jar
commons-io-2.4.jar
4.创建图片虚拟 目录 存储图片
通过图形界面配置:

也可以直接修改tomcat的配置:
在conf/server.xml文件,添加虚拟目录(注意是在最下方的Host标签对中添加):
<Context docBase="F:\develop\upload\temp" path="/pic" reloadable="false"/>
测试:我们在F:\develop\upload\temp下放置一个名为yuanchuanggongzuoshi.png的图片,重启服务器后直接访问http://localhost:8080/pic/yuanchuanggongzuoshi.png路径就可以直接看到图片,所以我们的配置是成功的。(以后我们上传数据往物理路径F:\develop\upload\temp下去上传,查看图片往/pic下去查)
注意:在图片虚拟目录 中,一定将图片目录分级创建(提高i/o性能),一般我们采用按日期(年、月、日)进行分级创建。
5.上传图片代码
5.1页面
<tr>
	<td>商品图片</td>
	<td>
		<c:if test="${items.pic !=null}">
			<img src="/pic/${items.pic}" width=100 height=100/>
			<br/>
		</c:if>
		<input type="file"  name="items_pic"/>
	</td>
</tr>
注意:"/pic"路径是绝对路径,不要加${pageContext.request.contextPath }/...
5.2controller方法
修改:商品修改controller方法:
//商品信息修改提交
//在需要校验的pojo前边加@Validated,在需要校验的pojo后边添加BindingResult bindingResult接收校验出错信息
//注意:@Validatedh和BindingResult bindingResult是配对出现,并且在形参中出现的顺序是固定的(一前一后)
//value={ValidGroup1.class}指定使用ValidGroup1分组的校验
//@ModelAttribute可以指定pojo回显到页面在request中的key
@RequestMapping("/editItemsSubmit")
public String editItemsSubmit(Model model,HttpServletRequest request,Integer id,@ModelAttribute("items") @Validated(value={ValidGroup1.class}) ItemsCustom itemsCustom,BindingResult bindingResult,MultipartFile items_pic/*接收商品图片*/ )throws Exception{

	//获取校验错误信息
	if(bindingResult.hasErrors()){
		//输出错误信息
		List<ObjectError> allErrors=bindingResult.getAllErrors();

		for(ObjectError objectError:allErrors){
			//输出错误信息
			System.out.println(objectError.getDefaultMessage());
		}

		//将错误传到页面
		model.addAttribute("allErrors",allErrors);

		//可以直接使用model将提交pojo回显到页面
		model.addAttribute("items",itemsCustom);

		//出错之后要跳转的页面
		return "items/editItems";
	}

	//上传的图片的原始名称
	String originalFilename=items_pic.getOriginalFilename();

	//上传图片
	if(items_pic!=null&&originalFilename=null&&originalFilename.length()>0){

		//存储图片的物理路径
		String pic_path="F:\\develop\\upload\\temp\\";

		//新的图片名称
		String newFileName=UUID.randomUUID()+originalFilename.substring(originalFilename.lastIndexOf("."));

		File newFile=new File(pic_path+newFileName);

		//将内存中的数据写入磁盘
		items_pic.transferTo(newFile);

		//将新的图片名称写到itemsCustom中
		itemsCustom.setPic(newFileName);
	}

	//调用service更新商品信息,页面需要将商品信息传到此方法
	itemsService.updateItems(id, itemsCustom);

	//重定向到商品的查询列表
	return "redirect:queryItems.action";

}
测试:

在硬盘中:

在数据库中:

再次点击修改,就可以看到上次上传的图片了
转载请注明出处:http://blog.csdn.net/acmman/article/details/47656831
