操作系统实验一(内核编译,系统调用)
操作系统实验一
——-系统调用
注: 实验前的准备工作就不一一叙述了。
Ubuntu运行环境:mac osx10.9.1 +VMware Fusion 6.0.2
Ubuntu 版本: 12.10 64位
具体实验流程如下:
1.安装有关编译程序。(这是第二次重装虚拟机时候加入的步骤, 不然在make步骤中会报错,要事先安装好有关编译程序)
sudo apt-getinstall build-essential kernel-package libncurses5-dev
2.下载需要编译的内核源码文件。(直接在终端上下载。找到适合对应版本Ubuntu的内核源码)
sudo apt-getinstall linux-source
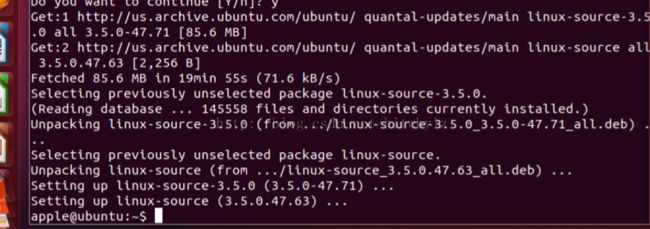
安装界面如下:
(图一:提示安装内核源码)
(图二:内核源码安装完成)
3。进入 /usr/src,解压源码文件
cd /usr/src
sudo tar jxvf/usr/src/linux-source-3.5.0/linux-source-3.5.0.tar.bz2
(图三:解压源码文件成功)
4。进入解压出的文件目录
cd/usr/src/linux-source-3.5.0/kernel
5. 安装vim
sudo apt-getinstall vim
注:ubuntu默认没有安装vim,出现:
jyg@ubuntu:~$vim test.c
The program 'vim' can be found in thefollowing packages:
* vim
* vim-gnome
* vim-tiny
* vim-athena
* vim-gtk * vim-nox
Try: sudo apt-get install <selectedpackage>
6.打开sys.c 加入函数
vim sys.c(在vim中, i进入编辑, esc退出编辑状态. G跳到末尾, gg进入开头。 :wq保存退出, :q不保存退出)
在开头加入头文件:
#include<linux/linkag.h>
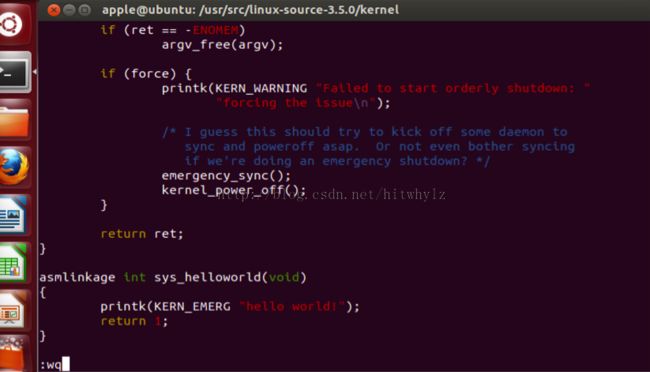
在末尾加入函数
asmlinkage intsys_helloworld(void){
printk(KERN_EMERG “hello world!”);
return 1;
}
(图四:在sys.c中加入函数)
7.添加声明
a、进入/usr/src/linux-source-3.5.0/arch/x86/include/asm/目录
cd/usr/src/linux-source-3.5.0/arch/x86/include/asm/
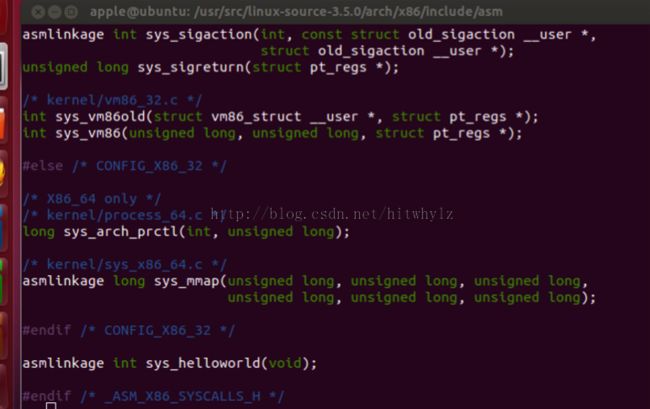
b、用vim打开文件syscalls.h进行编辑,加入我们的声明
(倒数第二行后插入asmlinkage int sys_helloworld(void);)
8.加一个系统调用的id
a、进入/usr/src/linux-source-3.5.0/arch/x86/syscalls目录
b、打开文件syscall_32.tbl(该文件有一个系统调用列表,最前面的属性是id)
c、可以发现222是没有使用的系统调用,所以我们可以插入系统调用(222 i386 helloworld sys_helloworld)
d、使用:wq命令保存退出
(图六: 加入系统调用ID)
9.编译
A。进入/usr/src/linux-xxx/目录下
cd /usr/src/linux-source-3.5.0
B。make prproper
删除以前进行过的内核功能选择文件
C。 make menuconfig 并且在makemenuconfig时,将那个General setup内的local version修改成新的名称,比如我这里的myKernel
D。 vim/usr/src/linux-source-3.5.0/.config
修改CONFIG_RTS5139=n in .config file in the source code directory.
E。 make bzImage (编译内核)
F。 make modules (编译模块)
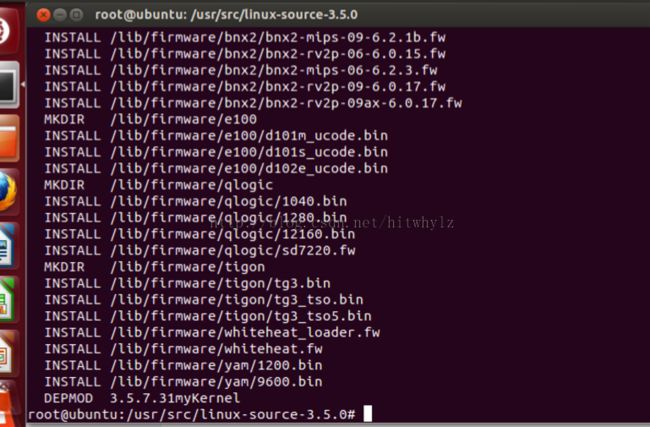
G。 makemodules_install (安装模块到正确目录)
这个过程错误总结:
输入sudo make bzImage报错后。
apple@ubuntu:/usr/src/linux-source-3.5.0$sudo make bzImage
HOSTLD scripts/kconfig/conf
scripts/kconfig/conf --silentoldconfigKconfig
***
*** Configuration file ".config"not found!
***
*** Please run some configurator (e.g."make oldconfig" or
*** "make menuconfig" or"make xconfig").
***
make[2]: *** [silentoldconfig] Error 1
make[1]: *** [silentoldconfig] Error 2
make[1]: Nothing to be done for `all'.
make[1]: Nothing to be done for `relocs'.
make: *** No rule to make target`include/config/auto.conf', needed by `include/config/kernel.release'. Stop.
解决方法:先make menuconfig, 并设置对应64位的配置。
安装后继续输入sudo make menuconfig
#
# using defaults found in/boot/config-3.5.0-17-generic
#
Your display is too small to runMenuconfig!
It must be at least 19 lines by 80 columns.
make[1]: *** [menuconfig] Error 1
make: *** [menuconfig] Error 2
解决方法:窗口最大化
之后继续make modules。
make modules的时候碰到了错误
ERROR: "__modver_version_show" [drivers/staging/rts5139/rts5139.ko] undefined!
make[1]: *** [__modpost] Error 1
make: *** [modules] Error 2
(修改/usr/src/linux-headers-3.2.0-24-generic-pae/.config文件,找到STAGING项,将其值改为n)
CONFIG_RTS5139=m
修改CONFIG_RTS5139=n in .config file in the source code directory.
(图七:make menuconfig成功)
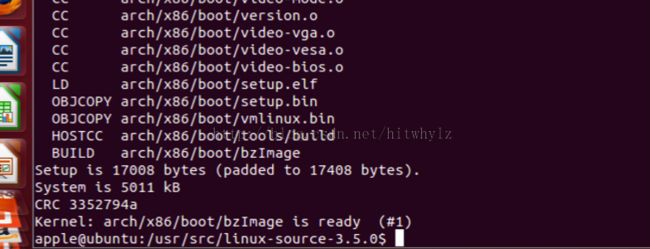
(图八:make bzImage成功)
(图九: make modules成功)
10.建立要载入ramdisk的映像文件(因为是虚拟硬盘,所以需要这一步)
mkinitramfs -o/boot/initrd.img-3.5.0-17-generic
11.拷贝原始内核,避免内核编译出错导致无法开机
sudo cp /usr/src/linux-source-3.5.0/arch/x86/boot/bzImage/boot/vmlinuz-3.5.0-17-generic
12.完成编译
sudo cp/usr/src/linux-source-3.5.0/.config /boot/config-3.5.0-17-generic
13.修改开机启动项
A。vim/etc/default/grub
B。将GRUD_HIDDEN_TIMEOUT改为一个大于0的数
C。更新一下开机启动项
sudo update-grub
(图十:将GRUD_HIDDEN_TIMEOUT改为一个大于0的数)
14.reboot。进入自己的内核。
这里遇到了一个问题, Ubuntu无法进入图形界面,停留在initramfs。但是我尝试uname –a显示内核信息。发现是进入了自己编译好的内核(myKernel)中。
如下所示。
(图十一:initramfs下显示内核信息)
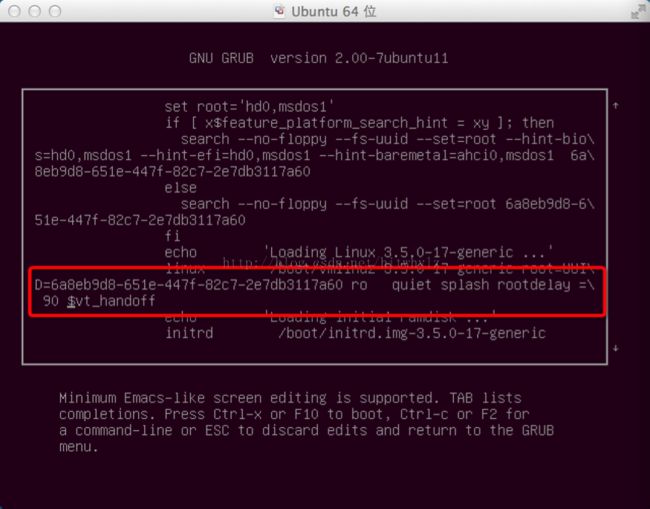
后百度了一下,发现了解决方法。在grub引导中,设置rootdelay。正常进入图形界面。
(图十二: grub设置rootdelay=90)
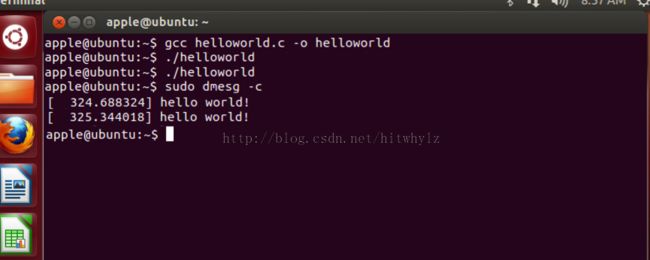
15. 利用helloworld.c进行测试
gcc helloworld.c–o helloworld
./helloworld
sudo dmesg -c
( 图十三: 利用helloworld.c进行测试)

