Android GCM使用
作者:阿米达
--------------------转载请注明:http://blog.csdn.net/liaoqianchuan00/article/details/8260107
1. 创建一个Google API 项目
1. 打开Goolge APIs Console 页面
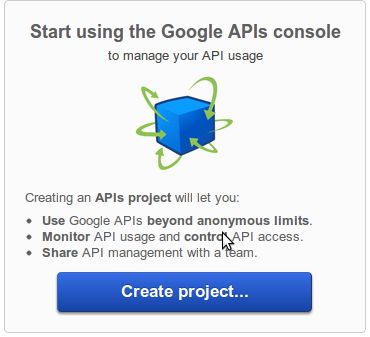
2. 如果你还没有创建过API 项目,将会看到如下页面:
3. 点创建项目,你的浏览器地址将会变成类似下面这样:
https://code.google.com/apis/console/#project:4815162342
4. 即如#project后面的数字。这就是你的项目号,这个数字后面会当做GMsender ID使用。
2. 打开GCM服务
1. 在Google APIs Console页面,选择Services。
2. 打开Google Cloud Messaging。
3. 在服务条款页面,选择接受条款。
3. 获取一个API key
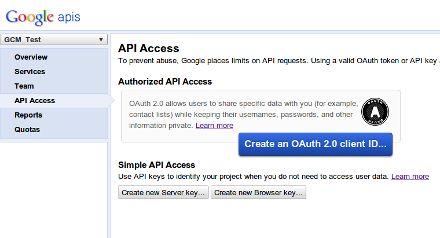
1. 在Google APIs Console的主页面,选择APIAccess。你会看到类似下面的页面:
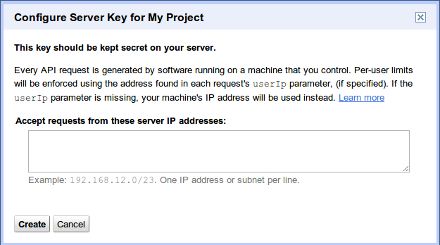
2. 点击Create new Server key。
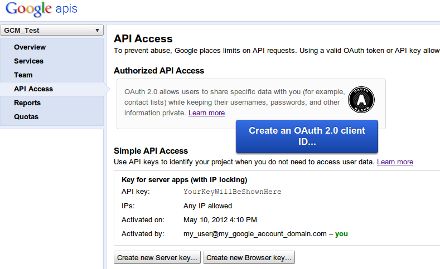
3. 点击Create
记住生成的API key,这会在以后使用到。
4. 安装GCM 库
打开SDK Manager,安装 Extras > Google Cloud Messaging forAndroid Library。它会创建一个YOUR_SDK_ROOT/extras/google/ 文件夹。
5. 编写Android 程序
1. 从 gcm-client/dist中拷贝gcm.jar到你的项目下面。
2. 在android manifest中作如下改变
1. GCM需要至少Android SDK2.2.
<uses-sdk android:minSdkVersion="8" android:targetSdkVersion="xx"/>
2. 声明一个自定义permission:
<permission android:name="my_app_package.permission.C2D_MESSAGE" android:protectionLevel="signature" /><uses-permission android:name="my_app_package.permission.C2D_MESSAGE" />3. 加入下面的权限:
<!-- App receives GCM messages. --><uses-permission android:name="com.google.android.c2dm.permission.RECEIVE" /><!-- GCM connects to Google Services. --><uses-permission android:name="android.permission.INTERNET" /><!-- GCM requires a Google account. --><uses-permission android:name="android.permission.GET_ACCOUNTS" /><!-- Keeps the processor from sleeping when a message is received. --><uses-permission android:name="android.permission.WAKE_LOCK" />4. 添加一个广播消息接收器
<receiver android:name="com.google.android.gcm.GCMBroadcastReceiver" android:permission="com.google.android.c2dm.permission.SEND" ><intent-filter><action android:name="com.google.android.c2dm.intent.RECEIVE" /><action android:name="com.google.android.c2dm.intent.REGISTRATION" /><category android:name="my_app_package" /></intent-filter></receiver>可以接收com.google.android.c2dm.intent.RECEIVE 和com.google.android.c2dm.intent.REGISTRATION
5. 添加一个service:
<service android:name=".GCMIntentService" />这个service会被GCMBroadcastReceiver调用。而且这个service必须继承自GCMBaseIntentService。主要在这个service中将注册成功的ID发送给我们自己的服务器保存呢,然后我们的服务器才可以根据这些ID向Google的服务器发送消息。
编写GCMIntentService类:
重写以下几个方法:
- OnRegistered:注册GCM成功后会返回一个ID,你需要把这个ID发送到自己的服务器保存,这样我们的服务器才能向指定的设备发送push消息。
- onUnregistered:当从GCM注销之后,你需要在自己的服务器上也注销这个设备。
- onMessage:当你的服务器向GCM发送消息,GCM把消息转发给指定设备的时候被调用。
- onError:当设备注册和注销发生错误的时候被调用。
- onRecoverableError:当设备注册和注销的时候,GCM服务器不可用,这个时候会被调用到。
6. 编写主Activity
在onCreate中添加下面的的代码:
GCMRegistrar.checkDevice(this);GCMRegistrar.checkManifest(this);final String regId = GCMRegistrar.getRegistrationId(this);if (regId.equals("")) {GCMRegistrar.register(this, SENDER_ID);} else {Log.v(TAG, "Already registered");}首先调用getRegistrationId查看设备是否已经注册,如果没有就注册一次。
7. 测试:
在chrome中安装ChromePoster
打开poster,填入地址信息:
https://android.googleapis.com/gcm/send.
添加头信息:
· Authorization: key=YOUR_API_KEY
· Content-Type: application/json for JSON; application/x-www-form-urlencoded;charset=UTF-8for plain text.
内容如下:
{ "data": {"score": "5x1","time": "15:10"},"registration_ids": ["4", "8", "15", "16", "23", "42"]}
参考自: http://developer.android.com/google/gcm/gs.html
http://developer.android.com/google/gcm/gcm.html


