Linux安装ArcGIS Server Java
预前说明
该安装是第一次在Linux操作系统安装AGS,希望把相关遇到的问题和解决方案以及我所能在安装过程中学到的相关知识与大家分享。
系统配置
该安装主要是在虚拟机进行的
虚拟机配置
操作系统:Cent OS 5.5 主机名:ags IP:192.168.198.130
GIS软件:ArcGIS Server Java
本机配置
Putty:本机操作Linux系统
Xming:显示可视化界面
系统预置
在安装之前,请务必检查操作系统是否安装了以下依赖包,如果你不走这一步,你会非常郁闷的!
还有一个必须记住:关闭防火墙!
相关系统需求: http://resources.arcgis.com/zh-cn/content/arcgisserver/10.0/arcgis-server-server-requirements查看是否安装命令:rpm –q 依赖包名称
如果没有安装,在Cent OS 可以直接利用yum install 依赖包名称安装(Root用户下),在RedHat系列应该是要下载安装的
开始安装
创建用户
useradd –d /home/ags -G oinstall,dba –m ags
passwd ags
New Password: ags
Re-enter new Password: ags
用户可以利用相关软件例如SSH将AGS安装程序拷贝到Linux操作系统上。
安装必须在Root用户下安装。
动态安装
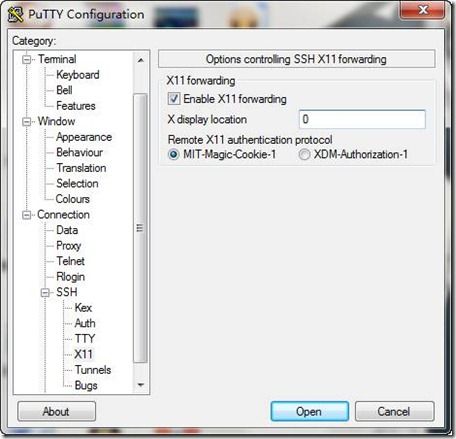
动态安装也就是界面化的安装,我们需要将Putty与Xming进行连接
在安装过程中出现如上图所示,我们需要设置DISPLAY环境变量
Export DISPLAY=本机的IP:0.0
然后重新进行安装,我们就可以看到界面化的安装界面了。基本上的安装都可以默认下一步,其中我们本次安装将实施完全安装(SOM和SOC安装在同一台机器上),将几个需要填写的界面给大家做以介绍:
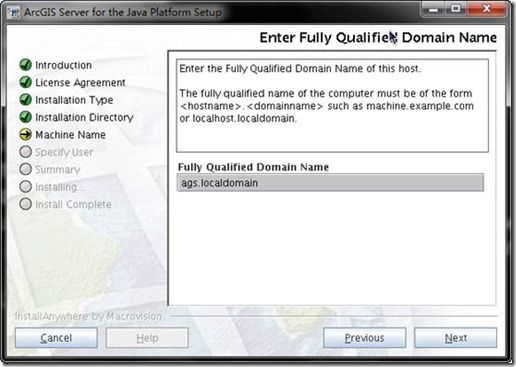
填写:主机名.域名
该填写的内容应该与root用户下的/etc/hosts对应
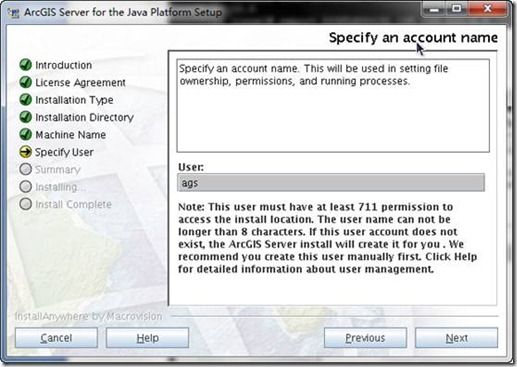
填写用户名称,也就是刚刚创建的用户名称ags
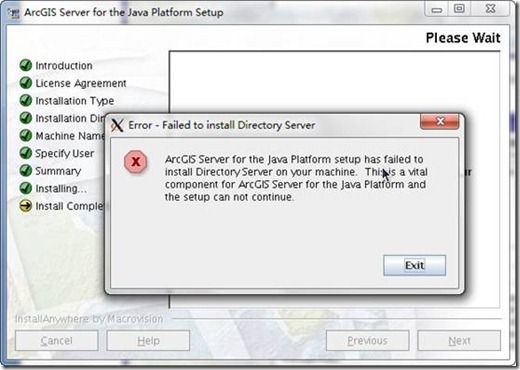
接着就等待时间,进行安装了,如果安装过程中出现以下界面,说明你并没有进行操作系统依赖包的检查和安装,恭喜你,你非要给自己的信心讨个说法,重新安装吧
静态安装
静态安装也就是在无界面的条件下修改相关的配置文件信息,直接运行。
相关的配置文件如下:
我们需要修改下列文件:
InstallServerSilently.sh

#!/bin/sh
# Script to launch the ArcGIS Server Java installer
# This should be changed to where your CD is mounted.
//修改一下 安装介质的路径
CD_ROOT=/opt/ags/linux; export CD_ROOT
product=ArcGISServer
if [ $# -eq 0 ]
then
echo " "
echo "Usage: $0 /path/to/properties/file" 1>&2
echo " "
exit 1
fi
……
SampleSilentServer.properties

# All properties must have a valid v:qalue.
# *** Install Values ***
# Valid path must start with a "/" and cannot contain capital letters
# Entire path must have at least 711 permissions for SRV_USER
//用户将软件安装到某个路径
USER_INSTALL_DIR=/opt/arcgis/server9
# Must be a comma seperated list.
# Valid features: SOM, SOC, PythonSrvr, SrvJADF
# Descriptions:
# SOM - The Server Object Manager (SOM) is a service running on a single machine. SOM manages server objects that are distributed across one or more SOC machines.
# SOC - The Server Object Container (SOC) can be installed in one or more machines. The SOC hosts the GIS services that are managed by the SOM.
# PythonSrvr - This feature will install Python required for some Geoprocessing tools.
# SrvJADF - The application developer framework facilitates the development of ArcGIS Server applications. It includes web controls, EJB, samples and documentation.
//选择安装组件
FEATURE_LIST=SOM, SOC, PythonSrvr, SrvJADF
# The Fully Qualified Domain Name of the computer ArcGISServer is being
# installed on. Example: machine.example.com
Z_FQDN_USER=ags.localdomain
# If this is a SOC-only install, the FQDN of the SOM machine.
# Otherwise, the FQDN of the machine you are installing on now.
//SOM机器名
SOM_MACHINE=ags.localdomain
# Existing user who will run ArcGISServer. New users are not supported
# at this time.
//SOC用户
SRV_USER=ags
# Authorization file provided by ESRI
//授权文件路径
Z_AUTH_FILE=/opt/ags/93.ecp
# *** Uninstall Values ***
# To uninstall without any user prompts use the -s flag: 'arcgis/scripts/uninstallArcGISServer -s'
# Do you wish to backup configuration files and applications created by this ArcGIS Server instance?
# Valid values are Y or N
UNINST_BACKUP=Y
# Where the files will be backed up to. A log file will be created at /tmp/ags_backup.log.
# The directory will be created if it does not currently exist.
# Please ensure the directory has correct permissions to be written to.
UNINST_BACKUP_DIR=/tmp/arcgis_server_backup
进行静态安装
[root@ags silent]# ./InstallServerSilently.sh SampleSilentServer.properties
Installing ArcGIS Server to /opt/arcgis/server9...
Preparing to install...
Extracting the JRE from the installer archive...
Unpacking the JRE...
Extracting the installation resources from the installer archive...
Configuring the installer for this system's environment...
Launching installer...
Preparing SILENT Mode Installation...
======================================================
ArcGIS Server for the Java Platform Setup(created with InstallAnywhere by Macrovision)
--------------------------------------------------------------------------------------
===============================================================================
Installing...
-------------
[==================|==================|=================]
[------------------|------------------|------------------|------------------]
Installation Complete.
Silent Install finished. Please check /tmp/ArcGISServerSilent.log to see if
the install was successful and for any additional messages from the install.
If the install was successful, you can begin using ArcGIS Server right away.
If an error occurred, the log file will contain a message about the reason why.
If the arcgis directory was created, please run the uninstallArcGISServer
script located in arcgis/scripts/ before you run the setup again.
To manage ArcGIS Server go to http://ags:8099 in your web browser.
配置文件说明
在安装目录里面的scripts里面的文件,有许多文件需要大家掌握。
启动停止服务
重新Post
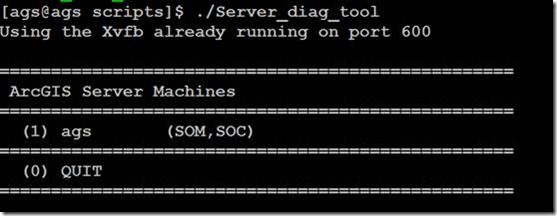
检查AGS安装
重新注册
查看lic
![]()
卸载AGS软件
相关测试
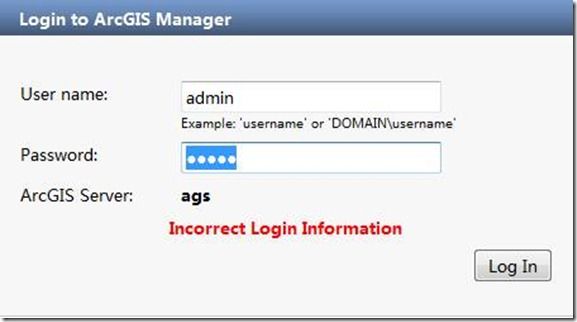
我在先前安装没有任何问题,但是走到该步死活进不去,高手建议“如果安装都没有问题,但是发布服务测试有问题而且找不到解决方案,那么建议卸载重装吧”,难道是RP问题,卸载重装,果然搞定了。
分布式安装SOM和SOC
预前说明
安装之前,请参考上面所要求的相关说明,在分布式安装SOM和SOC时,一定一定一定要注意,SOM和SOC的用户名、用户所在组、用户ID、用户密码必须完全相同。
文件共享
如果是分布式安装,SOC和SOM需要配置共享目录,那么介绍一下Linux下NFS(网络文件系统)的建立与配置方法
Linux 服务器端NFS服务器的配置
以root身份登陆Linux服务器,编辑/etc目录下的共享目录配置文件exports,指定共享目录及权限等。
执行如下命令编辑文件/etc/exports:
# vi /etc/exports
在该文件里添加如下内容:
/home/work 192.168.0.*(rw,sync,no_root_squash)
然后保存退出。
添加的内容表示:允许ip地址范围在192.168.0.*的计算机以读写的权限来访问/home/work目录。
/home/work也称为服务器输出共享目录。
括号内的参数意义描述如下:
rw:读/写权限,只读权限的参数为ro;
sync:数据同步写入内存和硬盘,也可以使用async,此时数据会先暂存于内存中,而不立即写入硬盘。
no_root_squash:NFS服务器共享目录用户的属性,如果用户是root,那么对于这个共享目录来说就具有root的权限。
接着执行如下命令,启动端口映射:
# /etc/rc.d/init.d/portmap start
最后执行如下命令启动NFS服务,此时NFS会激活守护进程,然后就开始监听Client端的请求:
# /etc/rc.d/init.d/nfs start
用户也可以重新启动Linux服务器,自动启动NFS服务。
在NFS服务器启动后,还需要检查Linux服务器的防火墙等设置(一般需要关闭防火墙服务),确保没有屏蔽掉NFS使用的端口和允许通信的主机,主要是 检查Linux服务器iptables,ipchains等选项的设置,以及/etc/hosts.deny,/etc/hosts.allow文件。
我们首先在Linux服务器上进行NFS服务器的回环测试,验证共享目录是否能够被访问。在Linux服务器上运行如下命令:
# mount–t nfs 192.168.0.20:/home/work /mnt
# ls /mnt
命令将Linux服务器的NFS输出共享目录挂载到/mnt目录下,因此,如果NFS正常工作,应该能够在/mnt目录看到/home/work共享目录中的内容。
共享一台机器目录(IP:192.168.198.131)
在另外一台机器验证是否共享成功(IP:192.168.198.130)
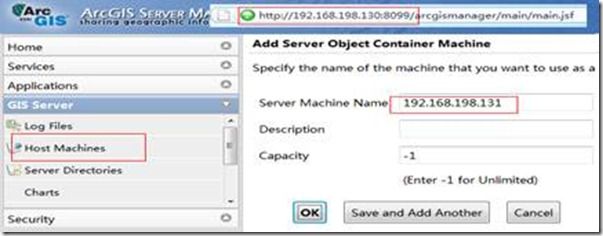
添加SOC
说明
该文档为作者在学习ArcGIS的一些笔记(自己学习、ArcGIS帮助、网络资源、高手请教相结合),难免有一些表达不全面或者理解有出入的,还请各位多多指教!
注意:
1:创建ArcGIS Server用户
2:使用这个用户创建ArcGIS Server目录文件夹,保证有775权限
3:注意/etc/hosts尽量不要出现localhost,最主要的机器名,域名等
# Do not remove the following line, or various programs
# that require network functionality will fail.
127.0.0.1               localhost
#::1            localhost6.localdomain6 localhost6
192.168.100.203     RedHat RedHat.arcgis.com
192.168.100.204     RedHatA RedHatA.arcgis.com
4:安装完毕后使用admin用户进入,对Server用户赋予agsadmin权限

