伪分布式hadoop环境搭建
官网上的教程版本不符,还过于简单(很多必要的步骤没提到),
所以自行网上找教程.
在这里整理一下:
假设java_home已经配置完成,ssh也可连通
1.修改配置文件
以下文件均在 %HADOOP_HOME%/conf/ 下
core-site.xml: Hadoop Core的配置项,例如HDFS和MapReduce常用的I/O设置等。
hdfs-site.xml: Hadoop 守护进程的配置项,包括namenode,辅助namenode和datanode等。
mapred-site.xml: MapReduce 守护进程的配置项,包括jobtracker和tasktracker。
预先建立好文件目录:
~/hadoop$ mkdir tmp
~/hadoop$ mkdir hdfs
~/hadoop$ mkdir hdfs/name
~/hadoop$ mkdir hdfs/data
配置内容:
core-site.xml
<?xml version="1.0"?>
<?xml-stylesheet type="text/xsl" href="configuration.xsl"?>

<!-- Put site-specific property overrides in this file. -->

<configuration>
        <property>
                <name>fs.default.name</name>
                <value>hdfs://localhost:9000</value>
        </property>
        <property>
                <name>hadoop.tmp.dir</name>
                <value>/usr/hadoop/hadoop-1.2.1/tmp</value>
        </property>

</configuration>
<?xml version="1.0"?>
<?xml-stylesheet type="text/xsl" href="configuration.xsl"?>

<!-- Put site-specific property overrides in this file. -->

<configuration>
        <property>
                <name>dfs.replication</name>
                <value>1</value>
        </property>
        <property>
                <name>dfs.name.dir</name>
                <value>/usr/hadoop/hadoop-1.2.1/hdfs/name</value>
        </property>
        <property>
                <name>dfs.data.dir</name>
                <value>/usr/hadoop/hadoop-1.2.1/hdfs/data</value>
        </property>
</configuration>
<?xml version="1.0"?>
<?xml-stylesheet type="text/xsl" href="configuration.xsl"?>

<!-- Put site-specific property overrides in this file. -->

<configuration>
        <property>
                <name>mapred.job.tracker</name>
                <value>localhost:9001</value>
        </property>

</configuration>
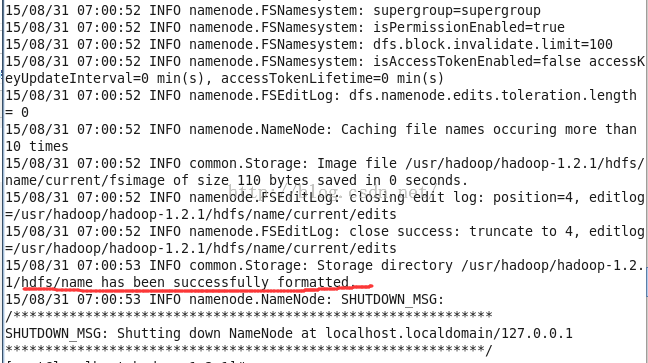
2.格式化
[root@localhost hadoop-1.2.1]# bin/hadoop namenode -format
3.开启
[root@localhost hadoop-1.2.1]# bin/start-all.sh
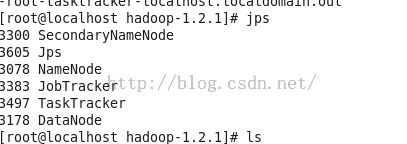
测试:
jps
使用web浏览器查看:
http://localhost:50030/ - Hadoop 管理介面
http://localhost:50060/ - Hadoop Task Tracker 状态
http://localhost:50070/ - Hadoop DFS 状态
4.执行map-reduce示例
创建hdfs上的input
[root@localhost hadoop-1.2.1]# bin/hadoop dfs -mkdir input
配置拷上去
[root@localhost hadoop-1.2.1]# hadoop dfs -copyFromLocal conf/* input
执行java文件
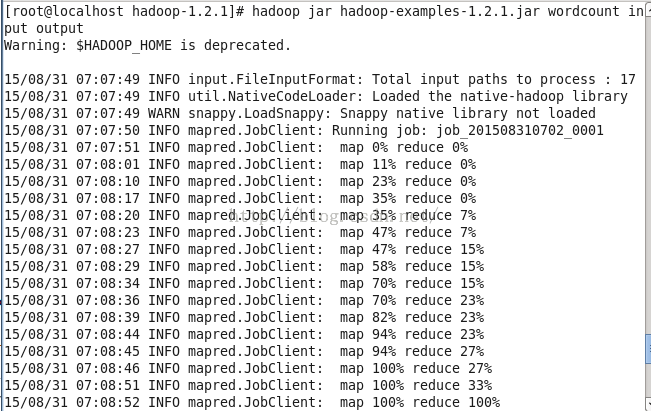
[root@localhost hadoop-1.2.1]# hadoop jar hadoop-examples-1.2.1.jar wordcount input output
完成:


