图像滤镜艺术---Photoshop实现Instagram之Nashville滤镜
本文继续介绍使用PS来实现Instagram中的Nashville滤镜特效,有人说这个没什么用,直接用INSTAGRAM就可以了,干嘛用PS,问一下,PS可以处理单反高清照片,Instagram可以么?呵呵,开个玩笑,下面进入正题。
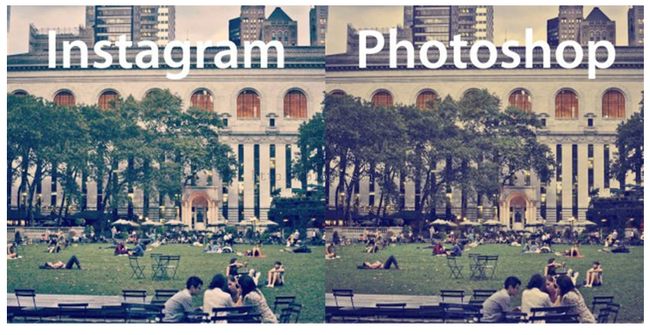
先看效果图:
接着是PS实现,这里还是英文的,不过有图示,不懂英文也没关系呵呵,资料来自网络搜集,所以本人也懒得翻译了。
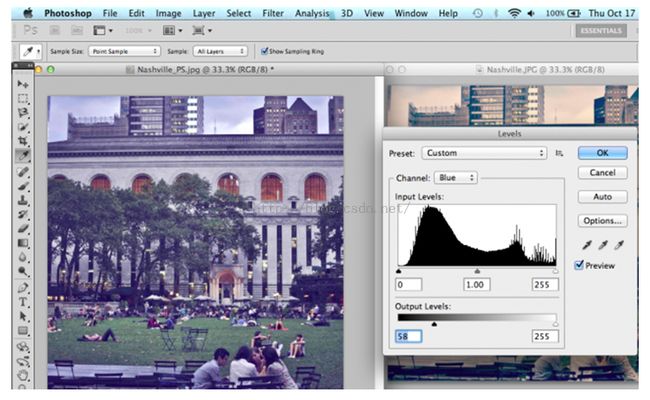
1. To mimic the soft purple tint of the Nashville filter, open up the Levels menu with Command / Ctrl + L or Image > Adjustments > Levels. Select "Blue" in the dropdown menu for "Channel." Increase the Output Levels at the bottom of the menu from 0 to 58 by dragging the left slider toward the center of the spectrum.
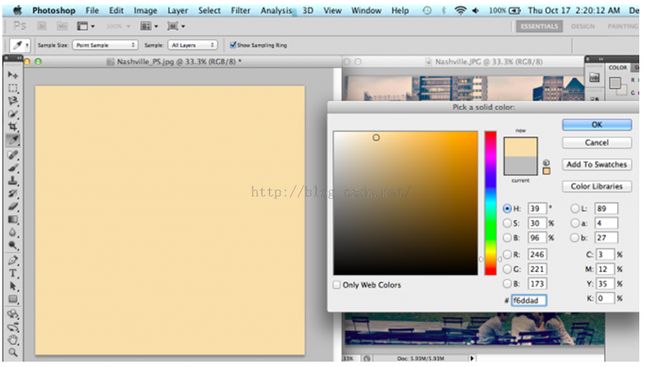
2. To soften the blue tint a bit, add a new layer of light yellow by going to Layer > New Fill Layer > Solid Color. The hex color #f6ddad adds a peachy tone to contrast the blue.
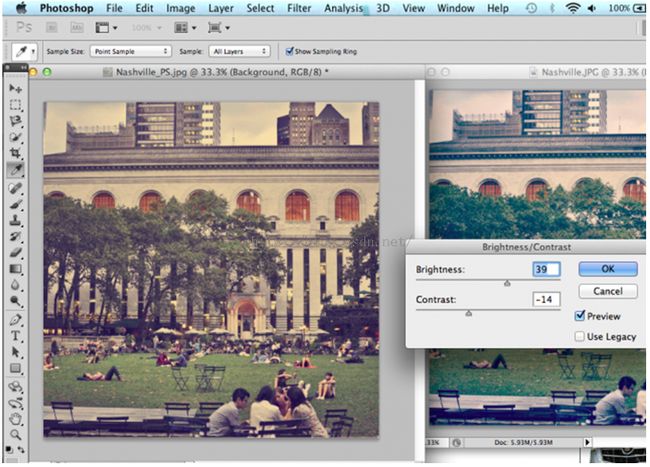
3. Next, increase by Brightness and decrease the Contrast by going to Image > Adjustments > Brightness/Contrast.
4. Change the Color Balance with Command / Ctrl + B, or Image > Adjustments > Color Balance. Increase the Cyan, Green and Blue levels.
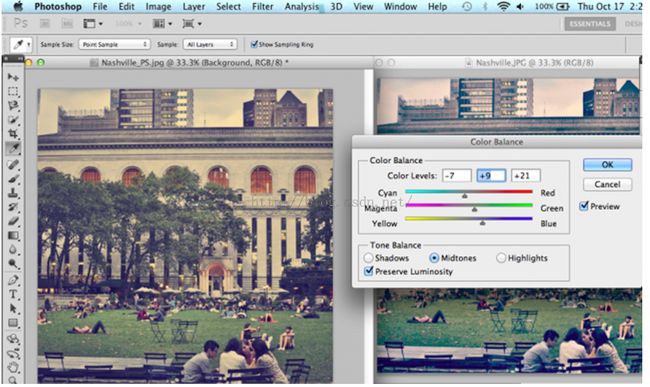
5. If the color is still not quite right, change the hue with Command / Ctrl + U, or Image > Adjustments > Hue/Saturation. I moved the Hue slider just a bit to the right to emphasize the blue a bit more.
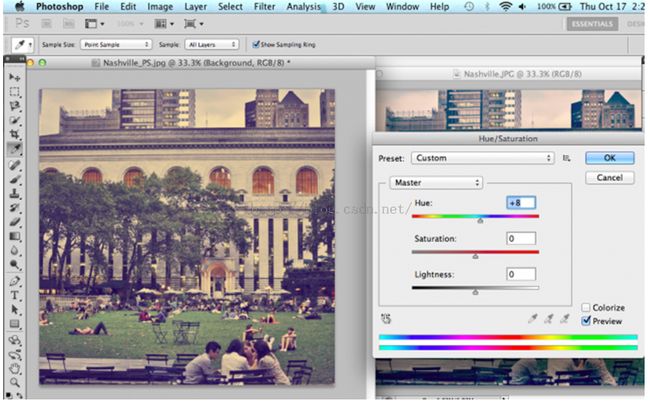
6. From here, I went back and adjusted the Color Balance a bit more by moving all sliders just a bit to the right for the final result.

上述实现均可以使用编程实现,有兴趣的同学们可以使用ZPhotoEngine库来实现,这个库是一个免费的PS功能库,适用于PC、Android、IOS等平台,很不错,下载地址:点击打开链接
