MyEclipse10 Strust2实例
一、新建Web Project ,并加入Struts2支持,不再赘述;
二、web.xml里,按如下配置:
  <filter>
  	<filter-name>struts2</filter-name>
  	<filter-class>
  		org.apache.struts2.dispatcher.ng.filter.StrutsPrepareAndExecuteFilter
  	</filter-class>
  </filter>
  <filter-mapping>
  	<filter-name>struts2</filter-name>
  	<url-pattern>*.action</url-pattern>
  </filter-mapping>
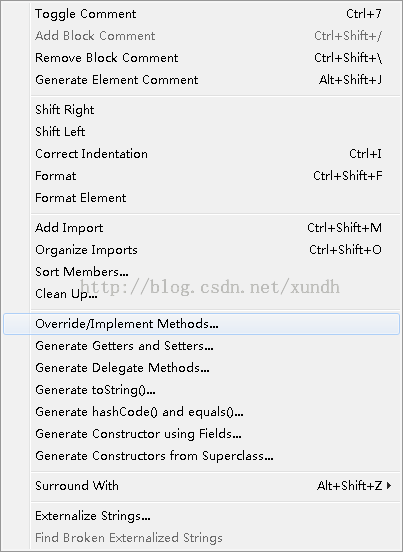
三、创建包,添加类,我添加的是LoginAction类,从 com.opensymphony.xwork2.ActionSupport继承,
生成execute方法:
修改代码如下:
import com.opensymphony.xwork2.ActionSupport;

 public class LoginAction extends ActionSupport {

	 @Override
	 public String execute() throws Exception {
	 // TODO Auto-generated method stub
	 System.out.println("Action执行了。");

	 return SUCCESS;
 //	 return super.execute();
	 }

 }
注:ActionSupport是Struts2提供的类,封装了几个有用的功能,比如:

getText():从资源文件中获取国际化消息。

addFieldError():验证输入未通过时添加错误消息,支持国际化。

execute():该方法一般会被重写,当客户端向Action发送请求时,会调用此方法。

总结起来,该类主要提供了错误消息的支持和国际化支持。
四、修改src下的struts.xml:
<?xml version="1.0" encoding="UTF-8" ?>
<!DOCTYPE struts PUBLIC "-//Apache Software Foundation//DTD Struts Configuration 2.1//EN" "http://struts.apache.org/dtds/struts-2.1.dtd">
<struts>
    <package name="a" extends="struts-default">
       <action name="LoginAction" class="com.cn.test.LoginAction">
           <result>/result.jsp</result>
       </action>
    </package>
</struts>
struts.xml简单解释:
| 标签名称 |
说明 |
| include |
包含其他xml文件,在示例中,这意味着struts.xml可以访问定义在struts-default.xml文件中的组件。 该元素可以使得Struts2定义多个配置文件,“分而治之”。 要注意的是,任何一个struts2配置文件都应该和struts.xml有相同的格式,包括doctype,并且可以放在类路径下的任何地方。 |
| package |
为Action或截拦器分组。 name:名称,必填项,名称自定义,没特别要求。方便别的package引用。 extends:package能继承其他的package,即通过该属性实现,值为另一个package的name。 在示例中,extends =”struts-default”是从struts-default.xml中继承的。 |
| action |
定义Action,name属性为访问时用到的名称,class属性是Action的类名。 |
| result |
根据Action的返回值定义页面导航。 Action的预定义的返回值有: String SUCCESS = "success"; String NONE = "none"; String ERROR = "error"; String INPUT = "input"; String LOGIN = "login"; 比如,当Action返回SUCCESS时希望转到ok.jsp页面,则可以这样写: <result name=”success”>ok.jsp</result> 其中,name的缺省为success。 |
六、启动MyEclipse Tomcat并测试,在浏览器输入http://localhost:8080/myproject/LoginAction.action,输出结果:result page。
七、修改LoginAction.java文件,调用action里的方法:
public String login() throws Exception{
  System.out.println("login method");
  return this.SUCCESS;
}
在浏览器调用:http://localhost:8080/myproject/LoginAction!login.action,输出result page。
本文参考:
- http://www.blogjava.net/lzhidj/archive/2008/07/08/213445.html
- http://blog.csdn.net/zz_mm/article/details/5460397
感谢原作者。

