ubuntu下安装gearman及php,python扩展
1.安装依赖包
$ sudo apt-get install libboost-all-dev
$ sudo apt-get install gperf
$ sudo apt-get install libevent1-dev
2.下载安装gearman
$ wget https://launchpad.net/gearmand/1.2/1.1.8/+download/gearmand-1.1.8.tar.gz
$ tar zxvf gearmand-1.1.8.tar.gz
$ cd gearmand-1.1.8/
$ ./configure
$ make
$ make install
ubuntu
$ apt-get install gearman-job-serve
3.下载安装php扩展
$ wget http://pecl.php.net/get/gearman-1.1.1.tgz
$ tar zxvf gearman-1.0.2.tgz
$ cd gearman-1.0.2/
$ phpize
$ make
$ make install
$ sudo echo "extension = gearman.so" > /etc/php5/conf.d/gearman.ini
重启apache
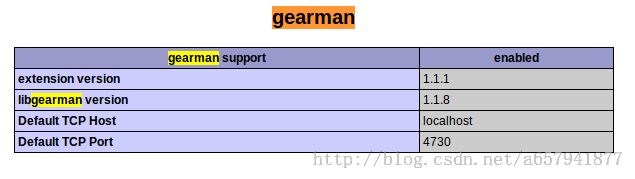
用以下命令检查扩展是否安装成功
$ php --info | grep "gearman support"
gearman support => enabled
或者检查phpinfo确认安装成功
4.简单php实例
接下来,我们可以试着用 PHP API 来连接 Job Server 。前面安装好 PECL 的 Gearman Extension 后,我们就可以在 PHP 程式裡建立操作 Gearman API 的物件了。
以下我用简单的方式来模拟 Client 和 Worker 的运作,所以这裡 Client 和 Worker 会在同一部主机上,但实际运作时是不需要的,请大家注意。
Client 端程式
以下我用简单的方式来模拟 Client 和 Worker 的运作,所以这裡 Client 和 Worker 会在同一部主机上,但实际运作时是不需要的,请大家注意。
Client 端程式
<?php
$client= new GearmanClient();
$client->addServer("127.0.0.1", 4730);
$who = array('who_send'=>'php','get_email'=>'this is a php test');
$img['image'] = '/var/www/pub/image/php_test.png';
print $client->do("sendEmail", serialize($who));
print "\n";
print $client->do("resizeImage", serialize($img));
print "\n";
Worker 端程式
<?php
$worker = new GearmanWorker();
$worker->addServer(); // 预设为 localhost
$worker->addFunction('sendEmail', 'doSendEmail');
$worker->addFunction('resizeImage', 'doResizeImage');


 while($worker->work());


  function doSendEmail($job)
  {
          $data = unserialize($job->workload());
              print_r($data);
                      echo "Email sending is done really.\n\n";
                      return "php receive ";


  }


   function doResizeImage($job)
   {
           $data = unserialize($job->workload());
               print_r($data);
            echo "Image resizing is really done.\n\n";
            return "php receive";
   }
首先, PHP Gearman Extension 提供了一个名为 GearmanClient 的类别,它可以让程式安排工作给 Job Server 。
而 addServer 方法表示要通知的是哪些 Job Server ,也就是说如果有多台 Job Server 的话,就可以透过 addServer 新增。
然后我们将要呼叫哪个 Worker 以及该 Worker 所需要的资料,利用 GearmanClient 的 doBackground 方法传送过去。 doBackground 方法顾名思义就是在背景执行, Client 在丢出需求后就可以继续处理其他的程式,也就是我们常说的「射后不理」。
doBackground 方法的第一个参数是告诉 Job Server 要执行哪个功能,而这个功能则是由 Worker 提供的;要注意是,这个参数只是识别用的,并不是真正的函式名称。而第二个参数是要传给 Worker 的资料,它必须是个字串;因此如果要传送的是阵列的话,我们就要用 PHP 的 serialize 函式来对这些资料做序列化。
PHP 的 Gearman Extension 也提供了一个 GearmanWorker 类别,让我们可以实作 Worker 。而 GearmanWorker 类别也提供了addServer 方法,让所生成的 Worker 物件可以注册到 Job Server 中。
另外 GearmanWorker 类别也提供了 addFuncton 方法,告诉 Job Server 自己可以处理哪些工作。 addFunction 的第一个参数就是对应到 GearmanClient::doBackground 方法的第一个参数,也就是功能名称;这使得 Client 和 Worker 能透过这个名称来互相沟通。而第二个参数则是一个callback函式,它会指向真正应该要处理该工作的函式或类别方法等。
最后因为 Worker 因为要随时准备服务,是不能被中断的,因此我们透过一个无限迴圈来让它常驻在 Job Server 中。
测试
准备好 Client 和 Worker 的程式后,就可以测试看看了。首先我们必须得先执行 worker.php ,让它开始服务。
php worker.php
这时我们会看到 worker.php 停驻在等待服务。
接着我们开启另一个 console 视窗来执行 client.php :
切换到执行 worker.php 的 console 时,就会看到以下执行结果:
Array
(
    [who_send] => web
    [get_email] =>
)
Email sending is really done.

Array
(
    [image] => /var/www/pub/image/test.png
)
Image resizing is really done.
这表示 Worker 正常地处理 Client 的需求了。
5.安装python 扩展
easy_install gearman
6.简单python应用
我们把上面php的例子简单改成python的
worker.py
import os
import gearman
import math

class CustomGearmanWorker(gearman.GearmanWorker):
    def on_job_execute(self, current_job):
        #print "Job started"
        return super(CustomGearmanWorker, self).on_job_execute(current_job)

def doSendEmail(gearman_worker, job):
    print job.data

    return "python receive %s"%job.data

def doResizeImage(gearman_worker, job):
    print job.data

    return "python receive %s"%job.data


new_worker = CustomGearmanWorker(['localhost:4730'])
new_worker.register_task("sendEmail", doSendEmail)
new_worker.register_task("resizeImage", doResizeImage)
new_worker.work()
client.py
from gearman import GearmanClient

new_client = GearmanClient(['localhost:4730'])
who = {
    'who_send':'python',
    'get_email':'this is a python test'
    }
img = {'image':'/var/www/pub/image/python_test.png'}
current_request = new_client.submit_job('sendEmail', str(who))
current_request2 = new_client.submit_job('resizeImage',str(img))
new_result = current_request.result
new_result2 = current_request2.result
print new_result
print new_result2
先运行worker.py在换一个窗口运行client.py可以看到效果
7.综合应用
因为两个例子中注册的函数名称相同,那也意味着worker.py能够处理client.php的请求,worker.php也能处理client.py的请求.甚至同时开启worker.py和worker.py 都可以正常运行。至于到底分配给那个进程处理,这个工作会由gearman处理。通过增加worker的进程数,我们可以实现负载平衡。但实际应用中我们肯定不会用两种语言共同担当worker,这里只是展示功能。但是worker和client采用不同的语言是很有可能的。