FAST-CGI安装与使用
FastCGI 像是一个常驻 (long-live) 型的 CGI,它可以一直执行着,只要激活后,不会每次都要花费时间去 fork 一次 (这是 CGI 最为人诟病的 fork-and-execute 模式)。
1.下载安装fcgi
# wget http://www.fastcgi.com/dist/fcgi.tar.gz
# tar zxvf fcgi.tar.gz
# cd ./fcgi-2.4.1-SNAP-0311112127
# ./configure
# make
# make install
注意安装会报错
fcgio.cpp:50: error: 'EOF' was not declared in this scope
参考:
http://qichunren.iteye.com/blog/609351
https://bugs.gentoo.org/256654?id=256654
解决办法:
在/include/fcgio.h文件中加上 #include <cstdio>,然后再编译安装就通过了。
--------------------
php-fpm
她同样也是一个PHP FastCGI管理服务器,是只用于PHP的
可以在 http://php-fpm.org/download 下载得到
她是PHP源代码的一个补丁,必须将她patch到你的PHP源代码中,在编译安装PHP后才可以使用
2.spawn-fcgi运行fcgi
安装spawn-fcgi
spawn-fcgi是一个通用的FastCGI管理服务器
她是lighttpd中的一部份,但目前已经单独成为一个项目,最新的lighttpd没有这一块,但可以在以前版本中找到她
在lighttpd-1.4.15( http://www.lighttpd.net/download/lighttpd-1.4.15.tar.gz )中就有她
Note注:最新的spawn-fcgi可以到lighttpd.net网站搜索“spawn-fcgi”找到她的最新版本发布地址
目前她的下载地址是http://redmine.lighttpd.net/news/2 最新版本是
# wget http://www.lighttpd.net/download/spawn-fcgi-1.6.3.tar.gz
# tar -zxvf spawn-fcgi-1.6.3.tar.gz
# cd spawn-fcgi-1.6.3
# ./configure
# make
# make install
=====或者安装lighttpd==========
# cd lighttpd-1.4.15
#./configure
# make
因为我不需要安装lighttp而是只需要他其中的某个文件,所以只make就可以了,不需要make install
# cp src/spawn-fcgi /usr/local/bin/spawn-fcgi
取出spawn-fcgi的程序
=============================
执行PHP-cgi
# /usr/local/bin/spawn-fcgi -a 127.0.0.1 -p 9000 -C 5 -u nobody -g nobody -f /usr/local/php/bin/php-cgi
执行成功返回pid![]()
查看进程
# ps aux
或者
# ps -A|grep php-cgi
8929 ? 00:00:00 php-cgi
8930 ? 00:00:00 php-cgi
8931 ? 00:00:00 php-cgi
8932 ? 00:00:00 php-cgi
8933 ? 00:00:00 php-cgi
8934 ? 00:00:00 php-cgi

绑定nginx
nginx默认web文件夹在配置文件中
#cd /usr/local/nginx/conf
修改nginx.conf,加入如下语句:
location ~ \.php$ {
root html;
fastcgi_pass 127.0.0.1:9000;
fastcgi_index index.php;
include fastcgi_params;
fastcgi_param SCRIPT_FILENAME /usr/local/nginx/html$fastcgi_script_name;
}
启动nginx
# /usr/local/nginx/sbin/nginx -c /usr/local/nginx/conf/nginx.conf
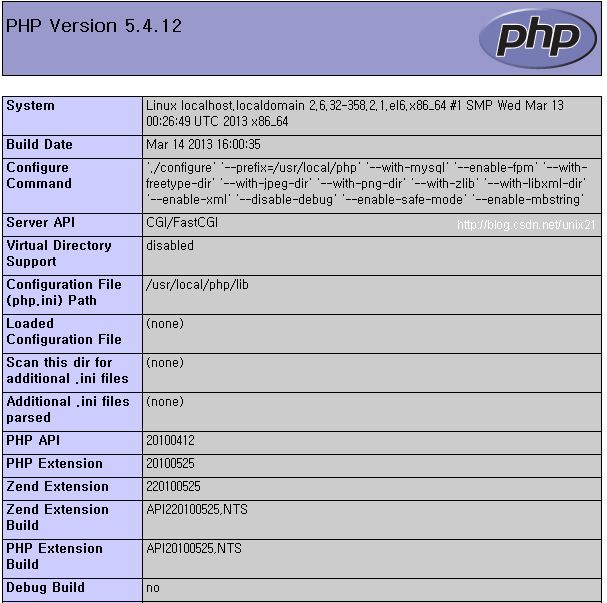
注意这里
| Server API | CGI/FastCGI |
64位Linux编译安装Nginx+PHP(phpfpm)
=============================================================
启动其他cgi
参数含义如下
-f <fcgiapp> 指定调用FastCGI的进程的执行程序位置,根据系统上所装的CGI的情况具体设置
-a <addr> 绑定到地址addr
-p <port> 绑定到端口port
-s <path> 绑定到unix socket的路径path
-C <childs> 指定产生的FastCGI的进程数,默认为5(仅用于PHP)
-P <path> 指定产生的进程的PID文件路径
-u和-g FastCGI使用什么身份(-u 用户 -g 用户组)运行,如nobody、apache等
3.安装fcgiwrap
其实fcgiwrap与spawn-fcgi的关系。spawn-fcgi是网上现成的封装了fcgiwrap的工具,可以下载直接使用。如果下载fcgiwrap,可以自己编写脚本。有些帖子让spawn-fcgi启动fcgiwrap是错误的。
如果要研究fcgiwrap可以如下安装
wget http://github.com/gnosek/fcgiwrap/tarball/master -P /usr/locl/src
tar zxvf gnosek-fcgiwrap-1.1.0-0-g333ff99.tar.gz -P /usr/local/src
cd /usr/local/src/gnosek-fcgiwrap-333ff99
autoreconf -i
./configure
make
# 复制fcgiwrap
cp fcgiwrap /usr/local/bin
中间有报错:
undefined reference to rpl_malloc 解决办法:
vi config.h.in
undef malloc
# 这这行注释
/* #undef malloc */
运行CGI
# /usr/local/bin/spawn-fcgi -f /usr/local/bin/fcgiwrap -a 192.168.1.10 -p 10000 -F 32 -P /tmp/fastcgi-c.pid -u nobody -g nobody
spawn-fcgi: child exited with: 8spawn-fcgi: child spawned successfully: PID: 5277
spawn-fcgi: child spawned successfully: PID: 5278
spawn-fcgi: child spawned successfully: PID: 5279
4.spawn-fcgi运行fastcgi代码
#include "fcgi_stdio.h"
#include <stdio.h>
#include <stdlib.h>
int count;
void initialize(void)
{
    count=0;
}
void main(void)
{
    initialize();
    while (FCGI_Accept() >= 0)   {
        printf("Content-type: text/html "
        " "
        "<title>FastCGI Hello! (C, fcgi_stdio library)</title>"
        "<h1>FastCGI Hello! (C, fcgi_stdio library)</h1>"
        "Request number %d running on host <i>%s</i> ",
        ++count, getenv("SERVER_HOSTNAME"));
    }
}
编译
# gcc -o tinyfastcgi.cgi tinyfastcgi.c -lfcgi
或者这样编译
# gcc -I/usr/include/fastcgi -lfcgi hello.cpp -o echo.fastcgi
编译生成hello.cgi程序,然后调用spawn-fcgi使得程序以fastcgi方式运行(具体底层运行方式由fastcgi实现,我们不用考虑)
运行
# /usr/local/bin/spawn-fcgi -f -a 192.168.1.10 -p 10000 -F 4 -P /usr/www/tinyfastcgi.fastcgi -u nobody -g nobody
绑定
然后配置nginx.conf文件
这里仅仅是一个最简单的功能演示,表单的交互还在研究中,cgicc封装了很好用的处理网页元素的方法,推荐使用。
参考:
spawn-fcgi运行fcgiwrap http://wiki.nginx.org/Fcgiwrap nginx c/c++ fastcgi支持
C++写一个简单的fastcgi程序
FastCGI服务器的安装和使用(spawn-fcgi和php-fpm)
fastcgi中的多线程使用
FastCGI 技术介绍