HTML5 New Feature Series: Web Notifications
Recently, I did some researches on new technologies of HTML5, and I really want to write down these knowledges I have leant, one hand, it can deepen my understanding of these new features, and on the other hand, I hope I can help the beginners to understand and master them.
Then today we will tell something about the so-called 'Desktop Notification', that is the 'Web Notifications' tech.
'Web Notifications' is an exciting new feature in HTML5, it allows developer to configure and show a desktop notification, and then to provide a better experience for user. Specially, users can receive a desktop message from page even though they are occupied with something else that unrelated with the page, and it can make users perceive some changes in the page. For instance, a mail notification from page will come when we're coding, or a new message from online chat when we're still coding, etc.
And then we will try to create our own notification step by step.
To create a notification, we need to create a message component first, and it's pretty simple, we can just use the Notification class to create an instance, it belongs to the 'window' object, so we can use it directly, just like this:
var n = new Notification("sir, you got a message", {
	icon: 'img/icon.png',
	body: 'you will have a meeting 5 minutes later.'
});
There're two important parameters in the constructor of Notification: the first one is the message title, and the second is message content object, note that the object consists of two properties, they represent the icon and a message description respectively.
After the execution of the code, we will have created a notification instance successfully, and finally it will show up just like this in Chrome:
Now we almost succeed, but whether it can show the message component depends on the permission user granted. In view of the security mechanism, our notification will not show up until user has granted. So currently what we need to do is to request the permission from user.
Fortunately, Notification provides us a great function to request permission, it's just called 'requestPermission', and it can perform just like this:
Notification.requestPermission(function(status) {
	//status is the current permission,if user allows notification,status should be 'granted'
	console.log('status: ' + status);

	//permission is a read-only property
	var permission = Notification.permission;
	//default user ignored our request or denied, the message will not show
	//granted user granted our request, the message can show
	//denied  user denied our request, the message will never show up

	console.log('permission: ' + permission);
});
When the codes are being executed, the browser will ask users whether they allow the notification of the current site, just like the following screenshot:
If user clicks the left button, no matter how we run our codes, the notification will never appear, and only when user clicks the 'Allow' button, it can work.
Just like the description above, after the requestPermission's execution, the program will get into a callback function, and we can pass a parameter named 'status' into this function, it indicates the final permission status after users make their choice. If user clicks the right close icon, that means user ignores this permission request, the status will be 'default', and the notification can not show under this condition. If user chooses the 'Block' button, we will get a 'denied' status, obviously, user denies the request, and naturally, the message notification will not come out. Lastly, if user clicks the 'Allow' button, the status will become 'granted', and the notification can show up perfectly in this condition.
Meanwhile, after the permission request is done, the browser will update the 'permission' property of Notification object and assign the current permission to it. Note that this property is read-only to developers, and its value is identical with the status we just mentioned above. So if we want to show a notification, we can detect whether we have the permission first:
if (Notification.permission === 'granted') {
	//show notification
}
Just as the codes described, we can show the notification when being sure the current permission is 'granted'. But just only a notification component is unattractive, it should have some interactions, and also should have some events getting involved. Luckily, the Notification has already defined a set of functions to process the events, and we can easily use them to complete our interaction:
var n = new Notification("sir, you got a message", {
	icon: 'img/icon.png',
	body: 'you will have a meeting 5 minutes later.'
});

//onshow function will be invoked when notification is showing
n.onshow = function() {
	console.log('notification shows up');
	//close message notification 5 seconds later
	setTimeout(function() {
		n.close();
	}, 5000);
};

//when notification is being clicked, it will call onclick
//we can open the associated view and close the notification at the same time
n.onclick = function() {
	alert('open the associated view');
	//opening the view...
	n.close();
};

//onerror will be called when some errors occured
//not that it will call onerror if we insist on creating notification instance without granted permission
n.onerror = function() {
	console.log('notification encounters an error');
	//do something useful
};

//onclose will be invoked when a notification is closed
n.onclose = function() {
	console.log('notification is closed');
	//do something useful
};
As we can see, There are 4 useful functions that can be used to process interaction events, basically the events can be easily handled by mastering the usage of these functions.
At last, we will organize these steps together to create a simple example for a better demonstration with this feature.
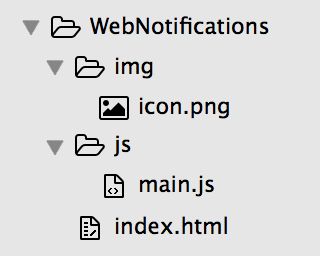
And we create some folders and files:
Then we organize the codes together to shape an object, just like the following codes:
var NotificationHandler = {
	isNotificationSupported: 'Notification' in window,
	isPermissionGranted: function() {
		return Notification.permission === 'granted';
	},
	requestPermission: function() {
		if (!this.isNotificationSupported) {
			console.log('the current browser does not support Notification API');
			return;
		}

		Notification.requestPermission(function(status) {
			//status is the current permission,if user allows notification,status should be 'granted'
			console.log('status: ' + status);

			//permission is a read-only property
			var permission = Notification.permission;
			//default user ignored our request or denied, the message will not show
			//granted user granted our request, the message can show
			//denied  user denied our request, the message will never show up

			console.log('permission: ' + permission);
		});
	},
	showNotification: function() {
		if (!this.isNotificationSupported) {
			console.log('the current browser does not support Notification API');
			return;
		}
		if (!this.isPermissionGranted()) {
			console.log('the current page has not been granted for notification');
			return;
		}

		var n = new Notification("sir, you got a message", {
			icon: 'img/icon.png',
			body: 'you will have a meeting 5 minutes later.'
		});

		//onshow function will be invoked when notification is showing
		n.onshow = function() {
			console.log('notification shows up');
			//close message notification 5 seconds later
			setTimeout(function() {
				n.close();
			}, 5000);
		};

		//when notification is being clicked, it will call onclick
		//we can open the associated view and close the notification at the same time
		n.onclick = function() {
			alert('open the associated view');
			//opening the view...
			n.close();
		};

		//onerror will be called when some errors occured
		//not that it will call onerror if we insist on creating notification instance without granted permission
		n.onerror = function() {
			console.log('notification encounters an error');
			//do something useful
		};

		//onclose will be invoked when a notification is closed
		n.onclose = function() {
			console.log('notification is closed');
			//do something useful
		};
	}
};

document.addEventListener('load', function() {
	//try to request permission when page has been loaded.
	NotificationHandler.requestPermission();
});
As we can see, the object has been created to manage the events that related with message, in general, our process is like this: executing the requestPermission function to ask user for granting, and then we can call showNotification when we need to show a message, for example:
setTimeout(function() {
	//if there has new mail, show notification
	NotificationHandler.showNotification();
}, 5000);
Note that, not all browsers support Notification API, so we added a property named 'isNotificationSupported', which is used to tell whether the browser supports. And in the above codes, if it's detected that browser doesn't support this API, our program will return directly, instead of executing continuously, but in our real development, we can notify user in another way.
Then let's take a look at the index.html file:
<!DOCTYPE html>
<html>
	<body>
		<button onclick="NotificationHandler.showNotification()">show notification</button>
	</body>
	<script type="text/javascript" src="js/main.js"></script>
</html>
This file is pretty simple and clear, therefore we don't need to talk too much on it, let's take a glance at it:
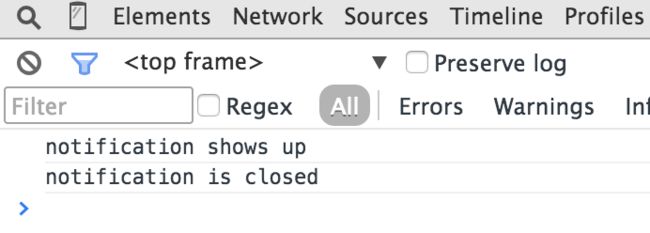
1. Click the button to show a message, then close the message directly or wait 5 seconds, we will see two logs in the console panel:
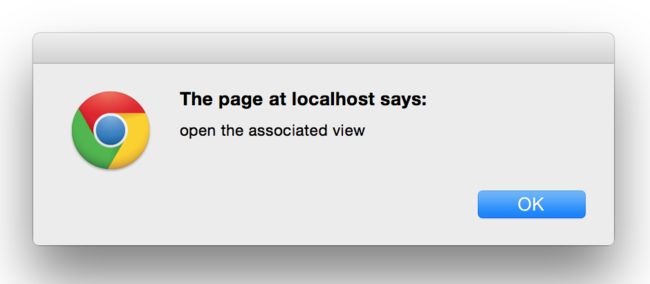
2. Click the button to show the message, and then click the message body, then an alert window will appear:
Looks pretty nice, isn't it? Maybe it's a little complicated in real development, but if we understand the way how it runs, everything will be easier than we think.
In the end, there is an very important thing needs to be pointed out, a message can show up only when developers visit the page in a running web server, if they double-click the local file, it doesn't work at all. So when we practise, remember to put the whole directory into a web container.
Although Notification is a fantastic feature, we can't stop some sites from sending unfriendly messages, fortunately, user can remove the corresponding permission to disable the notification functionality. We can click the 'setting' to open the setting panel, and then click the 'show advanced setting' at the bottom, then click the 'content setting' under the 'privacy', and ultimately a window will come out, scroll down and we will find the 'notification', and then we all know what to do next.
Now, perhaps the most usages of Notification have been covered, and I hope all of us can learn it, then apply this feature into our project, and if so, the interaction will be more attractive to user.


