cocos2d-x学习日志(8) --瓦片地图集
转载请标明:转载自【小枫栏目】,博文链接:http://blog.csdn.net/rexuefengye/article/details/10416499
Tiled Map Editor是Cocos2d-x支持的地图编辑器,使用Tiled编辑出的地图可以很方便的被Cocos2d-x使用Tiled的官网是Tiled Map Editor。我使用的地图编辑器是QT版本。
一、用Tiled地图编辑器编辑地图
1)选择“文件->新地图”,新建地图工程,在弹出的对话框中设置地图的高度和宽度、图块的大小以及地图的方向,如图
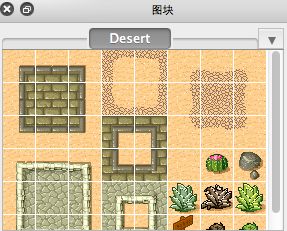
2)选择“地图->新图块”导入图素文件,在弹出的对话框中设置图块的大小、边矩和偏移量等,如图
3)选择完成图块后,左下角的部分就显示了目前的图块,选择相应图块便可以填充某图了,如图
4)工具栏中提供了不同工具填充,包括图章、填充、橡皮擦和选择矩形区域等。
5)屏幕的右上角为图层编辑部分,同时如图
通过图层编辑部分可以选择我们需要编辑的图层,并且可以排除其他层的干扰。
6)有关使用方法,可参考:http://www.joynb.net/blog/archives/427,最后效果图如图
二、如何在cocos2d-x 中使用地图
1)新建地图类并在地图中显示
HelloWorldScene.cpp
bool HelloWorld::init()
{
    //////////////////////////////
    // 1. super init first
    if ( !CCLayer::init() )
    {
        return false;
    }

    CCTMXTiledMap *map = CCTMXTiledMap::create("orthogonal-test4.tmx");
    this->addChild(map,0,kTagTileMap);

    CCSize size = map->getContentSize();

    //精灵批处理
    CCArray* pChildrenArray = map->getChildren();
    CCSpriteBatchNode* child = NULL;
    CCObject* pObject = NULL;
    CCARRAY_FOREACH(pChildrenArray, pObject)
    {
        child = (CCSpriteBatchNode*)pObject;

        if (!child)
            break;
        //设置抗锯齿
        child->getTexture()->setAntiAliasTexParameters();

    }
    return true;
}
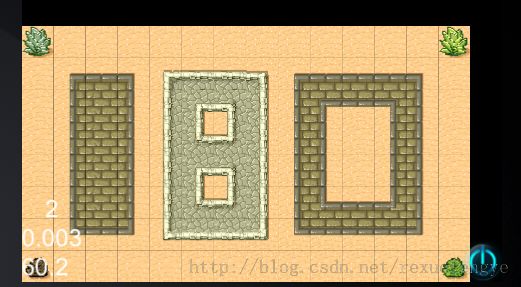
运行效果图:
2) 普通视角获得对应位置图素:
在init()添加
 //"Layer 0"为Tile的层名字
    CCTMXLayer* layer = map->layerNamed("Layer 0");
    CCSize s = layer->getLayerSize();

    //获得相应位置图素(地图四个角图素)
    CCSprite* sprite;
    sprite = layer->tileAt(ccp(0,0));
    sprite->setScale(2);
    sprite = layer->tileAt(ccp(s.width-1,0));
    sprite->setScale(2);
    sprite = layer->tileAt(ccp(0,s.height-1));
    sprite->setScale(2);
    sprite = layer->tileAt(ccp(s.width-1,s.height-1));
    sprite->setScale(2);

    //定时移动地图右上角的sprite
     schedule( schedule_selector(HelloWorld::removeSprite), 2 );
回调函数
void HelloWorld::removeSprite(float dt)
{
    unschedule(schedule_selector(HelloWorld::removeSprite));

    CCTMXTiledMap *map = (CCTMXTiledMap*)getChildByTag(kTagTileMap);
    CCTMXLayer* layer = map->layerNamed("Layer 0");
    CCSize s = layer->getLayerSize();

    CCSprite* sprite = layer->tileAt( ccp(s.width-1,0) );
    layer->removeChild(sprite, true);
}
效果图
3) 通过具体位置获得地图的行列数
    //获得具体位置的行列数,其中playerpoint为玩家获得屏幕点坐标
    float indexx = (playerpoint.x) / map->getTileSize().width;
    float indexy = map->getMapSize().height - (playerpoint.y) / map->getTileSize().width;
如上,使用坐标化成行列数,因为Cocos2d-x 中的坐标系中,轴是从下到上依次增加,而地图恰好相反,所以需要做一个转换,用总的行数减去y轴坐标除以图素高,结果才是在图素的函数。
三、在地图中加入精灵
HelloWorldScene.h
    cocos2d::CCSprite* hero;
    void repositionSprite(float dt);
HelloWorldScene.cpp
 CCTMXTiledMap *map = CCTMXTiledMap::create("orthogonal-test-zorder.tmx");
    this->addChild(map,0,kTagTileMap);

    CCSize s = map->getContentSize();
    CCLOG("ContentSize: %f,%f",s.width,s.height);
    //map->setPosition(ccp(-s.width/2,0));

    hero = CCSprite::create("Role.png");
    map->addChild(hero,map->getChildren()->count());
    hero->retain();
    int mapWidth = map ->getMapSize().width * map->getTileSize().width;
    hero->setPosition(CC_POINT_PIXELS_TO_POINTS(ccp(mapWidth/2,0)));

    CCActionInterval* move = CCMoveBy::create(10, ccp(300, 250));
    CCActionInterval* back = move->reverse();
    CCFiniteTimeAction* seq = CCSequence::create(move,back,NULL);
    hero->runAction(CCRepeatForever::create((CCActionInterval*)seq));
    schedule(schedule_selector(HelloWorld::repositionSprite));
回调函数
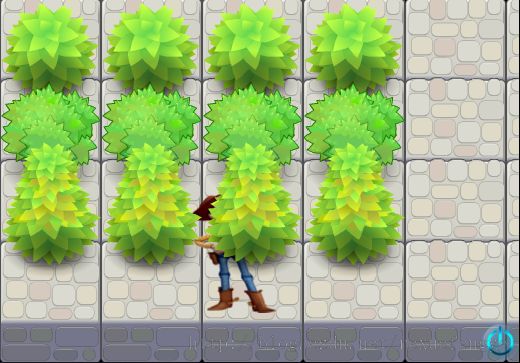
主要实现精灵和地图的遮挡关系:
void HelloWorld::repositionSprite(float dt)
{
    CCPoint p = hero->getPosition();
    p = CC_POINT_PIXELS_TO_POINTS(p);
    CCNode *map = getChildByTag(kTagTileMap);
    int newZ = 4 - ((p.y -10) / 81);
    newZ = MAX(newZ, 0);

    map->reorderChild(hero, newZ);
}
效果图
参考书籍《Cocos2d-x 权威指南》


