注1:本文译自Sprite Kit Tutorial: Making a Universal App: Part 2
目录
- 动画的定义:可行性
- 属性列表
- 添加游戏逻辑
- 添加音效
- 何去何从
上一篇文章中,创建了一个基本的游戏程序:一些可爱的鼹鼠从洞里面跳出来。并且为了能够让程序很好的运行在iPhone 3.5英寸,iPhone 4英寸,iPad和iPad Retina上,还花费了大量的篇幅介绍UI设计和坐标系相关知识。
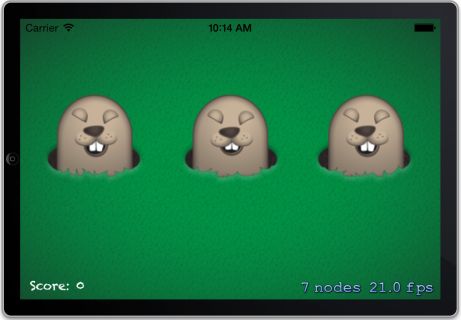
本文,将给鼹鼠添加一些可爱的动画:笑和被打时的表情,并添加一种玩法:可以通过敲打鼹鼠来赚取点数,另外还会添加一些音效。
动画的定义:可行性
为了让游戏更加有趣,我们将在游戏中给鼹鼠添加两个动画。首先,当鼹鼠从洞里面跳出来时是笑的动画,然后,当你敲打它们的时候,是一个被敲打的表情。
在开始之前,我们先来看看在代码里面定义动画的可行性。
鼹鼠笑的动画需要用到的图片和相关顺序是这样的: mole_laugh1.png, mole_laugh2.png mole_laugh3.png, mole_laugh2.png, mole_laugh3.png, mole_laugh1.png。
我们可以通过硬编码的方式来配置我们的动画,如下代码所示:
1
2
3
4
5
6
7
8
9
|
[animFrames addObject: [SKTexture textureWithImageNamed:@"mole_laugh1.png"]]; [animFrames addObject: [SKTexture textureWithImageNamed:@"mole_laugh2.png"]]; [animFrames addObject: [SKTexture textureWithImageNamed:@"mole_laugh3.png"]]; [animFrames addObject: [SKTexture textureWithImageNamed:@"mole_laugh2.png"]]; // And so on...
|
不过,这很容易让我们的代码剧增。为了简洁一点,此处我们不用上面的代码来定义动画,而是使用属性列表来代替。
属性列表
如果之前你没有用过属性列表,也没关系。属性列表就是一个特殊的文件,可以用Xcode创建,文件按照一定的格式包含数组、字典、字符串和数字,所以非常容易创建,并且在代码中叶能够方便的读取到这些值。
下面我们在Xcode中试试吧。右键单击ShackAMole,选择”New File…”,接着选择 “iOS\Resource\Property List”,然后单击”Next”。将文件命名为”laughAnim.plist”,最后单击创建。现在可以在Xcode中看到laughAnim.plist的可视化编辑界面,如下图所示:
 南
南
每个属性列表都有一个root element。一般这是一个数组或者字典。在我们创建的这个文件中,将包含让鼹鼠笑起来所需动画的所有图片名称,是一个数组,所以点击root element的第二列(Type,当前为Dictionary),将其修改为Array。
接着,单击Root单词右边的加号按钮,以在数组中添加一个新的entry。默认情况下,entry的类型是String(刚好是我们想要的).将这个entry的值修改为”mole_laugh1.png”。
继续点击加号按钮添加新的一条记录,直到所有的图片名称都添加进来了,如下图所示:
接着添加一个鼹鼠被打击所需要图片的属性列表文件,跟上面的步骤一样,不过记得将文件命名为hitAnim.plist文件,如下所示:

下面,我们就在代码中加载这些图片吧。打开MyScene.h文件,并为每个动画动作添加对应的属性,如下代码所示:
1
2
3
|
// Inside @interface MyScene @property (strong, nonatomic) SKAction *laughAnimation; @property (strong, nonatomic) SKAction *hitAnimation;
|
我们用上面这两个属性记录每个SKAction,这样可以在代码中方便的查找和重用。
接着在MyScene.m中添加一个方法,方法中的代码根据传入的属性列表创建并返回SKAction,如下所示:
1
2
3
4
5
6
7
8
9
10
11
12
13
|
- (SKAction *)animationFromPlist:(NSString *)animPlist { NSString *plistPath = [[NSBundle mainBundle] pathForResource:animPlist ofType:@"plist"]; // 1 NSArray *animImages = [NSArray arrayWithContentsOfFile:plistPath]; // 2 NSMutableArray *animFrames = [NSMutableArray array]; // 3 for (NSString *imageName in animImages) { // 4 [animFrames addObject:[SKTexture textureWithImageNamed:imageName]]; // 5 } float framesOverOneSecond = 1.0f/(float)[animFrames count]; return [SKAction animateWithTextures:animFrames timePerFrame:framesOverOneSecond resize:NO restore:YES]; // 6 }
|
理解上面的代码很重要,我们一行一行的来看看吧:
- 由于属性列表是包含在工程里面的,所以它应该在程序的”main bundle”中。这个helper方法计算出了属性列表文件在main bundle中的全路径。
- 这行代码是读取属性列表文件中的内容。NSArray中有一个名为arrayWithContentsOfFile的方法,此处将文件名传递进去,就可以将属性列表中的内容读取到数组中了。(注意,之所以可以这样,是因为属性列表中的root element设置为NSArray),如果是一个字典的话,可以使用[NSDictionary dictionaryWithContentsOfFile…]。
- 创建一个空的数组,用来存储动画的每一帧。
- 循环遍历数组获得每个图片名字。
- 获得每个图片的纹理,然后将其添加到数组中。
- 根据纹理数组返回一个SKAction。
接下来,在init方法的尾部为每个动画调用上面这个helper方法,如下代码所示:
1
2
|
self.laughAnimation = [self animationFromPlist:@"laughAnim"]; self.hitAnimation = [self animationFromPlist:@"hitAnim"];
|
最后一步:使用动画(让鼹鼠笑起来)。修改popMole方法,如下代码所示:
1
2
3
4
5
6
7
8
9
10
11
|
- (void)popMole:(SKSpriteNode *)mole { SKAction *easeMoveUp = [SKAction moveToY:mole.position.y + mole.size.height duration:0.2f]; easeMoveUp.timingMode = SKActionTimingEaseInEaseOut; SKAction *easeMoveDown = [SKAction moveToY:mole.position.y duration:0.2f]; easeMoveDown.timingMode = SKActionTimingEaseInEaseOut; SKAction *sequence = [SKAction sequence:@[easeMoveUp, self.laughAnimation, easeMoveDown]]; [mole runAction:sequence]; }
|
上面的代码与之前唯一不同的就是用laughAnimation action替代了pop down之前的延迟一秒。laughAnimation action会使用laughAnim.plist中的纹理,注意之前已经把restore设置为YES了,所以当动画播放完之后,鼹鼠会回到正常的表情。
现在编译并运行程序,可以看到鼹鼠跳出来,并笑了!如下图所示:

下面我们来看看如何停止鼹鼠的微笑动画,并开始敲打它们。
添加游戏逻辑
现在我们准备给游戏添加玩法,也就是游戏逻辑。基本想法就是会有一定数量的鼹鼠出现,当玩家打击到这些出现的鼹鼠时,就会获得相应的点数,玩家将尽力获得最多的点数。
因此,我们需要记录分数,并将分数显示在屏幕中。当鼹鼠显示完毕时候,我们将对用户做出提示。
先打开MyScene.h文件,并将下面这些实例变量添加到之前写的action后面:
1
2
3
4
|
@property (strong, nonatomic) SKLabelNode *scoreLabel; @property (nonatomic) NSInteger score; @property (nonatomic) NSInteger totalSpawns; @property (nonatomic) BOOL gameOver;
|
有一个用于显示分数的label,一个记录当前分数的变量,一个记录已经弹出了多少个鼹鼠,以及游戏是否结束。
接着,将下面的代码添加到文件MyScene.m文件中initWithSize:方法尾部:
1
2
3
4
5
6
7
8
9
10
|
// Add score label float margin = 10; self.scoreLabel = [SKLabelNode labelNodeWithFontNamed:@"Chalkduster"]; self.scoreLabel.text = @"Score: 0"; self.scoreLabel.fontSize = [self convertFontSize:14]; self.scoreLabel.zPosition = 4; self.scoreLabel.horizontalAlignmentMode = SKLabelHorizontalAlignmentModeLeft; self.scoreLabel.position = CGPointMake(margin, margin); [self addChild:self.scoreLabel];
|
上面的代码创建了一个用于分数显示的label。label位于屏幕的左下角,并且距离左下角的边距为10 point。并将label的属性horizontalAlignmentMode设置为SKLabelHorizontalAlignmentModeLeft,这样可以让label的文字从左侧对齐。
另外,此处并没有直接给label设置字体大小,而是先通过一个helper函数将字体大小做转换。这是因为在iPad和iPad retina上字体的尺寸要大一点。下面是convertFontSize方法的实现:
1
2
3
4
5
6
7
8
|
- (float)convertFontSize:(float)fontSize { if (UI_USER_INTERFACE_IDIOM() == UIUserInterfaceIdiomPad) { return fontSize * 2; } else { return fontSize; } }
|
如上代码所示,如果是iPad和iPad retina,那么就将字体尺寸变为原来的两倍,否则保持原样。
接着,我们需要添加触摸检测的代码,用来判断是否打击了某个鼹鼠。不过在开始之前,我们需要给鼹鼠添加一个flag,以此知道鼹鼠当前是否可以点击(tappable)。只有当鼹鼠笑的时候才可以点击,而当它移动或者在底下时是不可以点击的,也就是“安全的”。
我们可以创建一个SKSpriteNode的子类来记录这个flag,不过在此我们只需要存储一个信息,因此我们可以使用SKSpriteNode中的userData属性来代替。如下,再次将popMole做修改:
1
2
3
4
5
6
7
8
9
10
11
12
13
14
15
16
17
18
19
20
21
22
23
24
25
26
27
|
- (void)popMole:(SKSpriteNode *)mole { if (self.totalSpawns > 50) return; self.totalSpawns++; // Reset texture of mole sprite mole.texture = self.moleTexture; SKAction *easeMoveUp = [SKAction moveToY:mole.position.y + mole.size.height duration:0.2f]; easeMoveUp.timingMode = SKActionTimingEaseInEaseOut; SKAction *easeMoveDown = [SKAction moveToY:mole.position.y duration:0.2f]; easeMoveDown.timingMode = SKActionTimingEaseInEaseOut; SKAction *setTappable = [SKAction runBlock:^{ [mole.userData setObject:@1 forKey:@"tappable"]; }]; SKAction *unsetTappable = [SKAction runBlock:^{ [mole.userData setObject:@0 forKey:@"tappable"]; }]; SKAction *sequence = [SKAction sequence:@[easeMoveUp, setTappable, self.laughAnimation, unsetTappable, easeMoveDown]]; [mole runAction:sequence completion:^{ [mole removeAllActions]; }]; }
|
主要做了如下修改:
- 如果显示的鼹鼠数量有50个,那么立即返回,也就是说,在游戏中,50是最大的上限。
- 在函数开头,重置一下鼹鼠的图片(“mole_1.png”)。这样做是因为如果鼹鼠在上一次显示的时候被击打了,它仍然显示被击打的图片,所以在这里显示之前,需要重置一下。
- 在鼹鼠笑之前,先运行一个action,该action会在block中运行一段代码。该block将userData字典中名为tappable的key值设置为1,这样就可以表示鼹鼠可以被击打了。
- 类似的,当鼹鼠笑过之后,同样运行一个action:将tappable的值设置为0.
现在,鼹鼠有一个flag可以表示它是否可以被击中了。接着我们可以添加touchesBegan:方法了。将如下代码添加到文件中:
1
2
3
4
5
6
7
8
9
10
11
12
13
14
15
16
17
18
19
20
21
22
23
24
25
26
|
- (void)touchesBegan:(NSSet *)touches withEvent:(UIEvent *)event { UITouch *touch = [touches anyObject]; CGPoint touchLocation = [touch locationInNode:self]; SKNode *node = [self nodeAtPoint:touchLocation]; if ([node.name isEqualToString:@"Mole"]) { SKSpriteNode *mole = (SKSpriteNode *)node; if (![[mole.userData objectForKey:@"tappable"] boolValue]) return; self.score += 10; [mole.userData setObject:@0 forKey:@"tappable"]; [mole removeAllActions]; SKAction *easeMoveDown = [SKAction moveToY:(mole.position.y - mole.size.height) duration:0.2f]; easeMoveDown.timingMode = SKActionTimingEaseInEaseOut; // Slow down the animation by half easeMoveDown.speed = 0.5; SKAction *sequence = [SKAction sequence:@[self.hitAnimation, easeMoveDown]]; [mole runAction:sequence]; } }
|
上面的touchesBegan:方法首先获得触摸的位置,然后找到触摸位置对于的SKNode,如果node的名字是Mole,那么会进一步判断这个鼹鼠的tappable。
如果鼹鼠被击中,会将该鼹鼠设置为不可再被击中,并把分数增加。然后停止所有运行的action,并播放被击中的动画,动画播放完毕之后,就立即把鼹鼠放回洞中。
最后一步:添加一些代码对分数进行更新,并且做一个级别完成条件的检查,如下代码所示:
1
2
3
4
5
6
7
8
9
10
11
12
13
14
15
16
17
18
19
20
21
|
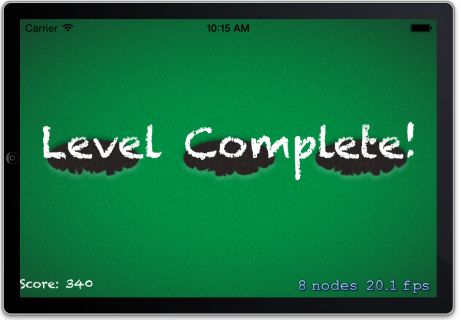
if (self.gameOver) return; if (self.totalSpawns >= 50) { SKLabelNode *gameOverLabel = [SKLabelNode labelNodeWithFontNamed:@"Chalkduster"]; gameOverLabel.text = @"Level Complete!"; gameOverLabel.fontSize = 48; gameOverLabel.zPosition = 4; gameOverLabel.position = CGPointMake(CGRectGetMidX(self.frame), CGRectGetMidY(self.frame)); [gameOverLabel setScale:0.1]; [self addChild:gameOverLabel]; [gameOverLabel runAction:[SKAction scaleTo:1.0 duration:0.5]]; self.gameOver = YES; return; } [self.scoreLabel setText:[NSString stringWithFormat:@"Score: %d", self.score]];
|
搞定!编译并运行程序,应该可以击打鼹鼠,并看到分数在增加!如下图所示:

添加音效
为了让程序更加有趣,下面我们给这游戏添加音效。先来这里下载音效吧。加压出文件,并把声音资源拖拽到WhackAMole文件件中。确保勾选上Copy items into destination group’s folder,然后单击Finish。
将下面声明语句添加到MyScene.h文件顶部:
1
|
#import <AVFoundation/AVFoundation.h>
|
接着将如下属性添加到@end前面:
1
2
3
|
@property (strong, nonatomic) AVAudioPlayer *audioPlayer; @property (strong, nonatomic) SKAction *laughSound; @property (strong, nonatomic) SKAction *owSound;
|
然后在MyScene.m文件中做如下修改:
1
2
3
4
5
6
7
8
9
10
11
12
13
14
15
16
17
18
19
20
|
// Add at the bottom of your initWithSize: method // Preload whack sound effect self.laughSound = [SKAction playSoundFileNamed:@"laugh.caf" waitForCompletion:NO]; self.owSound = [SKAction playSoundFileNamed:@"ow.caf" waitForCompletion:NO]; NSURL *url = [[NSBundle mainBundle] URLForResource:@"whack" withExtension:@"caf"]; NSError *error = nil; self.audioPlayer = [[AVAudioPlayer alloc] initWithContentsOfURL:url error:&error]; if (!self.audioPlayer) { NSLog(@"Error creating player: %@", error); } [self.audioPlayer play]; // Add at bottom of popMole method, change the sequence action to: SKAction *sequence = [SKAction sequence:@[easeMoveUp, setTappable, self.laughSound, self.laughAnimation, unsetTappable, easeMoveDown]]; // Add inside touchesBegan: method, change the sequence action to: SKAction *sequence = [SKAction sequence:@[self.owSound, self.hitAnimation, easeMoveDown]];
|
搞定!编译并运行程序试试吧!
何去何从
本文的代码工程在这里。
至此,关于如何制作通用程序的介绍到此结束!
如果你希望学习更多相关Sprite Kit内容,可以看看这本书:iOS Games by Tutorials。本书会告诉你需要知道的内容——从物理特性,到磁贴地图,以及粒子系统,甚至是制作自己的关卡编辑器。


