openGL纹理映射
第一次贴纹理,遇到一些比较麻烦的问题,记录在此备忘。
Texture Mapping可以说是让计算机生成的图像具有真实感的最好的机制,理论上可以将纹理图片映射到任意图形上(1
D,2D,3D都行),这样本来需要很多精心设计的多边形构成的真实感图像,只需在一个多边形上贴上一个纹理图片就行了,效率大大提高。同时如果纹理图片选择的好,再使用透明、重复……技术,画出来的图像将会很炫。
不说了,先贴代码,其实有两种实现的办法,一种是用glaux库,另一种是用glut库。glaux是淘汰的旧东西了,而且存在一些问题,所以有人提倡用glut的方法。但是网上盛传的版本还是glaux的占多数,本人也只试验了glaux的方法。如下
// textureTest.cpp : Defines the entry point for the console application. // //#include "stdafx.h" #include "stdio.h" #include <GL/glut.h> #include <GL/glaux.h> #include <iostream> using namespace std; #pragma comment(lib, "opengl32.lib")//Link to the OpenGL libraries #pragma comment(lib, "glu32.lib") #pragma comment(lib, "glut32.lib") #pragma comment(lib, "glaux.lib") bool load2DTexture(GLuint textureArray[], LPCSTR filename, int id); //bool LoadTexture(LPTSTR szFileName, GLuint &texid); void display() { glClear(GL_COLOR_BUFFER_BIT); glEnable(GL_TEXTURE_2D); glBegin(GL_QUADS);// Just create a simple square glTexCoord2f(0,1);//(NEW) This is the coordinate position on the texture we want to draw at this vertex (This is the upper left corner) glVertex2f(-4,4);//This is the upper left corner of the square glTexCoord2f(1,1);//This is the upper right corner of the bitmap glVertex2f(4,4); glTexCoord2f(1,0);//This is the lower right corner of the bitmap glVertex2f(4,-4); glTexCoord2f(0,0);//The lower left corner glVertex2f(-4,-4); glEnd(); //glPopMatrix(); glDisable(GL_TEXTURE_2D);//(NEW) Disable 2D texturing glFlush(); //glutPostRedisplay(); } GLuint textureArray[2]; int main(int argc, char* argv[]) { glutInit(&argc, argv); glutInitDisplayMode(GLUT_SINGLE|GLUT_RGB); glutInitWindowPosition(100,100); glutInitWindowSize(400,400); glutCreateWindow("A4"); glClearColor(0,0,0,0); gluOrtho2D(-5,5,-5,5); load2DTexture(textureArray,"textures.bmp",0); glutDisplayFunc(display); glutMainLoop(); return 0; } bool load2DTexture(GLuint textureArray[], LPCSTR filename, int id) { bool status=false; if(!filename) return false; //five steps in loading a texture // 1. load the image file // 2. generate a texture, acutually , opengl generates an unique id corresponding to this texture // when you use only one texture, it seems no need to use gen() and bind() function,but when there are many textures, you should assign them different ids using gen() // 3. binding, bingding a texture to opengl inner something, then you can use it // 4. set filter // 5. create texture image // after display, you may need to delete texture, because opengl allocates memory for storing texture infomation, otherwise there will be memory leak // maybe by using glTexImage(), it translate the bmp data to texture data and store the latter one in some place in the memory(could be video card memory or main memory) AUX_RGBImageRec *pBMP=auxDIBImageLoad(filename); //check if successfully load bmp file if(pBMP == NULL) return false; //generate one texture into our texture array glGenTextures(1,&textureArray[id]);//an unique id should be stored in this array after this operation glBindTexture(GL_TEXTURE_2D, textureArray[id]); glTexParameteri(GL_TEXTURE_2D,GL_TEXTURE_MIN_FILTER,GL_LINEAR); //set our filter glTexParameteri(GL_TEXTURE_2D,GL_TEXTURE_MAG_FILTER,GL_LINEAR); //set our filter glTexImage2D(GL_TEXTURE_2D, 0, 3, pBMP->sizeX, pBMP->sizeY, 0, GL_RGB, GL_UNSIGNED_BYTE, pBMP->data);//create our image //free the memory,which was used to store bmp info if(pBMP) { if(pBMP->data) { free(pBMP->data); } free(pBMP); } //glDeleteTextures(1,&textureArray[id]); delete texture in case of memory leak return true; }
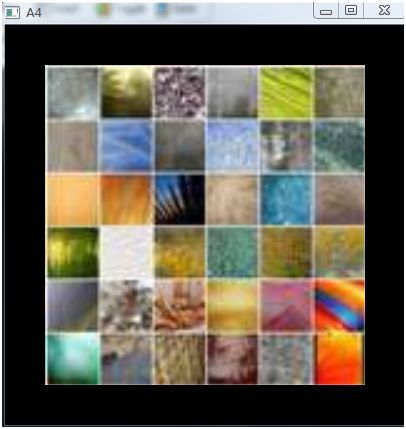
效果如下图:很简单就是在矩形上贴个图而已
下面是实现过程当中遇到的问题。
①首先,vs2008中没有glaux.h, glaux.lib, glaux.dll文件,所以网上下载了并放到相应的目录,dll文件放在System32目录下(vista),并且将他们的命名规范化,有可能下载文件名会是GlAux.Lib,这时候按照你自己的规范改下,原则就是你要记得自己改成了什么并且知道怎么用(但是有个弊端就是移植性降低,在别人机器上跑可能会要改少许代码)
②auxDBImageLoad函数的不接受字符串的文件名,接收LPWCSTR类型的字符串,转换很麻烦,试了很多做法,失败。其实这是微软为了统一各个平台而定义的数据格式,字符串采用unicode,最直接的解决办法就是将项目属性中字符集改成multi byte,但是后面会不会带来问题我也不知道了。
③移植到DEV C++上,链接失败,很多函数编译器不认识,以前一直是将project->option->parameter中的linker改成一个老师给的东西就行了,但是这次多了个glaux库,就得自己改了,发现直接点添加库然后到lib文件夹中选择相应库文件不行,后来将老师给的一串添了aux就搞定了。就是这一串: -lglaux -lglut32 -lglu32 -lopengl32 -lwinmm -lgdi32, 后来删了后面3个也没出问题,以后慢慢去明白吧。
其实在代码的前一部分用#pragma once命令可以链接库,而且这样更好,因为其他用户可以直接运行你的程序而不用配置项目的属性了,但是在dev中没成功,其库是以.a为后缀的,估计改下第二个参数也行……
下面也贴下glut的做法吧
1#include<glut.h> 2bool LoadTexture(LPTSTR szFileName, GLuint &texid) // Creates Texture From A Bitmap File 3{ 4 HBITMAP hBMP; // Handle Of The Bitmap 5 BITMAP BMP; // Bitmap Structure 6 7 glGenTextures(1, &texid); // Create The Texture 8 hBMP=(HBITMAP)LoadImage(GetModuleHandle(NULL), szFileName, IMAGE_BITMAP, 0, 0, LR_CREATEDIBSECTION | LR_LOADFROMFILE ); 9 10 if (!hBMP) // Does The Bitmap Exist? 11 return FALSE; // If Not Return False 12 13 GetObject(hBMP, sizeof(BMP), &BMP); // Get The Object 14 // hBMP: Handle To Graphics Object 15 // sizeof(BMP): Size Of Buffer For Object Information 16 // &BMP: Buffer For Object Information 17 18 glPixelStorei(GL_UNPACK_ALIGNMENT, 4); // Pixel Storage Mode (Word Alignment / 4 Bytes) 19 20 // Typical Texture Generation Using Data From The Bitmap 21 glBindTexture(GL_TEXTURE_2D, texid); // Bind To The Texture ID 22 glTexParameteri(GL_TEXTURE_2D, GL_TEXTURE_MIN_FILTER, GL_LINEAR); // Linear Min Filter 23 glTexParameteri(GL_TEXTURE_2D, GL_TEXTURE_MAG_FILTER, GL_LINEAR); // Linear Mag Filter 24 glTexImage2D(GL_TEXTURE_2D, 0, 3, BMP.bmWidth, BMP.bmHeight, 0, GL_BGR_EXT, GL_UNSIGNED_BYTE, BMP.bmBits); 25 26 DeleteObject(hBMP); // Delete The Object 27 28 return TRUE; // Loading Was Successful 29}
其中有三个函数需要进一步的解释,分别是LoadImage(),GetModuleHandle,GetObject()。
LoadImage()在系统中的定义如下:
1
2
3
4
5
6
7
8
9
10
11
12
13
14
15
16
17
18
19
20
21
22
23
24
25
26
27
28
29
参数分别表示如下:
HINSTANCE---------包含所需要图片的实例的句柄。
LPCSTR--------------图片所在路径及文件名。
UINT-------------------图片类型。
int-----------------------图片宽度。
int-----------------------图片高度。
UINT-------------------load flags(具体意义还没有弄清楚)
而在LoadImage函数中HINSTANCE参数是通过GetModuleHandle(NULL)获取的,GetModuleHandle的函数声明如下:
HMODULE GetModuleHandle( LPCTSTR lpModuleName);
函数的声明挺简单的,但对这个函数的解释却不少,解释如下:
用指针指向一个包含模块名以NULL字符结尾的串,模块是.dll或.exe文件。如果文件扩展名省略,则增加默认的扩展名.dll。文件名串可以是省略号(...),表示模块名没有扩展名。这个串不是必须指定一个路径。当指定一个路径时,确定要用反斜线(/),而不是斜线(/)。这个模块名将和当前映射到调用进程地址空间的模块名进行独立地比较。假如这个参数是NULL,函数将返回创建调用进程(.exe文件)的文件的句柄。
如果函数调用成功,返回值是某一模块的句柄。如果函数调用失败,返回NULL。
最后就是GetObject()函数的注释,如下:
函数原型:int GetObject(HGDIOBJ hgdiobj, int cbBuffer, LPVOID lpvObject);
参数:
hgdiobj:指向感兴趣的图形对象的句柄,它可以是这样的一个句柄:一个逻辑位图、一个刷子、一种字体、一个调色板、笔或通过调用CreateDIBsection函数创建的与设备无关位图。
cbBuffer:指定将要写到缓冲区的信息的字节数目。
lpvObject:指向一个缓冲区的指针,该缓冲区将要检索指定图形对象的信息。
这三个参数暂时还不能完全的理解,只是现在会使用就够了,以后再做深究。
好了,以上两种情况下的BMP纹理图像的加载就是这么多,如果以后有更好的方法再做更新。
特别需要注意的一点是,以上两种方法加载对.bmp位图的纹理图片,在加载之前应仔细检查图片是不是.bmp格式的,检查方法,用二进制工具UltraEdit打开图片,若开头两个字符数是"BM",说明是.bmp文件,否则不是.
