Working With Code Snippets In Sublime Text
Along the entire process of coding, developers (including me) tend to rewrite or reuse the same pieces of code over and over again. One way to eliminate this repetitive process is to keep codes we frequently use closeby in the form of snippets. This makes it easy to retrieve and access them easily.
To help make your coding more efficient, Sublime Text (code editor) provides developers with the ability to add custom-code snippets in the editor with ease. In this post, we will see how to create, manage, and insert code snippets to significantly streamline our workflow in Sublime Text.
Let’s have a look.
Recommended Reading: Top 10 Free Source Code Editors – Reviewed
Creating New Snippet
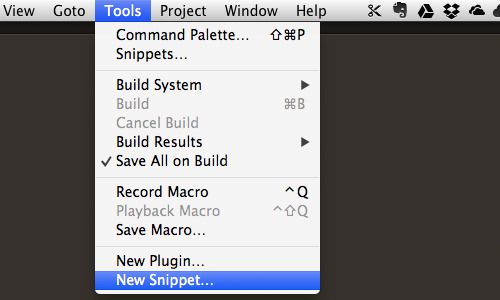
To create a new snippet, we go to Tools > New Snippet.
Sublime Text will then deliver the following template to set the new snippet.
- <snippet>
- <content><![CDATA[
- Hello, ${1:this} is a ${2:snippet}.
- ]]></content>
- <!-- Optional: Set a tabTrigger to define how to trigger the snippet -->
- <!-- <tabTrigger>hello</tabTrigger> -->
- <!-- Optional: Set a scope to limit where the snippet will trigger -->
- <!-- <scope>source.python</scope> -->
- </snippet>
We simply add the code snippet within <![CDATA[ ]]> in <content> element, for example:
- <content><![CDATA[
- -webkit-box-shadow: 1px 1px 1px 0px rgba(0, 0, 0, 0.5);
- -moz-box-shadow: 1px 1px 1px 0px rgba(0, 0, 0, 0.5);
- box-shadow: 1px 1px 1px 0px rgba(0, 0, 0, 0.5);
- ]]></content>
Then, we set the trigger keyword within <tabTrigger> for Sublime Text to autocomplete the snippet. The name of the trigger should be easily to remember, yet closely corresponds to the snippet. In this example, we set the trigger name with the keyword shadow.
- <tabTrigger>shadow</tabTrigger>
Lastly, we set the scope in which this snippet can be added. Since we added CSS3 Box Shadow, we might want to limit the usage for this snippet to only in a CSS stylesheet.
- <scope>source.css</scope>
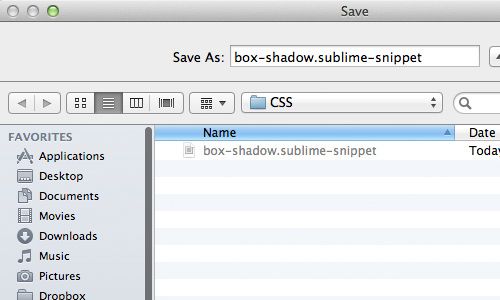
At this point, we are all set, and we can save the snippet. To make our snippets organized, we will create a new folder dedicated to saving CSS. Further, you might want to create more folders for saving the other types of codes, such HTML, JavaScripts, PHP, Python, and so on.
One thing must be noted here: the files must be saved within a .sublime-snippet extension, otherwise Sublime Text will not recognize it as a snippet.
Insert The Snippet
In the editor, Sublime Text will show the options as we type the trigger keyword. We can insert the snippet by selecting it from the options or completing the trigger keyword and hitting the Tab key.
As we have specified the scope to document with CSS syntax, this snippet will not be triggered and automatically added in other types of document, as shown below.
Tab Key And Fields Markers
Furthermore, there are times when we need to edit particular specifications within the code snippets. Given the example of our CSS3 box shadow above, we might want to change the color of the shadow, the shadow blur, or the horizontal offset.
Sublime Text also provides the ability to highlight specific fields, which we want to edit, after inserting the code snippet. These fields can be specified with $ sign followed with { } and the order of the field, as follows.
- -webkit-box-shadow: ${1:1px} ${2:1px} ${3:1px} ${4:0px} ${5:rgba(0, 0, 0, 0.5)};
- -moz-box-shadow: ${1:1px} ${2:1px} ${3:1px} ${4:0px} ${5:rgba(0, 0, 0, 0.5)};
- box-shadow: ${1:1px} ${2:1px} ${3:1px} ${4:0px} ${5:rgba(0, 0, 0, 0.5)};
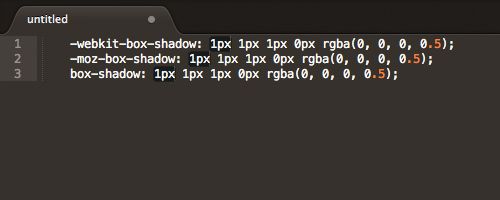
In the example above, the first highlighted field would be ${1:1px}, and to the next following few fields within the order as we hit the Tab key. In the following screenshot, notice how the first values of the box-shadow property, including the vendor prefixes, are all highlighted together.
Sublime Text has multiple-cursor feature, which allow us to select or highlight several lines at once and make editing much faster. Then, hit the Tab to highlight and edit the field number ${2:1px}and the next following order.
Installing Snippet Package
You don’t have to do everything on your own. There are several packages that we can install for almost any type of code snippets.
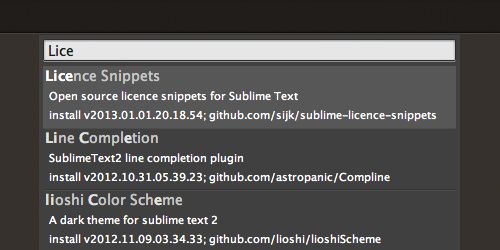
Assuming that you have install the Package Control, you can hit Shift + Command + P, then go to Package Control and search for the snippet package.
In the following example, I find that the package for SASS code snippet is available.
Even the snippet for Code License is also available.
Find and install the code snippets you need, and you are all set. You don’t have to memorize the entire trigger keyword for the snippets as Sublime Text will show you the options as you are typing in the codes.
That’s it for now, we hope this little tip can be useful to enhance your workflow on writing codes. Happy Coding!
Further Resource
For further reference on creating and customizing the code snippet, you can head over to the following page.


