How to Develop and Test Device Drivers in Windows CE 5.0
Summary: This article provides an introduction to developing and testing a Windows CE 5.0 device driver. It provides step-by-step instructions for creating a stream driver, creating a custom Windows CE Test Kit (CETK) test, and writing an application to test the driver. It will take approximately 60 minutes to complete. (25 printed pages)
Part 1: Setting Up a Device Driver
In this exercise, you will use Platform Builder to add a project that will act as a device driver.
Before you begin the process of writing drivers, you should understand the purpose of a device driver. Drivers abstract the underlying hardware from the operating system, and better still from an application developer. An application developer shouldn't need to know the specifics of your display hardware or your serial hardware — for example, whether a serial device is implemented in a Universal Asynchronous Receiver/Transmitter (UART) or a field-programmable gate array (FPGA). For the most part, it makes no sense for an application developer to need to know how the hardware is implemented.
Microsoft® Windows® exposes application programming interfaces (APIs) for a developer to call into the hardware without needing to know what the physical hardware is. For example, to write to a serial port, an application developer simply calls CreateFile( ) on COMx (where x donates the serial port number you want to open, for example COM1 for serial port 1), calls WriteFile( ) to write some bytes of data to the serial port, and then calls CloseHandle( ) to close the serial port. The same sequence of APIs works no matter what the underlying serial hardware is (or which Windows operating system you are running).
The same is also true of other APIs: If you want to write to a line to the display surface, you would simply call PolyLine( ), MoveToEx( ), or LineTo( ). As an application developer, for the most part, you don't need to know what the display hardware is. There are APIs to call that will return the dimensions of the display surface, the color depth, and so on.
The good news is that developers have a consistent, well-known set of APIs to call. These APIs abstract their application from the underlying hardware. This is crucial because an application developer has no way of knowing whether the application will run on a laptop, Tablet PC, or desktop computer. Whether the computer is running at 1024×768 or 1600×1200, the application developer can query the screen resolution and color depth at run time and therefore doesn't need to build the application to run only on specific hardware.
A driver is simply a dynamic-link library (DLL). DLLs are loaded into a parent process address space; the parent process can then call any of the interfaces exposed from the DLL. The driver is typically loaded by its parent process through a call to LoadLibrary( ) or LoadDriver( ). LoadDriver not only loads the DLL into the parent process address space, but also makes sure the DLL isn't paged out.
How does a calling process know which APIs or functions are exposed from your DLL or driver? The parent process calls GetProcAddress( ), which takes the name of a function and the hInstance of the loaded DLL. The call returns a pointer to the function, if it exists, or NULL if the function is not exposed from the DLL.
Stream drivers expose a well-known set of functions. For a stream driver, you want to be able to write a stream of bytes to the device, or read a stream of bytes from the device. Therefore, in the serial port example used earlier, you would expect the following set of functions to be exposed from your driver: Open, Close, Read, and Write. Stream drivers expose some additional functions: PowerUp, PowerDown, IOControl, Init, and DeInit.
You can use an existing operating system image for the emulator platform (the Basic Lab MyPlatform platform is ideal). You can then add your DLL/driver project to the platform.
After the platform is built and downloaded (this shows that the operating system starts and runs well), you need to create your skeleton driver. You can use Platform Builder New Project or File command on the File menu to create a Microsoft Windows CE DLL. There is no difference between creating a DLL to expose functions or resources and creating a DLL to be used as a driver; the only difference is which functions the DLL exposes, and how the DLL is registered or used on the platform.
As an aside, one way to create internationalized applications is to create a base application that contains one set of core language strings, dialog boxes, and resources, and then create a number of external DLLs, each of which contains the dialog boxes, strings, and resources for a specific locale. The application can then load the appropriate language resources on the fly. You can add languages to the application by simply adding DLL files. This and other interesting topics are described in the book Developing International Software available on the Microsoft Press® Web site.
To add a project that will act as the device driver
- Use Platform Builder to open the existing MyPlatform workspace.
- On the File menu, click New Project or File.
- Select WCE Dynamic-Link Library, give it an appropriate name (for example, StreamDrv), and then click OK, as shown in the following illustration.
- On the page shown in the following illustration, fill in as much or as little information as you want, and then click Next.
- Click A simple Windows CE DLL project, as shown in the following illustration.
- Click Finish to complete the wizard.
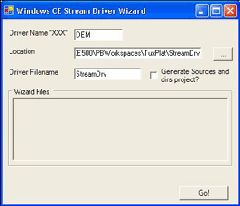
At this point, the DLL contains only an empty DllMain function. You can expose functions to be called by an application, expose resources (perhaps to make this part of a language/culture-aware application), or make this into a device driver. In this article, you'll use the Windows CE Stream Driver Wizard to create your skeleton stream driver.
In Windows CE, stream drivers are opened just like files, and are opened by means of a unique three-letter prefix (for example, COM).
- Choose a unique three-letter identifier for your driver. In the Location box, type the full path for the stream driver that you created previously. Or, use the browse button to browse to the PBWorkspaces directory in your Platform Builder installation, find the platform that you created previously, and then find the name of the stream driver (in the earlier example, this was PBWorkspaces/TuxPlat/StreamDrv).
- In the Driver Filename box, type a name for the driver. As shown in the following illustration, use the same name that you used earlier (StreamDrv) to ensure that the original file created in Platform Builder is overwritten.
- Press Go, and the stream driver source will be generated.
Part 2: Testing the Stream Driver Test Code
You have now written the basic code for a custom stream driver for Windows CE. At the moment, the driver isn't connected to any hardware.
After the driver is written, you need to provide a way for developers to test it. Windows CE ships with a Windows CE Test Kit (CETK), which provides driver tests for a range of driver types, including networking, Bluetooth, serial, and display. The driver that you wrote is a custom stream driver that doesn't expose the same functionality as existing driver tests, so you need to write a custom test for the driver. Although you could just write an application to exercise the driver, it's perhaps better to provide a CETK module that can be used during development and shipped to customers to test the driver on shipping hardware.
In this part of the exercise, you will perform the following procedures:
- Create a skeleton Tux module
- Add test code for a custom driver to the Tux DLL
- Rebuild an operating system
- Set a breakpoint
To create a skeleton Tux module
- In Platform Builder, on the File menu, click New Project or File.
- Select WCE TUX Dynamic-Link Library, type TuxTest as the project name, enter a location, click Workspace Project, and then click OK, as shown in the following illustration. (In practice, you can choose either project type; for this article, click Workspace Project).
- On the page shown in the following illustration, fill in as much or as little information as you want, and then click Next.
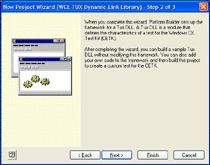
- Read the information on the screen shown in the following illustration, and then click Next.
- On the final page, you can optionally select CETK under Release Type, as shown in the following illustration. This option turns off optimizations for retail binaries to increase debugging productivity. Click Finish.
- Click View | File View, and then expand the Projects tree to show the tux source, as shown in the following illustration.
The important files to note in the preceding illustration are:
- ft.h — This file contains the function table used by the tux DLL.
- test.cpp — This file contains the test procedures called from the function table.
- TuxStreamTest.cpp — This file contains DLLMain and ShellProc, the latter of which is called from Tux.exe.
To add the custom driver test code to the Tux DLL
- Open the source Test.cpp.
- Use CodeClip to get the Tux_Custom_Test | TuxCode source.
- Replace the contents of the function TestProc with the code from CodeClip.
You will notice that the code in Test.cpp loads a driver called Demo.dll. For this article, you created a driver called StreamDrv. You will need to modify the source to load your StreamDrv.dll driver.
- Locate the source in Test.cpp that calls LoadLibrary, and then modify the name of the driver being loaded from Demo.dll to StreamDrv.dll.
- In the Platform Builder File View, right-click the TuxTest project, and then click Build Current Project.
You also need to add the Windows CE Test Kit component from the catalog.
- Under Device Drivers, locate the Windows CE Test Kit component in the catalog, and then select Add the Windows CE Test Kit to add the component to your platform.
Note Adding the component to your platform doesn't add any files to the final operating system image; it adds the Clientside files to the build release folder. From Platform Builder, you can download the Clientside application and run the application on your target device.
You now need to rebuild your operating system to incorporate these changes.
To rebuild your operating system
- In Platform Builder, select BuildOS | Sysgen.
The build process will take approximately five minutes to complete.
It would be useful to set a breakpoint in the entry point of the stream driver to see when the driver is loaded.
To set a breakpoint
- Click File View, open the StreamDrv project, and then open Source files.
- Locate and open StreamDrv.cpp.
- Locate DllMain, and then locate and click the switch statement.
- Set a breakpoint by pressing F9.
- Download the operating system to the emulation environment by clicking Target | Attach.
You will see the following debug output, and the breakpoint will fire. Note that this happens long before the user interface (UI) of the operating system has loaded.
Copy
4294780036 PID:23f767b6 TID:23f767e6 0x83fa6800: >>> Loading module streamdrv.dll at address 0x01ED0000-0x01ED5000
Loaded symbols for 'C:/WINCE500/PBWORKSPACES/DRVDEMO/RELDIR/EMULATOR_X86_DEBUG/STREAMDRV.DLL'
- Disable the breakpoint by clicking the switch statement, and then pressing F9.
- Allow the operating system to continue loading by pressing F5.
You've now built a Windows CE 5.0 operating system that contains a custom stream driver, and you've seen the driver load during the boot sequence of the operating system.
Part 3: Examining the Driver
In this exercise, you will perform the following procedures:
- Use a command-line tool to look at the exposed functions from the driver
- Use the Remote System Information tool to examine the driver
- Determine that the driver is loaded
The first way to examine the device driver that you created is to look at the exposed functions from the driver. There is a command-line tool that ships with Windows CE called Dumpbin, which you can use to examine the imports to an application or module, or to examine the exports from a DLL (or driver).
To use the command-line tool to look at the exposed functions from the driver
- In Platform Builder, click Build OS | Open Release Directory. This action opens a Command Prompt window in the build release folder for your current workspace.
- Type dumpbin –exports StreamDrv.dll
The following illustration shows how the output looks. You can see that all of the expected stream driver functions are exposed from the driver; functions are exposed from a DLL through the project's .def file.
- Close the Command Prompt window by typing Exit
The contents of the StreamDrv.def file are as follows.
Copy
LIBRARY DemoDriver
EXPORTS
DEM_Init
DEM_Deinit
DEM_Open
DEM_Close
DEM_IOControl
DEM_PowerUp
DEM_PowerDown
DEM_Read
DEM_Write
DEM_Seek
CustomFunction
CustomFunctionEx
The second way that you can examine the driver is through the Remote System Information tool.
To examine the driver through the Remote System Information tool
- In Platform Builder, click Tools | Remote System Information.
- Select Windows CE Default Platform | Default Device, and then click OK, as shown in the following illustration.
This procedure connects the Remote System Information application to the current active platform being used by Platform Builder. The following illustration shows the result.
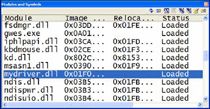
You can also use the list of loaded modules to determine that your driver is loaded.
To determine that the driver is loaded
- In Platform Builder, use the Target Control window (gi mod), or View | Debug Windows | Modules and Symbols.
The following illustration shows the result of this procedure.
Part 4: Using the Windows CE Test Kit
The Windows CE Test Kit contains a device-side component and a desktop component. The device side component is called Clientside.exe, which you added to your workspace by adding the CETK component from the catalog. Note that adding the Clientside.exe application to the workspace doesn't add any files to the final operating system image, but it does copy the application to the build release folder.
Before running the CETK on the desktop computer, you need to start the Clientside.exe application on the device. The reason the tools are not linked (like a remote tool) is that the CETK will also operate on shipping (retail) devices, such as the Pocket PC.
In this part of the exercise, you will perform the following procedures:
- Examine the Windows CE Test Kit user interface
- Run one of the standard tests
To examine the Windows CE Test Kit user interface
- In Platform Builder, on the Tools menu, click Windows CE Test Kit.
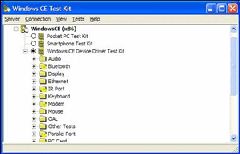
This step starts the Windows CE Test Kit application, as shown in the following illustration. Note that this is not a standard remote tool. Most of the remote tools that ship with Windows CE use the Kernel Independent Transport Layer (KITL), a transport that abstracts the tools from the underlying communication hardware so that the tools will run over Ethernet, serial, 1394, USB, or other transports.
The Windows CE Test Kit typically connects over sockets, although for Windows CE 5.0, the tools have been updated to also support KITL.
- In the Windows CE Test Kit, click Connection | Start Client.
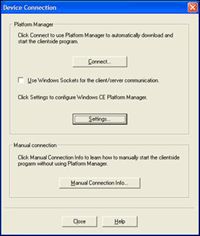
This step displays the Device Connection dialog box, where you can choose whether to connect over sockets or KITL.
- Make sure that the Use Windows Sockets for the client/server communication check box is cleared, as shown in the following illustration.
- Click Connect.
In the standard user interface for remote tools (KITL), select Windows CE Default Platform | Default Device, and then click OK, as shown in the following illustration.
This procedure starts Clientside.exe on the target device and makes a connection to the target. After the connection is made, the CETK enumerates the supported devices on the target platform, and nonsupported devices are disabled in the CETK.
After the CETK has connected to the target and enumerated devices, the UI looks similar to the following illustration. Notice that certain hardware categories, such as Bluetooth, IR Port, and Modem, are disabled.
Before adding a custom test to the CETK, you can run one of the standard tests to see how the test behaves.
To run a standard test
- In the CETK, expand Windows CE (x86).
- Locate and expand Serial Port.
- Right-click Serial Port Driver Test, and then click Quick Start.
This step runs just this one test without also running the other selected tests. The UI indicates that the test is in progress, as shown in the following illustration.
The CETK provides updates on the progress of the test and the outcome of the test. You can also examine the debug output in Platform Builder to see the progress of the test, as shown in the following example.
Copy
405910 PID:83d4ee4a TID:83ea5a8a *** Test Name: Set event mask and wait for thread to close comm port handle
405920 PID:83d4ee4a TID:83ea5a8a *** Test ID: 1007
405920 PID:83d4ee4a TID:83ea5a8a *** Library Path: /serdrvbvt.dll
405920 PID:83d4ee4a TID:83ea5a8a *** Command Line:
405920 PID:83d4ee4a TID:83ea5a8a *** Result: Passed
405920 PID:83d4ee4a TID:83ea5a8a *** Random Seed: 15595
405930 PID:83d4ee4a TID:83ea5a8a *** Thread Count: 1
405930 PID:83d4ee4a TID:83ea5a8a *** Execution Time: 0:00:05.110
405930 PID:83d4ee4a TID:83ea5a8a *** ^^^^^^^^^^^^^^^^^^^^^^^^^^^^^^^^^^^^^^^^^^^^^^^^^^^^^^^^^^^^^^^^^^
If the CETK UI indicates that the serial port test has failed on the emulator (as shown in the following illustration), the failure may not be due to a complete failure of every test. It may indicate that only a portion of the overall test suite has failed, which may actually be expected behavior.
- Right-click Serial Port Driver Test [Failed], and then click View Results.
A window like that shown in the following illustration appears.
Looking at the results shown in the preceding illustration, you can see that 10 individual tests have been run. All of these tests have passed except for Set and verify receive timeout.
To get more information, you can click the individual test.
Part 5: Creating a Custom CETK Test
By using the Platform Builder User-Defined Test Wizard, you can create a custom CETK test. This test will verify the exported functions from a custom stream driver (which you've also added to the platform).
In this part of the exercise, you will perform the following procedures:
- List the custom stream driver test in the CETK
- Run the custom stream driver test
To list the custom stream driver test in the CETK
- In the CETK, click Tests | User Defined.
This step starts the User-Defined Test Wizard. The first page of the wizard is for information only.
- Click Next, as shown in the following illustration.
- Click Add a New Test, and then click Next, as shown in the following illustration.
- Enter the following information, and then click Next:
- In the Name of Test box, type Custom Stream Driver Test
- In the Tux Module (DLL) box, browse to C:/Wince500/PBWorkspaces/MyPlatform/RelDir/Emulator_x86_Debug, and then select either test.dll or TuxTest.dll (this depends on the name of the Tux test you used in Platform Builder).
- In the Command Line box, leave the default setting for the current test.
- In the Processor box, type x86
The following illustration shows how the information appears on the current wizard page.
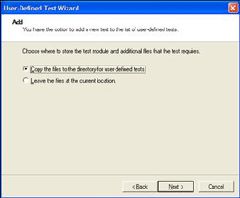
- Click Copy the files to the directory for user-defined tests, and then click Next, as shown in the following illustration.
You want to copy the custom driver test (your DLL) to the folder for user-defined tests. If you were to delete your existing workspace, the custom driver test would still be intact.
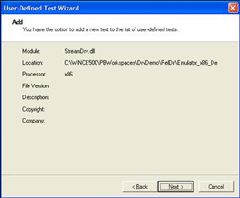
- Click Next, as shown in the following illustration.
- Click Finish, as shown in the following illustration.
The CETK application doesn't automatically refresh with the new tests. You need to resynchronize the desktop application to view the newly added test.
- Right-click Windows CE (x86), and then click Redetect Peripherals.
This procedure adds a new driver category called User Tests. You've added only one test, so when you expand this item, you will see only Custom Stream Driver Test.
Note The DLL for the custom stream driver test has been copied to the following location: C:/Program Files/Windows CE Platform Builder/5.00/CEPB/wcetk/user/x86.
To run the custom stream driver test
- In the list of available tests, expand User Tests.
- Right-click Custom Stream Driver Test, and then click Quick Start.
Make a note of the following debug information being displayed in Platform Builder.
Copy
1162630 PID:3c92032 TID:3efe3ea *** TEST STARTING
1162630 PID:3c92032 TID:3efe3ea ***
1162630 PID:3c92032 TID:3efe3ea *** Test Name: Sample test
1162630 PID:3c92032 TID:3efe3ea *** Test ID: 1
1162640 PID:3c92032 TID:3efe3ea *** Library Path: /test.dll
1162650 PID:3c92032 TID:3efe3ea *** Command Line:
1162650 PID:3c92032 TID:3efe3ea *** Random Seed: 26648
1162650 PID:3c92032 TID:3efe3ea *** Thread Count: 0
1162650 PID:3c92032 TID:3efe3ea *** vvvvvvvvvvvvvvvvvvvvvvvvvvvvvvvvvvvvvvvvvvvvvvvvvvvvvvvvvvvvvvvvvv
1162660 PID:3c92032 TID:3efe3ea test: ShellProc(SPM_BEGIN_TEST, ...) called
1162660 PID:3c92032 TID:3efe3ea BEGIN TEST: "Sample test", Threads=0, Seed=26648
1162690 PID:3c92032 TID:3efe3ea Custom Stream Driver Test Starting
1162690 PID:3c92032 TID:3efe3ea Custom Driver Test - Loading Demo.DLL
1162710 PID:3c92032 TID:3efe3ea 0x83d3dc28: >>> Loading module streamdrv.dll at address 0x01ED0000-0x01ED5000
1162720 PID:3c92032 TID:3efe3ea StreamDrv - DLL_PROCESS_ATTACH
1162720 PID:3c92032 TID:3efe3ea Custom Driver Test - Loaded Demo.DLL OK
1162740 PID:3c92032 TID:3efe3ea Custom Driver Test - Checking Interfaces...
1162740 PID:3c92032 TID:3efe3ea Custom Driver Test - Checking DEM_Open
1162740 PID:3c92032 TID:3efe3ea Custom Driver Test - DEM_Open OK
1162740 PID:3c92032 TID:3efe3ea Custom Driver Test - Checking DEM_Close
1162750 PID:3c92032 TID:3efe3ea Custom Driver Test - DEM_Close OK
1162750 PID:3c92032 TID:3efe3ea Custom Driver Test - Checking DEM_Read
1162750 PID:3c92032 TID:3efe3ea Custom Driver Test - DEM_Read OK
1162770 PID:3c92032 TID:3efe3ea Custom Driver Test - Checking DEM_Write
1162790 PID:3c92032 TID:3efe3ea Custom Driver Test - DEM_Write OK
1162790 PID:3c92032 TID:3efe3ea Custom Driver Test - Checking DEM_Init
1162790 PID:3c92032 TID:3efe3ea Custom Driver Test - DEM_Init OK
1162790 PID:3c92032 TID:3efe3ea Custom Driver Test - Checking DEM_Deinit
1162800 PID:3c92032 TID:3efe3ea Custom Driver Test - DEM_Deinit OK
1162800 PID:3c92032 TID:3efe3ea Custom Driver Test - Checking DEM_PowerUp
1162800 PID:3c92032 TID:3efe3ea Custom Driver Test - DEM_PowerUp OK
1162800 PID:3c92032 TID:3efe3ea Custom Driver Test - Checking DEM_PowerDown
1162810 PID:3c92032 TID:3efe3ea Custom Driver Test - DEM_PowerDown OK
1162810 PID:3c92032 TID:3efe3ea Custom Driver Test - Checking DEM_IOControl
1162810 PID:3c92032 TID:3efe3ea Custom Driver Test - DEM_IOControl OK
1162810 PID:3c92032 TID:3efe3ea Custom Driver Test - Checking DEM_Seek
1162820 PID:3c92032 TID:3efe3ea Custom Driver Test - DEM_Seek OK
1162830 PID:3c92032 TID:3efe3ea StreamDrv - DLL_PROCESS_DETACH
1162840 PID:3c92032 TID:3efe3ea 0x83d3dc28: <<< Unloading module streamdrv.dll at address 0x01ED0000-0x01ED5000
1162870 PID:3c92032 TID:3efe3ea test: ShellProc(SPM_END_TEST, ...) called
1162870 PID:3c92032 TID:3efe3ea END TEST: "Sample test", PASSED, Time=0.180
1162870 PID:3c92032 TID:3efe3ea *** ^^^^^^^^^^^^^^^^^^^^^^^^^^^^^^^^^^^^^^^^^^^^^^^^^^^^^^^^^^^^^^^^^^
1162870 PID:3c92032 TID:3efe3ea *** TEST COMPLETED
1162880 PID:3c92032 TID:3efe3ea ***
1162880 PID:3c92032 TID:3efe3ea *** Test Name: Sample test
1162880 PID:3c92032 TID:3efe3ea *** Test ID: 1
1162890 PID:3c92032 TID:3efe3ea *** Library Path: /test.dll
1162890 PID:3c92032 TID:3efe3ea *** Command Line:
1162890 PID:3c92032 TID:3efe3ea *** Result: Passed
1162900 PID:3c92032 TID:3efe3ea *** Random Seed: 26648
1162910 PID:3c92032 TID:3efe3ea *** Thread Count: 1
1162910 PID:3c92032 TID:3efe3ea *** Execution Time: 0:00:00.180
The test completed without any warnings or errors. You can also examine the test results in the client.
Part 6: Determining Who Owns the Stream Driver
So far, you've seen the custom stream driver load through Platform Builder debug messages, through a breakpoint in the driver source, and through a custom CETK test.
In this part of the exercise, you will perform the following procedures:
- Use the Remote Process Viewer to determine which process is loading the driver
- Display information
To use the Remote Process Viewer to determine which process is loading the driver
- In Platform Builder, click Tool | Remote Process Viewer.
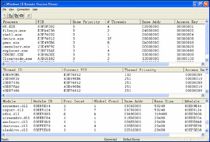
The Process Viewer application displays a list of all the currently running processes, in addition to the DLLs or modules loaded into each process address space.
- Locate and select device.exe.
The following illustration shows the list of DLLs loaded into the Device.exe process address space. Device.exe is the device driver manager for Windows CE.
To display information
- By using Platform Builder, write a Microsoft Win32® application that writes data to the custom stream driver and reads back and displays the information. You can use the MessageBox API to do this.
The APIs that you need for this task are:
- CreateFile
- WriteFile
- ReadFile
- CloseHandle
- MessageBox
Summary
- Drivers are simply DLLs.
- Drivers are mapped into the Device.exe process address space.
- Drivers expose a known set of interfaces.
- It's relatively easy to add a device driver to a Windows CE operating system image.
- The Windows CE Test Kit is available to assist with the development and debugging of a platform.
- Writing custom CETK tests is fairly easy.


