在windows的PHP环境下安装Nginx。
以前一直是用apache做PHP的web服务器。现在看看如何安装Nginx作为PHP的web服务器。
1. 下载Ngix : http://nginx.org/download/nginx-1.1.12.zip 写这篇文章时,windows的最新版本。
2. 下载PHP与Nginx的cgi连接 : http://redmine.lighttpd.net/attachments/660/RunHiddenConsole.zip 。
3. 将下载的Nginx 解压到 E:\nginx目录下。
4.修改E:\nginx\conf中的nginx.conf配置文件。修改后如下:(去掉了没用的,可以直接复制,覆盖nginx.conf,只需修改第四步和第七步的项目目录即可。)
- worker_processes 1;
- error_log logs/error.log; #第一步:打开错误日志
- events {
- worker_connections 1024;
- }
- http {
- include mime.types;
- default_type application/octet-stream;
- sendfile on;
- keepalive_timeout 65;
- server {
- listen 8088; #第二步:修改端口
- server_name localhost;
- charset utf-8; #第三步:修改字符集
- location / {
- root E:/workspace; #第四步:修改项目目录
- index index.php index.html index.htm; #第五步:加入indx.php
- autoindex on
- }
- error_page 500 502 503 504 /50x.html;
- location = /50x.html {
- root html;
- }
- location ~ \.php$ { #第七步:打开php的location,并进行如下配置
- root E:/workspace;
- fastcgi_pass 127.0.0.1:9000;
- fastcgi_index index.php;
- fastcgi_param SCRIPT_FILENAME $document_root$fastcgi_script_name; #修改成项目目录
- include fastcgi_params;
- }
- }
- }
这里的“$document_root”就是指前面“root”所指的站点路径
5. 打开php.ini。我的php.ini在C:\WINDOWS\php.ini 。修改以下配置:
- cgi.force_redirect = 1
- cgi.fix_pathinfo=1
- cgi.rfc2616_headers = 1
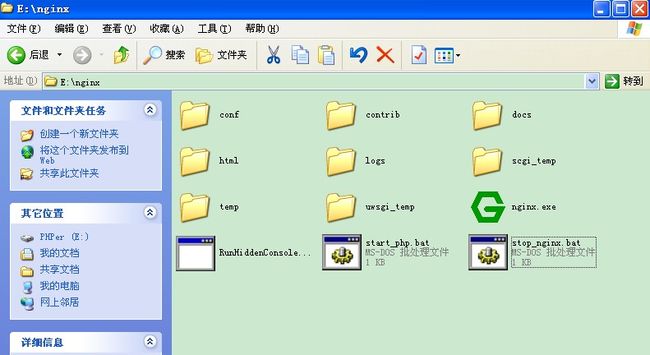
6.将下载的RunHiddenConsole.zip解压到E:\nginx\RunHiddenConsole.exe。
7.编写启动bat文件,以后更加好的运行nginx和php.
启动:
- @echo off
- echo Starting PHP FastCGI...
- RunHiddenConsole.exe E:/php/php-cgi.exe -b 127.0.0.1:9000 -c C:/windows/php.ini
- echo Starting nginx...
- E:/nginx/nginx.exe
停止:
- @echo off
- echo Stopping nginx...
- taskkill /F /IM nginx.exe > nul
- echo Stopping PHP FastCGI...
- taskkill /F /IM php-cgi.exe > nul
- exit
最后得到的目录结构是:
8.启动nginx。点击start_php.bat ,可能会弹出框报错,不过不影响。
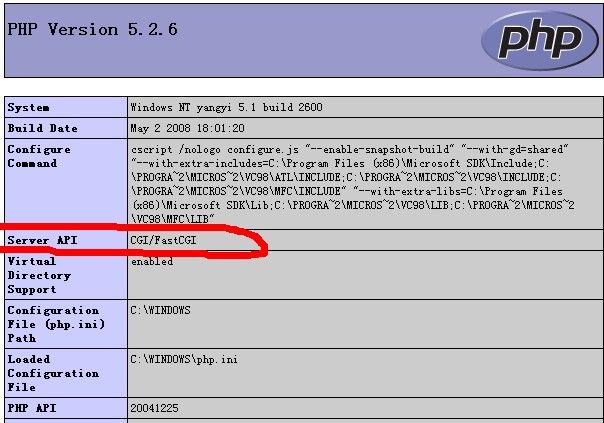
9.在E:\workspace目录下编写一个文件index.php。加入一句话:phpinfo();
10.打开浏览器:输入: HTTP://127.0.0.1:8088
得到以上图片信息,说明:nginx安装好了。nginx与php的连接也安装好了。

