Grunt构建Web程序
From:http://www.cnblogs.com/snandy/archive/2013/03/11/2949177.html
Gruntjs是JavaScript项目的构建工具,也是基于node的一个命令行工具。很多开源JS项目都是使用它搭建。如jQuery、Qunit、CanJS等。它有以下作用
- 合并JS文件
- 压缩JS文件
- 单元测试(基于QUnit)
- 一句话:完全自动化(automation)
以下是它的安装过程
一、安装node
参考nodejs入门 (最新的node会自动安装npm)
二、安装grunt命令行工具grunt-cli
使用-g全局安装,这样可以在任何一个目录里使用了。命令: npm install -g grunt-cli
需要注意的是在linux或mac下有时会报没有权限的错误,这时须在前面加一个sudo,
安装后,可以查看改工具的版本。命令:grunt -version
npm http GET https://registry.npmjs.org/grunt
npm http 304 https://registry.npmjs.org/grunt
npm http GET https://registry.npmjs.org/js-yaml
npm …………………………………………………………
npm http 304 https://registry.npmjs.org/argparse
npm http GET https://registry.npmjs.org/underscore
npm http 304 https://registry.npmjs.org/abbrev
npm http 304 https://registry.npmjs.org/sigmund
npm http 304 https://registry.npmjs.org/underscore
[email protected] C:\Users\wb_chaoyi.yancy\AppData\Roaming\npm\no
├── [email protected]
├── [email protected]
├── …………………………………………
├── [email protected] ([email protected])
├── [email protected] ([email protected], [email protected])
└── [email protected] ([email protected], [email protected])
此时,再查看grunt版本会多了一个4.0,如下
grunt-cli v0.1.9
grunt v0.4.1
grunt 安装完毕
三、新建项目Bejs
源码放在src下,该目录有两个js文件,selector.js和ajax.js。编译后代码放在dest,这个grunt会自动生成。
四、新建package.json
package.json 放在根目录下,它包含了该项目的一些元信息,如项目名称、描述、版本号,依赖包等。它应该和源码一样被提交到svn或git。 现在的项目结构如下
package.json内容
{
  "name": "Bejs",
  "version": "0.1.0",
  "devDependencies": {
    "grunt": "~0.4.0",
    "grunt-contrib-jshint": "~0.1.1",
    "grunt-contrib-uglify": "~0.1.2",
    "grunt-contrib-concat": "~0.1.1"
  }
}
- grunt-contrib-jshint js语法检查
- grunt-contrib-uglify 压缩,采用UglifyJS
- grunt-contrib-concat 合并文件
此时,打开命令行工具进入到项目根目录,敲如下命令: npm install
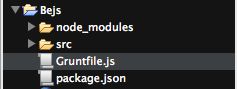
查看根目录,发现多了个node_modules目录,包含了四个子目录,见图
五、新建文件Gruntfile.js
Gruntfile.js也是放在项目根目录下,几乎所有的任务都定义在该文件中,它就是一个普通的js文件,里面可以写任意js代码而不仅局限于JSON。和package.json一样它也要和源码一样被提交到svn或git。
Gruntfile.js由以下内容组成
wrapper函数,结构如下,这是Node.js的典型写法,使用exports公开API
module.exports = function(grunt) {
  // Do grunt-related things in here
};
- 项目和任务配置
- 载入grunt插件和任务
- 定制执行任务
该示例完成以下任务
- 合并src下的文件(ajax.js/selector.js)为domop.js
- 压缩domop.js为domop.min.js
- 这两个文件都放在dest目录下
module.exports = function(grunt) {
    // 配置
    grunt.initConfig({
        pkg : grunt.file.readJSON('package.json'),
        concat : {
            domop : {
                src: ['src/ajax.js', 'src/selector.js'],
                dest: 'dest/domop.js'
            }
        },
        uglify : {
            options : {
                banner : '/*! <%= pkg.name %> <%= grunt.template.today("yyyy-mm-dd") %> */\n'
            },
            build : {
                src : 'dest/domop.js',
                dest : 'dest/domop.min.js'
            }
        }
    });
    // 载入concat和uglify插件,分别对于合并和压缩
    grunt.loadNpmTasks('grunt-contrib-concat');
    grunt.loadNpmTasks('grunt-contrib-uglify');
    // 注册任务
    grunt.registerTask('default', ['concat', 'uglify']);
};
从打印信息看出成功的合并和压缩并生成了dest目录及期望的文件,这时的项目目录下多了dest