Archie OSGStep By Step① 绘制简单多边形
《OpenSceneGraph 三维渲染引擎编程指南》对于OSG各个模块进行了详细介绍,然而这种分散的介绍并不适合OSG初学者。《OpenSceneGraph快速入门指导》反而更加合适,然而讲解的并不透彻,也没有深入浅出。
对于学习OSG,我同样建议最好有本参考OpenGL编程基础的书或是NeHe教程一类。
我觉得OpenGL编程基础还算可以,虽然不如Nehe生动详细,但是这么200页的书,讲的却也是极为简明了,任何一个生手看着书中的代码都可以敲出一个程序,就以此为参考吧。
首先,我觉得先是学习下OSG组成模块和编程约定,我不是给初学者写书的,这里就推荐《OpenSceneGraph快速入门指导》,不过没想到竟然讲了50页,讲的还不错,《编程基础》绪论只用了不到10页。这里不再赘述。
我们第一课来看一个简单的示例程序吧,也是摘自《快速入门指导》。原谅我电脑上只装了VS2010,我只能依次平台来介绍,其实平台的不同对代码影响并不大,我这里不会对版本和平台进行更多介绍,请去看VS相关书籍。
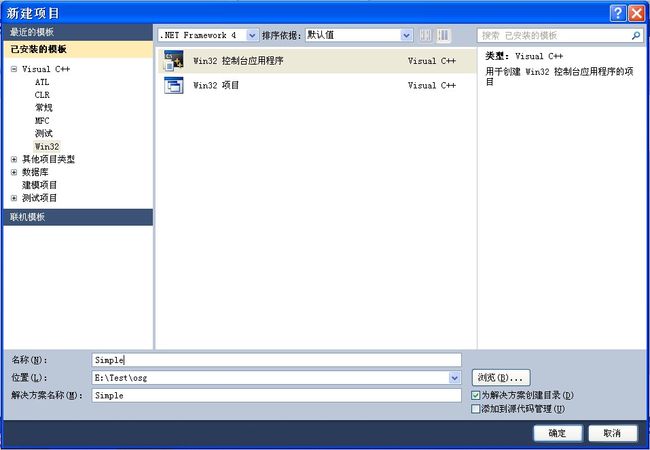
1、新建控制台应用程序Simple,默认到完成
2、根据Release和Debug分别进行配置
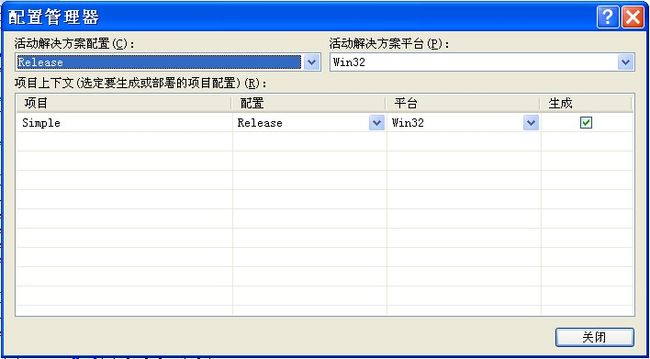
①配置Release版解决方案
生成→配置管理器,设置为Release版
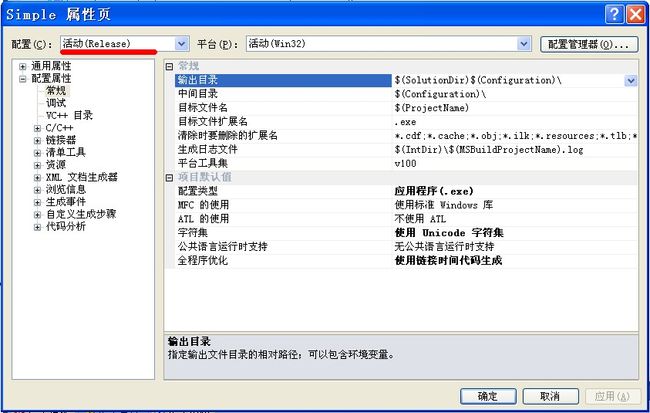
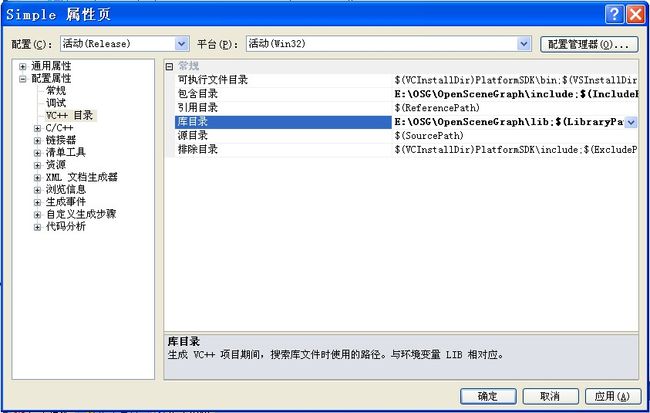
项目→SImple属性,选择Release进行配置
②生成Debug版程序
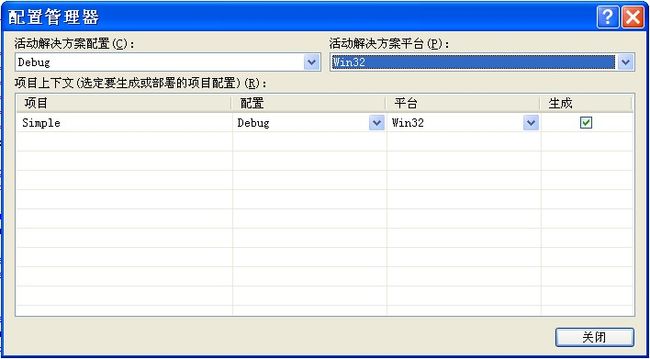
生成→配置管理器,选择Debug版Win32
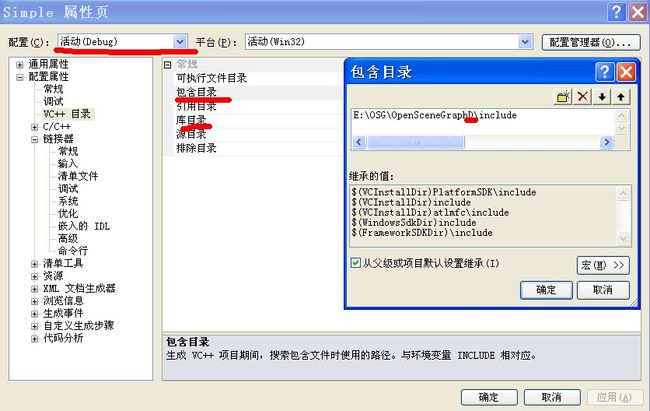
项目→Simple属性 进行Debug属性设置
设置OSG Debug 版包含文件目录和库文件目录
设置依赖项,在配置属性,连接器,输入中添加“附加依赖项”,输入如下几项,注意分行写
osgd.lib
osgDB.lib
osgViewerd.lib
osgUtild.lib
注意,每项名称最后的d代表Debug。
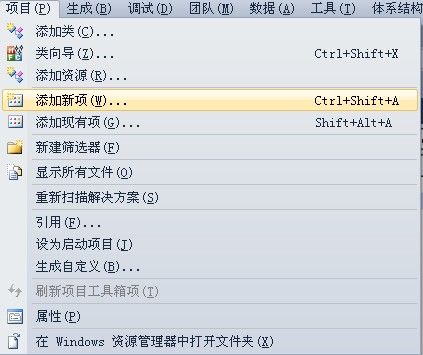
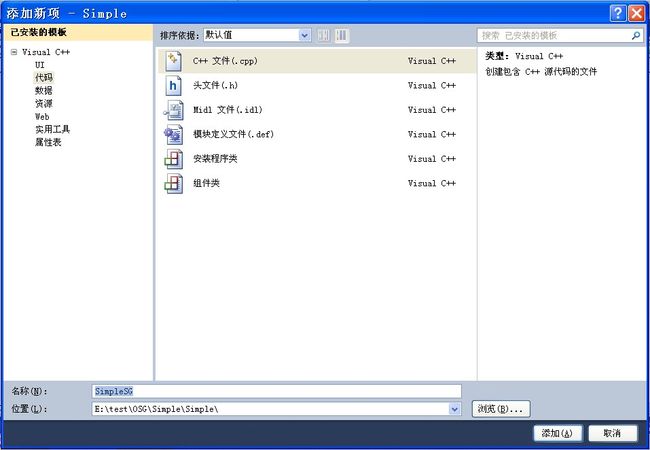
3、添加源代码
Simple.cpp代码如下
// Simple.cpp : 定义控制台应用程序的入口点。
//

#include "stdafx.h"
// Simple Example, Basic Geode and Geometry class usage
#include <osgViewer/Viewer>
#include <osg/ref_ptr>
#include <osgDB/Registry>
#include <osgDB/WriteFile>
#include <osg/Notify>
#include <iostream>
using std::endl;

osg::ref_ptr<osg::Node> createSceneGraph();
int _tmain(int argc, _TCHAR* argv[])
{
    osg::ref_ptr<osg::Node> root = createSceneGraph();
    if (!root.valid())
    {
        osg::notify(osg::FATAL) << "Failed in createSceneGraph()." << endl;
        return 1;
    }

    osgViewer::Viewer viewer;
    viewer.setSceneData( root.get() );
    return viewer.run();
}
SimpleSG.cpp
// Simple Example, Basic Geode and Geometry class usage

#include "stdafx.h"
#include <osg/Geode>
#include <osg/Geometry>

osg::ref_ptr<osg::Node>
    createSceneGraph()
{
    // Create an object to store geometry in.
    osg::ref_ptr<osg::Geometry> geom = new osg::Geometry;

    // Create an array of four vertices.
#if 1
    // Using the push_back interface
    osg::ref_ptr<osg::Vec3Array> v = new osg::Vec3Array;
    geom->setVertexArray( v.get() );
    v->push_back( osg::Vec3( -1.f, 0.f, -1.f ) );
    v->push_back( osg::Vec3( 1.f, 0.f, -1.f ) );
    v->push_back( osg::Vec3( 1.f, 0.f, 1.f ) );
    v->push_back( osg::Vec3( -1.f, 0.f, 1.f ) );
#else
    // Using resize() and operator[]().
    osg::ref_ptr<osg::Vec3Array> v = new osg::Vec3Array;
    geom->setVertexArray( v.get() );
    v->resize( 4 );
    (*v)[ 0 ] = osg::Vec3( -1.f, 0.f, -1.f );
    (*v)[ 1 ] = osg::Vec3( 1.f, 0.f, -1.f );
    (*v)[ 2 ] = osg::Vec3( 1.f, 0.f, 1.f );
    (*v)[ 3 ] = osg::Vec3( -1.f, 0.f, 1.f );
#endif

    // Create an array of four colors.
    osg::ref_ptr<osg::Vec4Array> c = new osg::Vec4Array;
    geom->setColorArray( c.get() );
    geom->setColorBinding( osg::Geometry::BIND_PER_VERTEX );
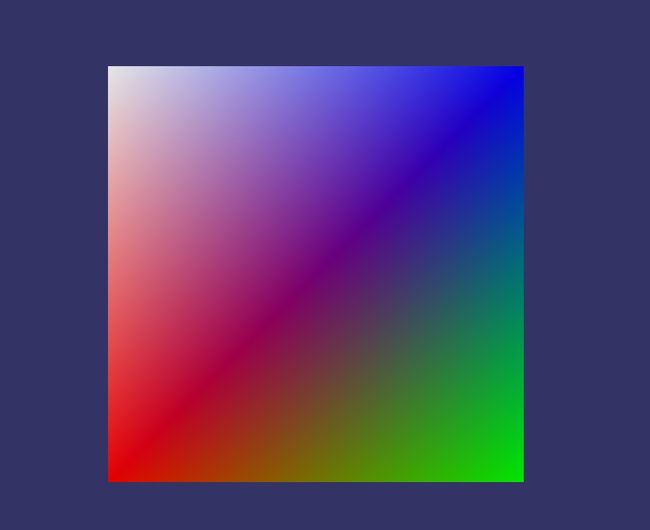
    c->push_back( osg::Vec4( 1.f, 0.f, 0.f, 1.f ) );
    c->push_back( osg::Vec4( 0.f, 1.f, 0.f, 1.f ) );
    c->push_back( osg::Vec4( 0.f, 0.f, 1.f, 1.f ) );
    c->push_back( osg::Vec4( 1.f, 1.f, 1.f, 1.f ) );

    // Create an array for the single normal.
    osg::ref_ptr<osg::Vec3Array> n = new osg::Vec3Array;
    geom->setNormalArray( n.get() );
    geom->setNormalBinding( osg::Geometry::BIND_OVERALL );
    n->push_back( osg::Vec3( 0.f, -1.f, 0.f ) );

    // Draw a four-vertex quad from the stored data.
    geom->addPrimitiveSet(
        new osg::DrawArrays( osg::PrimitiveSet::QUADS, 0, 4 ) );

    // Add the Geometry (Drawable) to a Geode and return the Geode.
    osg::ref_ptr<osg::Geode> geode = new osg::Geode;
    geode->addDrawable( geom.get() );
    return geode.get();
}
4、编译调试生成可执行程序
建议调试程序时使用Debug版OSG库,发布时再采用Release版,还需注意的一点,测试Debug版程序时,需要将E:\OSG\OpenSceneGraphD\bin下的dll和第三方插件拷贝到当前可执行文件目录下才可运行,Release则不需要。
生成的Simple运行如下,可以利用鼠标左键进行旋转,中键平移,滚轮缩放。
