android游戏引擎andengine学习系列二:简单的例子
如何高效的学习,这才是我们最值得去学习的。
首先导入架包,下载:http://download.csdn.net/detail/duancanmeng/4060082 lib文件夹中
像我们写android程序entends Activity一样,我们一开始也要extends BaseGameActivity,而且实现四个必须被重载函数:
public class Main extends BaseGameActivity {
    public void onLoadComplete() {

    }
    public Engine onLoadEngine() {
        return null;
    }
    public void onLoadResources() {

    }
    public Scene onLoadScene() {
        return null;
    }
}
只需实现上面四个方法,把业务逻辑和数据加进去,便可完成一个简单的小例子。
先上效果图:

具体代码如下:
public class ShapeModifierExample extends BaseGameActivity{

	private static final int CAMERA_WIDTH = 720;
	private static final int CAMERA_HEIGHT = 480;

	private Camera mCamera;
	private Texture mTexture;
	private TiledTextureRegion mFaceTextureRegion;
	@Override
	public Engine onLoadEngine() {
		Log.i("test","onLoadEngine");
		//游戏摄像机,在AndEngine的Camera有两种作用,一是用以调节屏幕的显示区域,二是利用HUD类实际绘制游戏屏幕于手机之上。
		//new Camera中的四个参数,第一个和第二个是代表camera的左顶点,第三个和第四个分别代表camera的宽和高
		this.mCamera = new Camera(0,0,CAMERA_WIDTH,CAMERA_HEIGHT);

		//Engine是AndEngine的核心所在,
		//它对AndEngine引擎中Camera、Scene等重要组件进行了统一管理,
		//但必须和BaseGameActivity合作使用,
		//利用EngineOptions类可以对其进行必要的参数配置。

		//其中EngineOptions中的参数:
		//    第一个判断是否为全屏
		//	  第二个判断屏幕横屏还是竖屏
		//    第三个RatioResolutionPolicy(按比例修正画面大小,以适应屏幕大小),
		//	  第四个便是我们自己定义的
		//第三个参数还可以:BaseResolutionPolicy(除了会校验一下屏幕大小外,什么也不做)、
		//	 	FillResolutionPolicy(拉伸游戏画面为全屏填充,视摄像机大小不同,会有不同程度变形)、
		//		FixedResolutionPolicy(强行规定游戏画面为固定大小,此设置不会自动适应屏幕大小),
		//		RatioResolutionPolicy(按比例修正画面大小,以适应屏幕大小),
		//		RelativeResolutionPolicy(根据构建RelativeResolutionPolicy时的缩放参数,缩放游戏屏幕为指定比例)。
		return new Engine(new EngineOptions(true,ScreenOrientation.LANDSCAPE,new RatioResolutionPolicy(CAMERA_WIDTH,CAMERA_HEIGHT),this.mCamera));
	}

	@Override
	public void onLoadResources() {
		Log.i("test","onLoadResources");
		//该处Texture的构造方法中三个参数:
		//  第一个:要使用的纹理图片的宽度
		//  第二个:要使用的纹理图片的高度
		//  第三个:纹理的渲染方式
		//第三个参数其中有如下情况:
		//1、NEAREST(Nearest滤波,实现上依赖GL_NEAREST做不光滑过滤,纹理环绕模式为GL_CLAMP_TO_EDGE,显示速度快画质差)
		//2、BILINEAR(双线性插值,实现上依赖GL_LINEAR做线性滤波,纹理环绕模式为GL_CLAMP_TO_EDGE,显示速度慢画质佳)
		//3、REPEATING(与NEAREST同为Nearest滤波,但纹理环绕模式为GL_REPEAT,会自动填充纹理上的空白区域,显示速度较快画质差)
		//4、REPEATING_BILINEAR(与BILINEAR同为双线性插值,但纹理环绕模式为GL_REPEAT,会自动填充纹理上的空白区域,显示速度很慢画质佳(低端机跑此模式异常悲剧,高端机尚可))
		//5、NEAREST_PREMULTIPLYALPHA(所有[PREMULTIPLYALPHA]结尾的TextureOptions与其它同名类差别仅在于是否支持根据Alpha值设置透明纹理,以下同)
		//6、BILINEAR_PREMULTIPLYALPHA
		//7、REPEATING_PREMULTIPLYALPHA
		//8、REPEATING_BILINEAR_PREMULTIPLYALPHA等静态对象。
		//等等
		this.mTexture = new Texture(64,32,TextureOptions.BILINEAR_PREMULTIPLYALPHA);	//前2个参数意义是划出									//pWidth*pHeight大小的一块空间用来存储createFromAsset装载的贴图								//备注1

		//将纹理图片“贴”到我们上面定义的Texture上
		//其中的参数:第二个代表本context,第四个:代表纹理贴到Texture上的X坐标,第五个:代表贴到Texture上的Y坐标,第六个:代表纹理要贴的列数,第七个:代表纹理要贴的行数
		this.mFaceTextureRegion = TextureRegionFactory.createTiledFromAsset(this.mTexture, this, "face_box_tiled.png", 0, 0, 2, 1);
		this.mEngine.getTextureManager().loadTexture(mTexture);
	}

	@Override
	public Scene onLoadScene() {
		Log.i("test","onLoadScene");
		//registerUpdateHandler函数注册得到IUpdateHandler接口,内部有onUpdate以及reset两个函数等待实现,几乎所有AndEngine应用中都必然会看到它的身影,它也是AndEngine添加具体业务到游戏业务线程中的主要方法之一。
		//主要用来供外部方法调用,以便更新业务
		//可以看到所有的exmaples中都有如此写法
		this.mEngine.registerUpdateHandler(new FPSLogger());	//备注2

		//场景容器,作用类似于LGame中的Screen,能够将某一特定场景作为游戏模块进行调用,我们可以利用它来切换当前游戏的画面与触摸屏监听,切换方法是利用Engine.setScene
		final Scene scene = new Scene(1);
		//这里的颜色的值设置必须在0.0到1.0,例如(1,0,0)为红色
		scene.setBackground(new ColorBackground(0.09804f, 0.6274f, 0.8784f));

		final int centerX = (CAMERA_WIDTH - this.mFaceTextureRegion.getWidth()) / 2;
		final int centerY = (CAMERA_HEIGHT - this.mFaceTextureRegion.getHeight()) / 2;
		Log.i("test","centerX:"+centerX+",centerY:"+centerY);
		//定义一个方块
		final Rectangle rect = new Rectangle(centerX + 100, centerY, 32, 32);
		rect.setColor(1, 0, 0);

		//定义一个动画精灵,并设置一些属性
		final AnimatedSprite face = new AnimatedSprite(centerX - 100, centerY, this.mFaceTextureRegion);
		face.animate(100);
		face.setBlendFunction(GL10.GL_SRC_ALPHA, GL10.GL_ONE_MINUS_SRC_ALPHA);  	    //备注3

		//主要设置上面定义的两个组件的动作
		//LoopShapeModifier(final IShapeModifierListener pShapeModiferListener, final int pLoopCount, final ILoopShapeModifierListener pLoopModifierListener, final IShapeModifier pShapeModifier)
		//从打印的语句可以看出,第一个参数是当整个动作结束的时候所做的一些操作,第二个参数就是动作的循环的次数,第三个就是一个动作完成后所做的一些操作,第四个就是具体的动作
		final LoopShapeModifier shapeModifier =
			new LoopShapeModifier(
					new IShapeModifierListener() {
						@Override
						public void onModifierFinished(final IModifier<IShape> pShapeModifier, final IShape pShape) {
							ShapeModifierExample.this.runOnUiThread(new Runnable() {
								@Override
								public void run() {
									Toast.makeText(ShapeModifierExample.this, "Sequence ended.", Toast.LENGTH_LONG).show();
								}
							});
						}
					},
					1,
					new ILoopShapeModifierListener() {
						@Override
						public void onLoopFinished(final LoopModifier<IShape> pLoopShapeModifier, final int pLoopsRemaining) {
							ShapeModifierExample.this.runOnUiThread(new Runnable() {
								@Override
								public void run() {
									Toast.makeText(ShapeModifierExample.this, "Loops remaining: " + pLoopsRemaining, Toast.LENGTH_SHORT).show();
								}
							});
						}
					},
					new SequenceShapeModifier(
							//这里面的参数,第一个是Duration,第二个是From,第三个是to
							new RotationModifier(1, 0, 90),
							new AlphaModifier(2, 1, 0),
							new AlphaModifier(1, 0, 1),
							new ScaleModifier(2, 1, 0.5f),
							new DelayModifier(0.5f),
							//这里是一些组合动作
							new ParallelShapeModifier(
									new ScaleModifier(3, 0.5f, 5),
									new RotationByModifier(3, 90)
							),
							new ParallelShapeModifier(
									new ScaleModifier(3, 5, 1),
									new RotationModifier(3, 180, 0)
							)
					)
			);

		face.addShapeModifier(shapeModifier);
		rect.addShapeModifier(shapeModifier.clone());

		scene.getTopLayer().addEntity(face);
		scene.getTopLayer().addEntity(rect);

		return scene;
	}

	@Override
	public void onLoadComplete() {
		// TODO Auto-generated method stub
		Log.i("test","onLoadComplete");
	}

}
备注1:这里因为纹理图片是:,所以定义的时候会根据纹理的具体情况来定义。
运行程序后可以发现后台很快的打印出:onLoadEngine,onLoadResources,onLoadScene,centerX:328,centerY:224,onLoadComplete
然后再执行一系列的动作,可以看到后台打印:
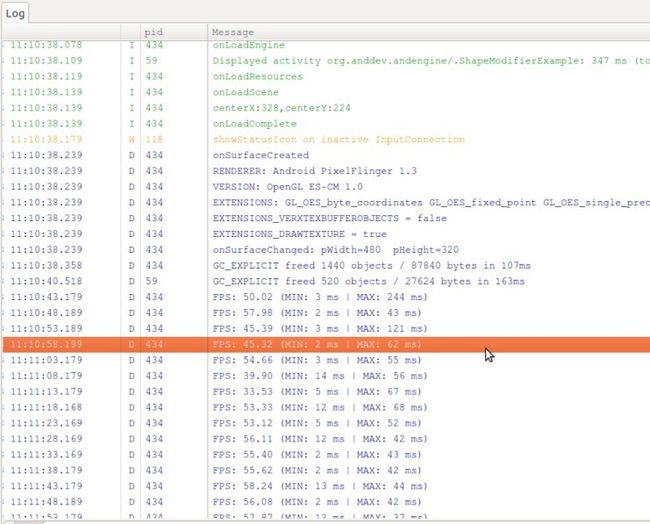
由此可以判定:备注2处注册的作用便是不停的刷新屏幕,其Engine类中的onTickUpdate函数外部调用。
备注3:这里不明白的,可以参考http://www.cnblogs.com/yujunyong/archive/2011/04/13/2015467.html