原文地址:http://blog.csdn.net/yongyinmg/article/details/40982791
App Extension 概述
应用程序扩展是iOS8中引入的一个非常重要的新特性,扩展让app之间的数据交互成为可能.用户可以在app中使用其他应用提供的功能,而无需离开当前的应用.但是基于安全和性能的考虑,每一个扩展运行在一个单独的进程中,它拥有自己的bundle,bundle后缀名是”.appex””.(PS:当天听到最多的可能就是,不用越狱也能用第三方输入法了,搜狗和百度也第一时间推出了Custom keyboard)
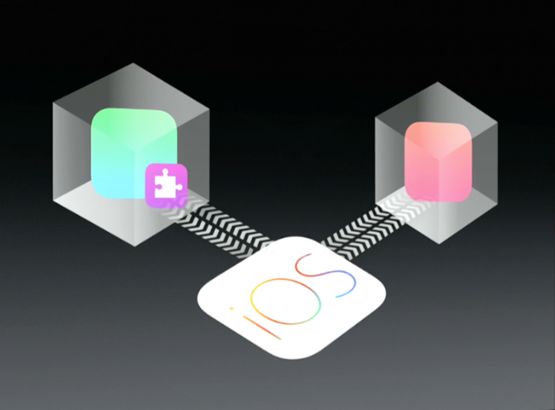
iOS8上共有6个区域支持Extension,分别是Today、Share、Action、Photo Editing、Storage Provider、Custom keyboard几种,其中Today中的extension一般称为widget.
这里主要介绍widget(其他脑补…键盘最容易…)
先来看一张图:
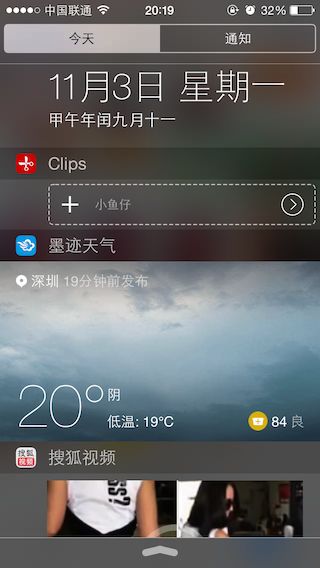
分别是Clips、墨迹天气、搜狐视频3个App的Widget.
我们所要做的,也就是这样,根据Containing App来定制属于自己的Widget.
我做的这个Demo是类似于Clips的widget,完整代码我已经上传到了github点这里,Demo里面注释比较详细.
1.创建Extension
点击“File”->”New”->”Target”
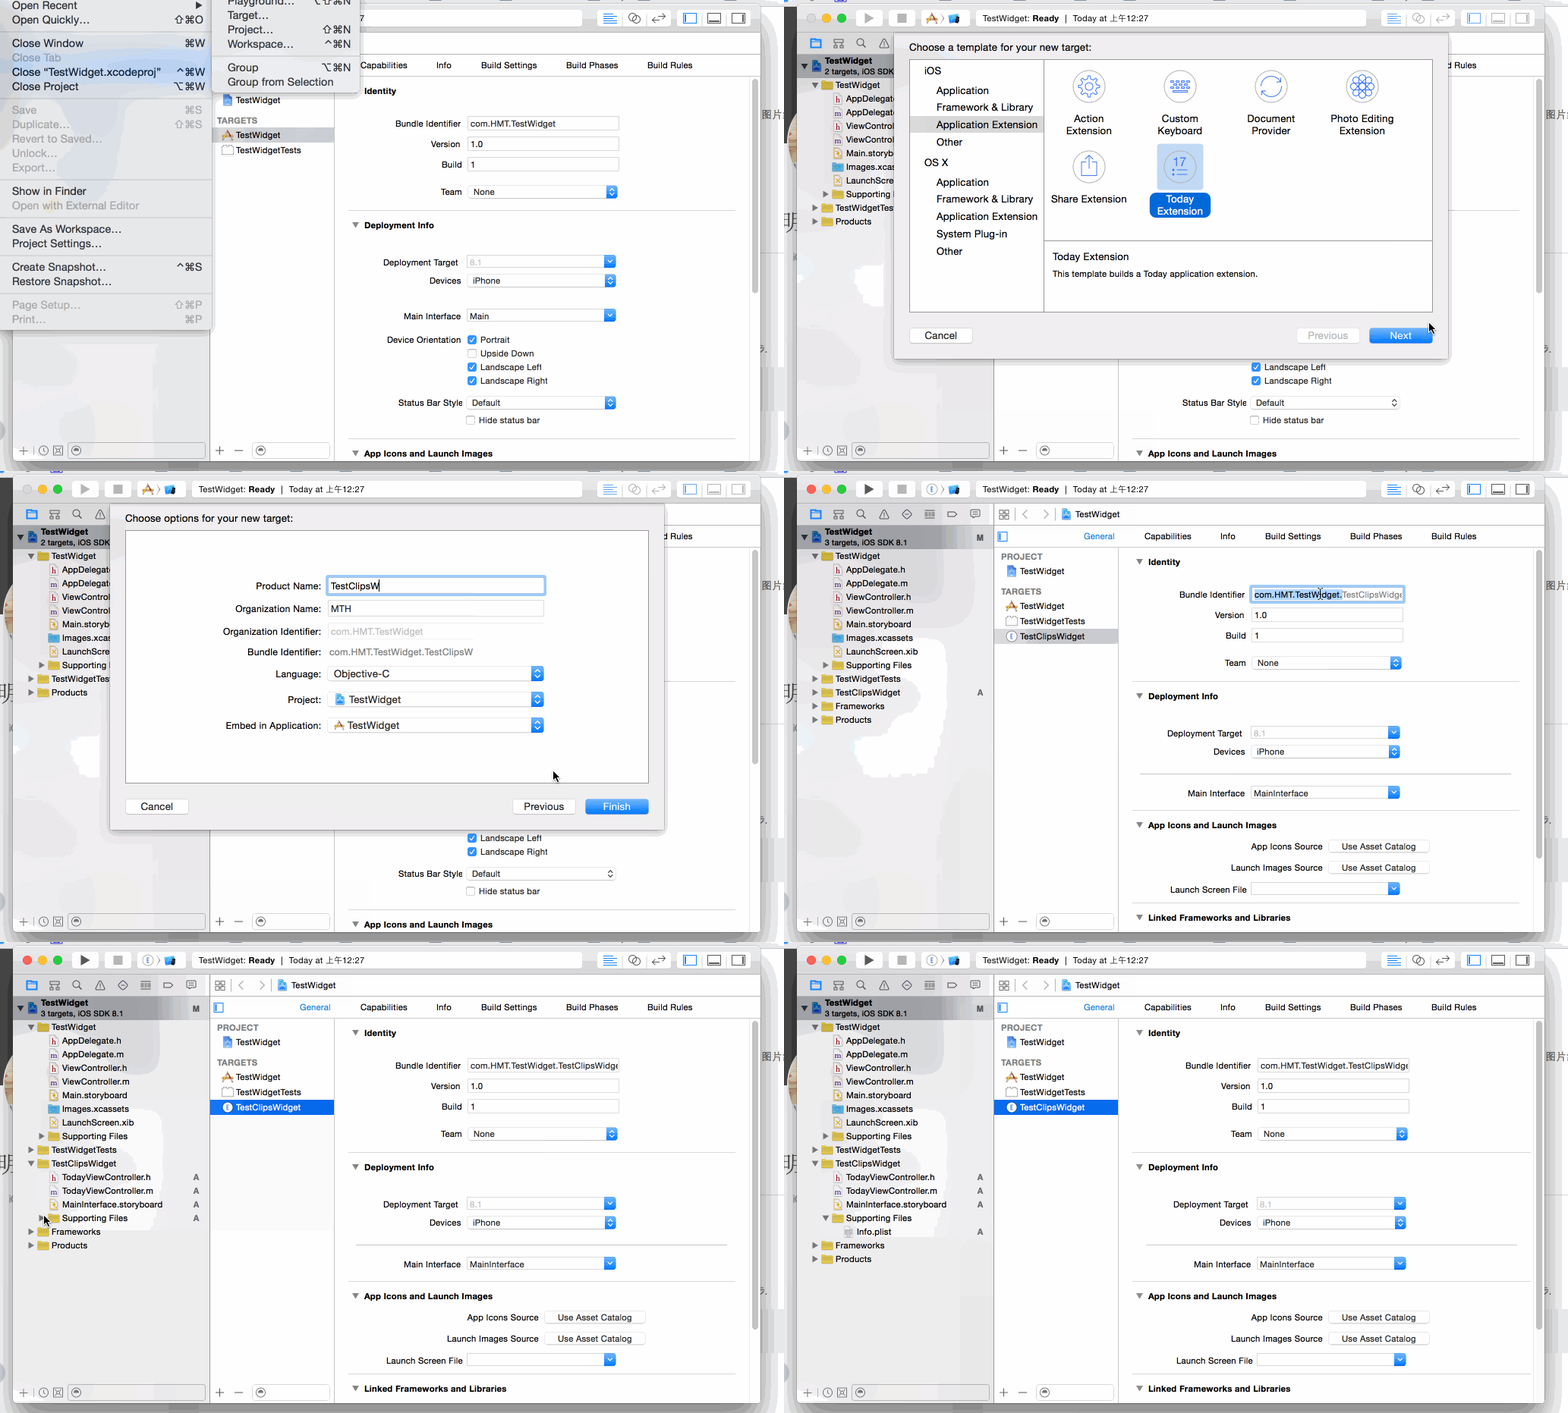
2.后续步骤略略略略略
涉及扩展如何运作、Extension和Containing App、host app之间的关系、Containing App与扩展共享数据、开启App Groups等等知识点在查看到的资料中写得很详细,我就不打算详述(其实是水平有限^_^),接下来我重点讲下我在项目具体遇到的问题。(详细请见最后的参考资料,大牛们写得很棒!膜拜!)
3.My Problem
(1)UI布局:系统默认,widget的View的x坐标是和Containing App的图标坐标的bottom相对应的(参照搜狐视频效果),如果你想靠到左边去“越界”,要实现NCWidgetProviding代理方法- (UIEdgeInsets)widgetMarginInsetsForProposedMarginInsets:(UIEdgeInsets)defaultMarginInsets,这个defaultMarginInsets打印出来是{0, 47, 39, 0},注意看x左边是0.
1
2
3
4
5
6
7
|
// 一般默认的View是从图标的右边开始的
...如果你想变换,就要实现这个方法
- (UIEdgeInsets)widgetMarginInsetsForProposedMarginInsets:(UIEdgeInsets)defaultMarginInsets {
//UIEdgeInsets newMarginInsets = UIEdgeInsetsMake(defaultMarginInsets.top, defaultMarginInsets.left -
16, defaultMarginInsets.bottom, defaultMarginInsets.right);
//
return newMarginInsets;
//
return UIEdgeInsetsZero; // 完全靠到了左边....
return UIEdgeInsetsMake(
0.0,
16.0,
0,
0);
}
|
(2)View高度问题:有的时候运行程序,view显示不出来,这个时候你可能需要[self setPreferredContentSize:(CGSize)];。不仅如此,Demo中的widget是放置了个UITableView,设置它与View的AutoLayout,结果是没起作用。。。tableView的高度是随着Cell的减少而减少,但是View的高度缺固定在最初值。因此加上这句代码来限制:
1
2
|
self.preferredContentSize =
CGSizeMake(
self.view.bounds.size.width,
400-
72*(
5 - _allDataArray.
count));
|
(3)真机调试时,App Groups 会因为你用开发者账号进行调试而出现取消勾选的情况。如果真机调试失败,记得去检查这里。附上gif动图和调用不一样的NSUserDefaults进行固化的代码。
1
2
3
4
5
6
7
8
9
10
11
12
13
14
15
16
17
18
19
20
|
static
NSString *
const KArchiverKey =
@"DataArray";
NSUserDefaults *sharedUserDefaults = [[
NSUserDefaults alloc] initWithSuiteName:
@"group.com.tranfer"];
NSData *unarchiverData = [sharedUserDefaults objectForKey:KArchiverKey];
self
.allDataArray = [
NSMutableArray arrayWithArray:[NSKeyedUnarchiver unarchiveObjectWithData:unarchiverData]];
NSData *lastStringData = [sharedUserDefaults objectForKey:KArchiverLastClipKey];
self
.lastPasteBoard = [NSKeyedUnarchiver unarchiveObjectWithData:lastStringData];
- (
void)_saveDataToSanBoxWithDataArray:(
NSMutableArray *)dataArray {
NSUserDefaults *sharedUserDefaults = [[
NSUserDefaults alloc] initWithSuiteName:
@"group.com.tranfer"];
NSData *archiverData = [NSKeyedArchiver archivedDataWithRootObject:dataArray];
[sharedUserDefaults setObject:archiverData forKey:KArchiverKey];
[sharedUserDefaults synchronize];
}
|
(4)在extension中打开containing app.调用下面方法:
1
|
- (
void)openURL:(
NSURL *)URL completionHandler:(
void (^)(
BOOL success))completionHandler;
|
接下来最关键的来了:
1
2
3
|
[
self
.extensionContext openURL:[
NSURL URLWithString:
@"iOSWidgetApp://"] completionHandler:^(
BOOL success) {
NSLog(
@"open url result:%d",success);
}];
|
上传注意事项
按照以往步骤上传应用就会报如下错误:
1
2
3
|
error: Embedded
binary
is
not signed
with the same certificate
as the parent app. Verify the embedded
binary target
Embedded
Binary Signing Certificate: iPhone Developer: xxx xxx (H536M777VC)
Parent App Signing Certificate: iPhone Distribution: xxx xxx (AA56B6R4CW)
|
如果想要将带有Extension的应用上传到App Store,你需要为extension单独的申请一个AppID(Bundle ID要对应XCode里面extension的Bundle ID,千万别直接复制,会漏掉后面无法复制到呈灰白的字段),同时配备相对应的distribution profile.
Ending
暂时就这些了,这也是我第一个Extension的Demo,大家如果发现什么问题,欢迎给我留言,小菜鸟的我仍在不断的探索中。