第16课 数据与通信之JSON
概述
Silverlight 2 Beta 1版本发布了,无论从Runtime还是Tools都给我们带来了很多的惊喜,如支持框架语言Visual Basic, Visual C#, IronRuby, Ironpython,对JSON、Web Service、WCF以及Sockets的支持等一系列新的特性。《一步一步学Silverlight 2系列》文章带您快速进入Silverlight 2开发。
本文将简单介绍在Silverlight 2中对于JSON的支持。
简单示例
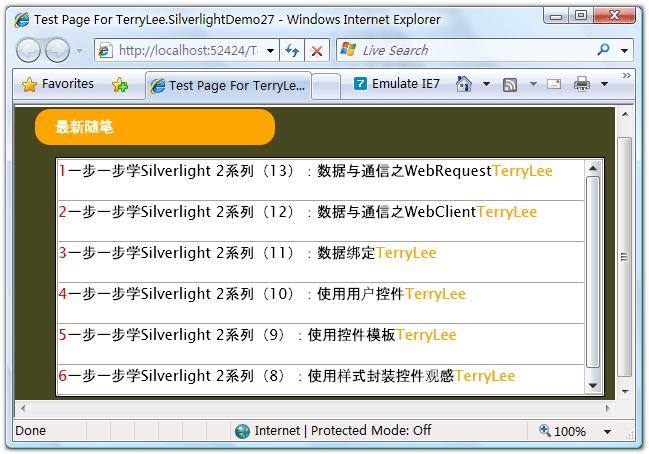
在本文中我们仍然采用前面两篇文章中用过的显示最新随笔这样一个示例(举一反三嘛:)),最终完成的效果如下图所示:
首先我们建立服务端,以便能够提供JSON格式的数据。在这里为了产生JSON格式的数据,我们借助于一个开源项目Json.NET。建立两个实体类型:
public class Post
{
    public int Id { get; set; }

    public string Title { get; set; }

    public string Author { get; set; }
}
public class Blog
{
    public List

    Posts { get; set; }
}
在Silverlight项目中我们也会使用到这两个实体类,新建一个HttpHandler,产生JSON格式数据,我们使用Json.NET中的JavaScriptConvert.SerializeObject方法即可序列化一个对象为JSON格式:
public class BlogHandler : IHttpHandler
{

    public void ProcessRequest(HttpContext context)
    {
        context.Response.ContentType = "text/plain";

        List

    posts = new List

    () { new Post{ Id=1, Title="一步一步学Silverlight 2系列(13):数据与通信之WebRequest", Author="TerryLee" }, new Post{ Id=2, Title="一步一步学Silverlight 2系列(12):数据与通信之WebClient", Author="TerryLee" }, new Post{ Id=3, Title="一步一步学Silverlight 2系列(11):数据绑定", Author="TerryLee" }, new Post{ Id=4, Title="一步一步学Silverlight 2系列(10):使用用户控件", Author="TerryLee" }, new Post{ Id=5, Title="一步一步学Silverlight 2系列(9):使用控件模板", Author="TerryLee" }, new Post{ Id=6, Title="一步一步学Silverlight 2系列(8):使用样式封装控件观感", Author="TerryLee" } }; Blog blog = new Blog(); blog.Posts = posts; context.Response.Write(JavaScriptConvert.SerializeObject(blog)); } public bool IsReusable { get { return false; } } }
现在测试一下HttpHandler,查看一下生成的数据格式:
对这些数据格式化一下,看起来更明显,这里推荐一个在线JSON数据格式化工具http://www.curiousconcept.com/jsonformatter/:
格式化后的数据如下:
现在实现在Silverlight中获取JSON数据,并进行反序列化,界面布局XAML就不再贴出来了,跟前面两篇的示例一样。在Silverlight 2中,内置了对于JSON的支持,通过命名空间System.Runtime.Serialization.Json提供,位于System.ServiceModel.Web.dll中。
我们使用WebRequest获取数据:
private void UserControl_Loaded(object sender, RoutedEventArgs e)
{
    Uri endpoint = new Uri("http://localhost:8081/BlogHandler.ashx");

    WebRequest request = WebRequest.Create(endpoint);
    request.Method = "POST";
    request.ContentType = "application/x-www-form-urlencoded";
    request.BeginGetResponse(new AsyncCallback(ResponseReady), request);
}

void ResponseReady(IAsyncResult asyncResult)
{
    WebRequest request = asyncResult.AsyncState as WebRequest;
    WebResponse response = request.EndGetResponse(asyncResult);

    using (Stream responseStream = response.GetResponseStream())
    {
        DataContractJsonSerializer jsonSerializer = new DataContractJsonSerializer(typeof(Blog));

        Blog blog = jsonSerializer.ReadObject(responseStream) as Blog;

        Posts.ItemsSource = blog.Posts;
    }
}
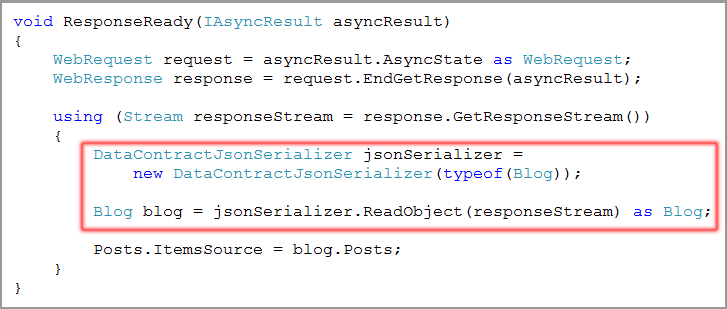
DataContractJsonSerializer用于将对象序列化为JSON或者反序列化为对象实例,分别使用方法WriteObject和ReadObject。
至此一个完整的在Silverlight 2对于JSON的支持示例就完成了。运行后的效果与前面的示例一样:
结束语
本文简单介绍了在Silverlight 2中对于JSON的支持,DataContractJsonSerializer用于将对象序列化为JSON或者反序列化为对象实例,你可以从这里下载本文示例代码。


