使用Ubuntu SDK开发Flickr应用教程
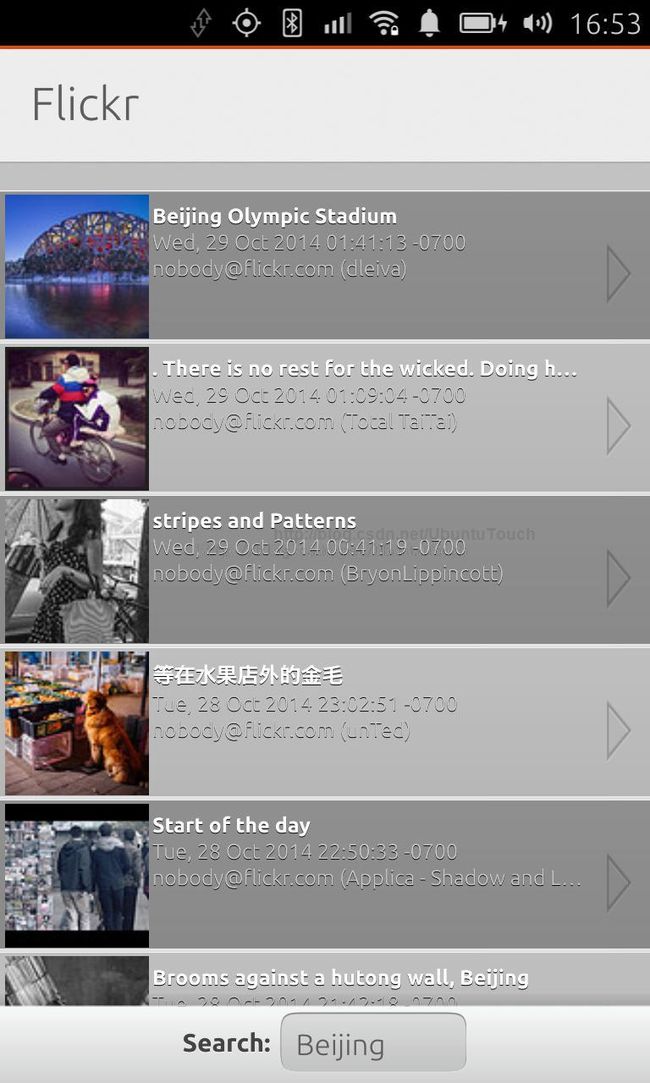
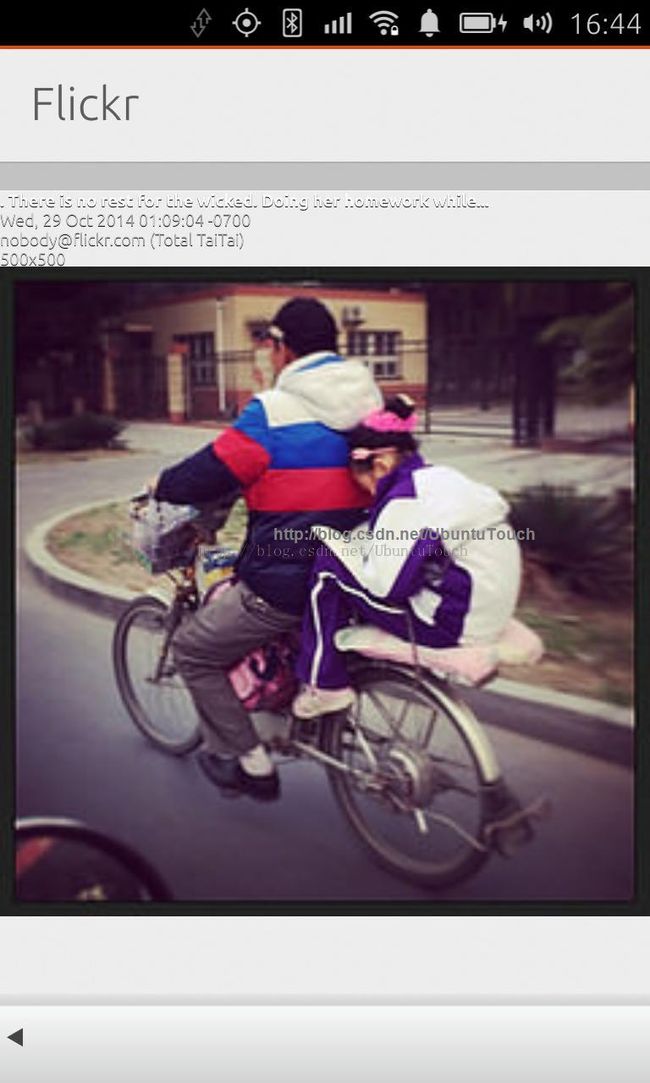
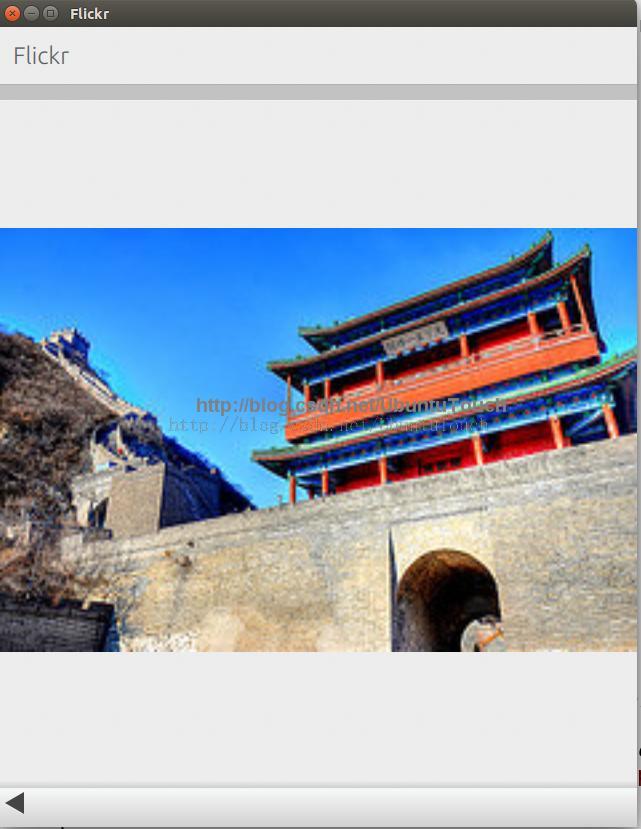
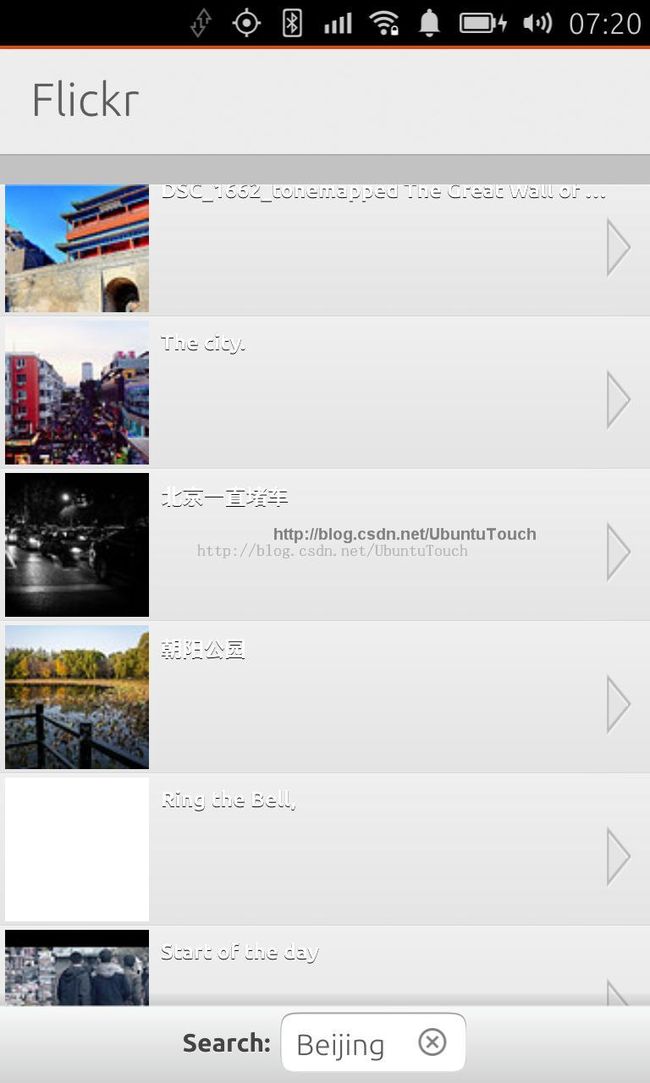
在这篇文章中我们将一步一步地教大家怎么在Ubuntu手机平台来开发一个QML的应用。我们知道QML开发对很多初学者来说并不难。我们需要有一些简单的javascript的基础就可以开始我们的开发了。QML应用的调试也是很方便的。我们通过这个教程的学习,掌握基本的开发流程及界面设计。最终的应用显示的图片如下:
如果大家想对这个开发有更多的了解,可以参阅文章“Ubuntu手机应用QML开发 (视频)”
1)创建一个最基本的QML应用
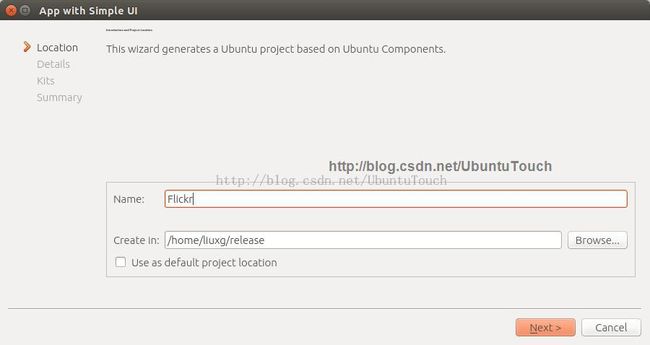
我们首先打开Ubuntu SDK,并选择“
App with Simple UI”模版。
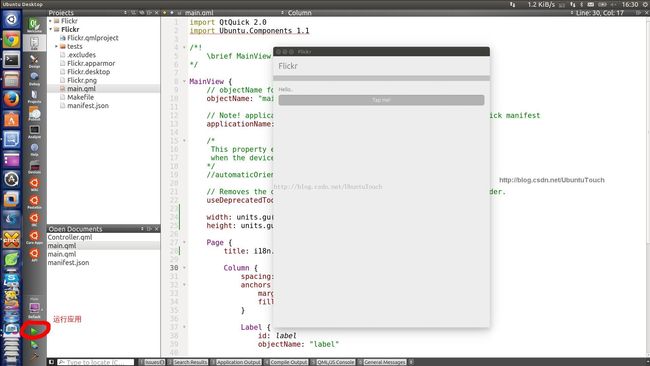
这样我们就产生了一个最基本的QML应用。我们可以在desktop上运行它(通过按下
Ctrl+
R)键或点击SDK左下方的绿色的运行键。我们同时修改main.qml中的尺寸为:
    width: units.gu(80)
    height: units.gu(100)
这样我们的应用更像手机的长宽比。修改应用的title为:
应用中有一个按钮,大家可以点击并看看有什么变化。
2)实现一个最基本的列表
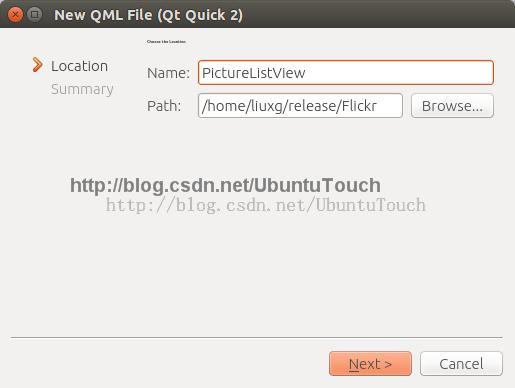
回头看看我们的设计,我们需要有一个列表来列出我们的图片。我们这里来使用一个列表的控件来实现它。在Ubuntu SDK的toolkit中,有一个conrtol叫做 UbuntuListView。我们可以使用它来设计我们的列表。当然我们也可以使用QML中的 ListView。UbuntuListView有一些更多的功能比如PullToRefresh。我们可以在下面用到。我们首先通过如下的方式添加一个文件“PictureListView.qml”到项目中。
这样我们就基本上创建了一个叫做“PictureListView.qml”的文件。在这里,它实际上创建一个叫做“PictureListView”的Component。一个Component的名称通常是以大写字母为开始的。通常它是以“ Item”为基础的元素。Item在QML中是所有可视元素的最基础的元素。相当于在我们C++或JAVA编程中最基础的一个类。PictureListView.qml的设计如下:
import QtQuick 2.0

Item {
    anchors.fill: parent

}
为了能够在main.qml中调用它,我们修改我们的main.qml如下:
MainView {
    // objectName for functional testing purposes (autopilot-qt5)
    objectName: "mainView"

    // Note! applicationName needs to match the "name" field of the click manifest
    applicationName: "com.ubuntu.developer.liu-xiao-guo.flickr"

    /*
     This property enables the application to change orientation
     when the device is rotated. The default is false.
    */
    //automaticOrientation: true

    // Removes the old toolbar and enables new features of the new header.
    useDeprecatedToolbar: false

    width: units.gu(80)
    height: units.gu(100)

    Page {
        id:mainPage
        title: i18n.tr("Flickr")
        clip:true

        PictureListView {
            anchors.fill: parent
        }
    }
}
注意这里的“applicationName”。对于一些应用来说它必须是和应用的包的名称是一样的。因为应用安全的考虑,在使用ContentHub或使用API时创建自己的设置文件,都存在于和这个名称相关的目录里。重新运行运行程序,显示如下。目前我们的应用应该没有做上面东西。代码可以在如下的地址找到:
bzr branch
lp:~liu-xiao-guo/debiantrial/flick1
2)完成UbuntuListView
我们再次回顾一下我们最上面的设计。里面是一个ListView。这里我们来使用 UbuntuListView来完成该View。我们重新设计我们的PictureListView.qml文件。为了能够显示我们的ListView,我们对PictureListView做了一个简单的展示:
import QtQuick 2.0
import Ubuntu.Components 1.1
import Ubuntu.Components.ListItems 1.0

Item {
    id: mainScreen

    UbuntuListView {
        id: listView
        width: mainScreen.width
        height:mainScreen.height

        model: 10

        delegate:
            Text {
                text: "Hi"
            }

        Scrollbar {
            flickableItem: listView
        }
    }
}
重新运行程序,我们可以看到显示为10个“Hi”,证明ListView已经是在工作,虽然不是我们所需要的设计。在我们的设计中,我们的ListView的左边是一个图片,右边是一些文字。为了快速设计的方便,我们们将先只显示一行字。同时我们可以在网上的任何一个位置下载一个我们自己喜欢的图片并存放到项目根目录下的一个叫做“images”的目录中,并重新命令为sample.jpg。在这里,我选择网上的一个 图片。我们也需要下载另外一个图片 list.png来完成我们的这个步骤(存放于images目录中)。我们可以同时参阅Qt网页里的 ListView介绍。我们修改我们的程序如下:
import QtQuick 2.0
import Ubuntu.Components 1.1
import Ubuntu.Components.ListItems 1.0

Item {
    id: mainScreen

    ListModel {
        id: sampleListModel

        ListElement {
            imagePath: "images/sample.jpg"
            title: "First picture"
        }
        ListElement {
            imagePath: "images/sample.jpg"
            title: "Second picture"
        }
        ListElement {
            imagePath: "images/sample.jpg"
            title: "Third picture"
        }
    }

    Component {
        id: listDelegate
        BorderImage {
            source: "images/list.png"
            border { top:4; left:4; right:100; bottom: 4 }
            anchors.right: parent.right
            // width: mainScreen.width
            width: ListView.view.width

            property int fontSize: 25

            Rectangle {
                id: imageId
                x: 6; y: 4; width: parent.height - 10; height:width; color: "white"; smooth: true
                anchors.verticalCenter: parent.verticalCenter

                BorderImage {
                    source: imagePath; x: 0; y: 0
                    height:parent.height
                    width:parent.width
                    anchors.verticalCenter: parent.verticalCenter
                }

            }

            Text {
                x: imageId.width + 20
                y: 15
                width: ListView.view.width*2/3
                text: title; color: "white"
                font { pixelSize: fontSize; bold: true }
                elide: Text.ElideRight; style: Text.Raised; styleColor: "black"
            }
        }
    }

    UbuntuListView {
        id: listView
        width: mainScreen.width
        height:mainScreen.height

        model: sampleListModel

        delegate: listDelegate
    }

    Scrollbar {
        flickableItem: listView
    }
}
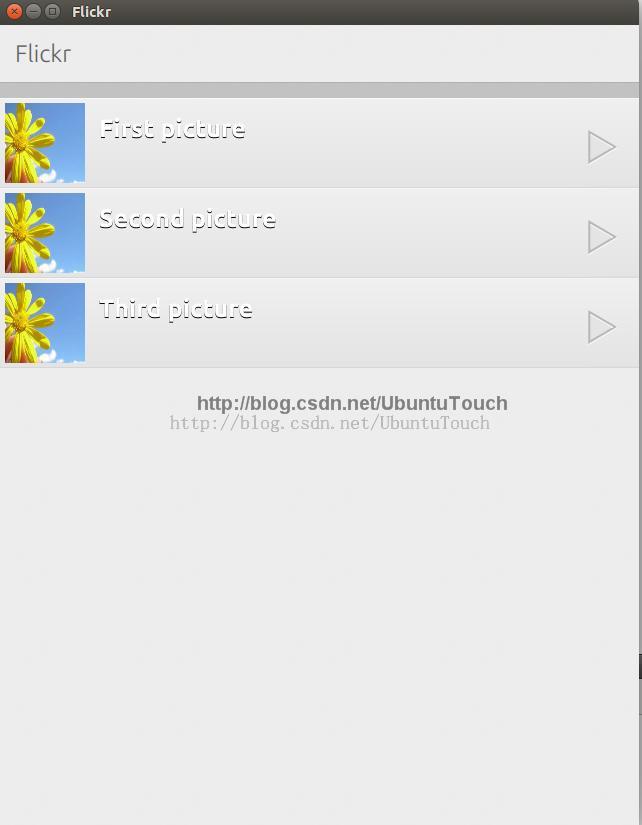
特别值得注意的是,我们这里使用了一个叫做listDelegate的Component来显示每一个list中的项。这个listDelegate相当于是每个ListView中的每一项显示的模版。对于Android开发比较熟悉的开发者来说,这个并不陌生。Android里是采用adapter来实现相同功能的。同时我们也使用了一个人工假想的sampleListModel来填充我们的数据。重新运行我们的应用。我们可以看到如下的显示:
到这里,我们基本上已经完成了整个ListView的显示。整个的源代码在如下的网址可以下载:
bzr branch
lp:~liu-xiao-guo/debiantrial/flick2
3)创建toolbar
在这个章节里,我们来完成我们的toolbar的设计。再回到我们最上面图显示的最初的设计,我们需要有一个输入的框来输入我们的关键词以来搜索。
    BorderImage {
        id:toolbar

        anchors.bottom:parent.bottom
        anchors.horizontalCenter: parent.horizontalCenter

        width: parent.width
        height: units.gu(6)

        source: "images/toolbar.png"
        border.left: 4; border.top: 4
        border.right: 4; border.bottom: 4

        Row {
            id:inputcontainer
            anchors.centerIn:toolbar
            anchors.verticalCenterOffset:6
            spacing:12
            Text {
                id:label
                font.pixelSize:30
                anchors.verticalCenter:parent.verticalCenter;
                text: i18n.tr("Search:")
                font.bold:true
                style:Text.Raised
                styleColor:"#fff"
                color:"#444"
            }

            TextField {
                id:input
                placeholderText: "Please input a text to search:"
                width:220
                text:"Beijing"
            }
        }

        Image {
            id: backbutton
            opacity:0
            source: "images/back.png"
            anchors.verticalCenter:parent.verticalCenter
            anchors.verticalCenterOffset:0
            anchors.left:parent.left
            anchors.leftMargin:8

            MouseArea{
                anchors.fill:parent
                onClicked: mainScreen.state=""
                scale:4
            }
        }
    }
整个的设计也是非常直接的。我们使用了一个toolbar.png作为背景。使用一个 Row来管理我们的“Search”及TextField输入框。同时我们还有一个在默认情况下opacity为零的back.png的Image。当opacity为零时,就是不可见。许多的control还有visible。虽然在某种程度上,visible和opacity有相同的功能,但是由于opacity可以从“0”到“1”进行变化,从而达到动画的效果。它用来显示在detail屏中来返回到ListView.默认情况下是不可见的。我们需要下载 toolbar.png及 back.png来完成该步骤。为了能够得到整屏的显示,我们也对ListView的高度进行调整如下:
    UbuntuListView {
        id: listView
        width: mainScreen.width
        height:mainScreen.height - toolbar.height
        model: sampleListModel
        delegate: listDelegate
    }
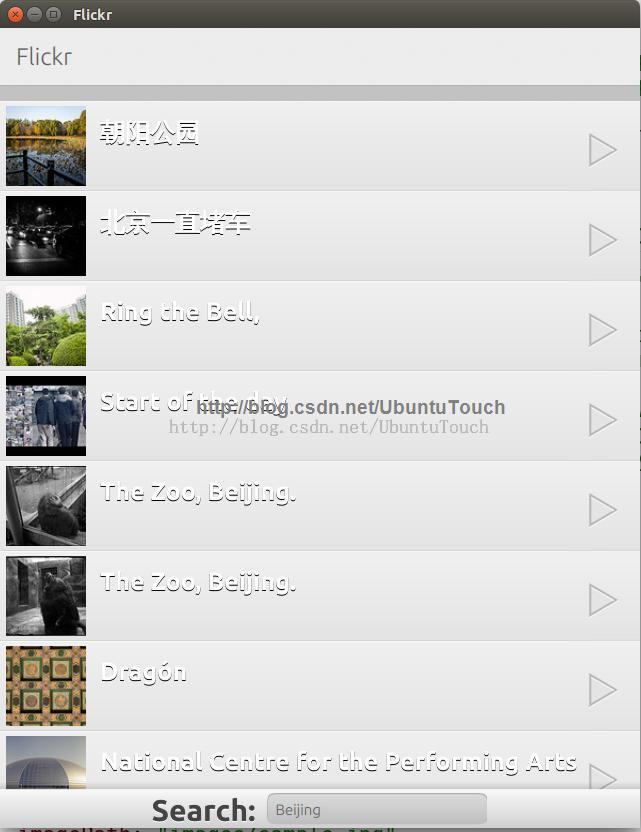
这样整个屏幕的上方是一个ListView,下面的部分是toolbar。重新运行我们的应用,我们可以看到如下的画面:
虽然现在还不能做什么,但是我们应用的基本框架已经搭好了。在接下来的章节中,我们来更进一步把真实的数据填进来。这个步骤的代码在如下的地址可以找到:
bzr branch
lp:~liu-xiao-guo/debiantrial/flick3
3)对ListView添加真实的数据
虽然上面我们已经有一个显示,但是毕竟是虚假的数据。在这个章节中,我们将使用 XmlListModel来对Flickr网站进行请求并得到真实的数据。首先,我们在PictureListView.qml的开始部分加入
import QtQuick.XmlListModel 2.0
这里我们包含上面的 XmlListModel的库,就可以使用它里面的API了。在sampleListModel的上面加入如下的代码:
XmlListModel {
    id: feedModel

//     source: "http://api.flickr.com/services/feeds/photos_public.gne?format=rss2"
    source: "http://api.flickr.com/services/feeds/photos_public.gne?format=rss2&tags=" + escape(input.text)
    query: "/rss/channel/item"  // flickr
    namespaceDeclarations:  "declare namespace media=\"http://search.yahoo.com/mrss/\";"

    // Flickr
    XmlRole { name: "title"; query: "title/string()" }
    XmlRole { name: "imagePath"; query: "media:thumbnail/@url/string()" }
    XmlRole { name: "photoAuthor"; query: "author/string()" }
    XmlRole { name: "photoDate"; query: "pubDate/string()" }

    XmlRole { name: "url"; query: "media:content/@url/string()" }
    XmlRole { name: "description"; query: "description/string()" }
    XmlRole { name: "tags"; query: "media:category/string()" }
    XmlRole { name: "photoWidth"; query: "media:content/@width/string()" }
    XmlRole { name: "photoHeight"; query: "media:content/@height/string()" }
    XmlRole { name: "photoType"; query: "media:content/@type/string()" }
}
同时修改listView的model为feedModel:
    UbuntuListView {
        id: listView
        width: mainScreen.width
        height:mainScreen.height - toolbar.height
        model: feedModel
        delegate: listDelegate
    }
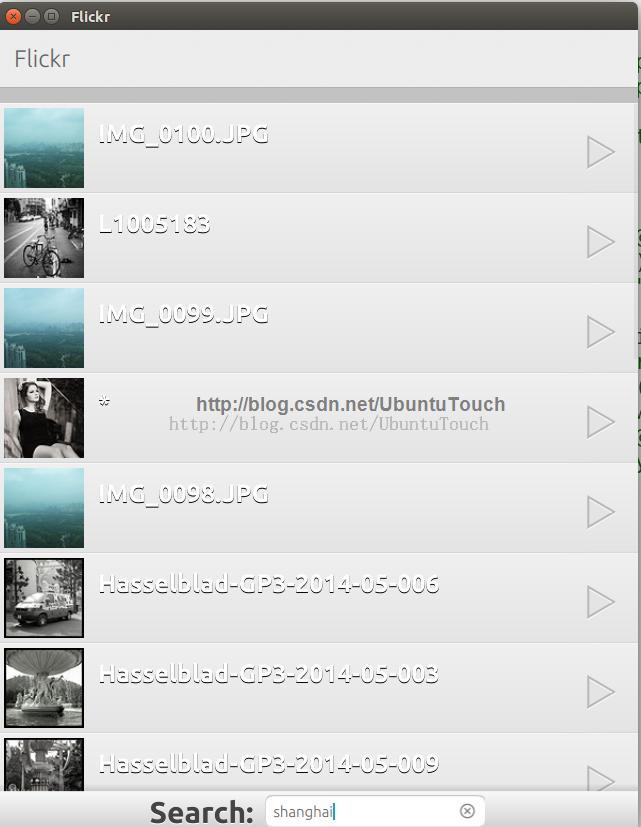
我们通过XmlListModel进行查询,并同时转换为我们所需要的数据进行显示。比如我们用到的“
title”及“
imagePath”。在查询时我们也同时使用了input输入框中的text。我们运行我们刚生成的应用,并同时修改在输入框中的内容,比如“shanghai”或“tianjing”等。我们会看到内容的改变。
为了使得图片的大小更加适合于在手机上显示,我们也同时修改listDelegate中BorderImage的高度为180.
所有的源码可以在如下的地址找到:
bzr branch
lp:~liu-xiao-guo/debiantrial/flick4
4)显示照片的详细信息
我们虽然已经显示了照片的详细信息,我们希望在点击每个ListView中的每个项目的时候,能够更加清楚地看得到更加详细的照片信息。为了能够达到这个目的,我们可以在ListView的右边放置一个同样大小的屏幕。当我们点击ListView中的每一项时,我们就把屏幕向右移动。这样就可以看到照片的详细信息。当我们看完照片时,我们也可以把屏幕向左移动这样又回到ListView的页面。为了达到这样的设计,我们在我们的项目中加入一个新的叫做“SpinnerImage.qml”的Component。它的创建方法和上面介绍的“PictureListView.qml”是一样的。它的设计如下:
import QtQuick 2.0

Image {
    id:image

    property bool loading:status != Image.Ready

    Image {
        id: container
        property bool on: false
        source: "images/spinner.png";
        visible: loading
        anchors.centerIn:parent
        NumberAnimation on rotation {
            running: loading ; from: 0; to: 360;
            loops: Animation.Infinite; duration: 2000
        }
    }
}
我们可以看到,这是一个Image中含有一个Image的Component。当id为image中的Image还在下载时,里面的container中的spinner.png将不断地旋转。我们需要下载 spinner.png文件。
我们需要修改ListView的设计如下:
    Row {
        id:viewcontainer

        UbuntuListView {
            id: listView
            width: mainScreen.width
            height:mainScreen.height - toolbar.height

            model: feedModel
            delegate: listDelegate

            Scrollbar {
                flickableItem: listView
            }
        }

        SpinnerImage {
            id:viewscreen
            clip:true
            width:mainScreen.width
            height:mainScreen.height - toolbar.height
            smooth:true
            fillMode:Image.PreserveAspectFit
        }
    }
    Component {
        id: listDelegate
        BorderImage {
            source: "images/list.png"
            border { top:4; left:4; right:100; bottom: 4 }
            anchors.right: parent.right
            // width: mainScreen.width
            width: ListView.view.width
            height: 180

            property int fontSize: 25

            Rectangle {
                id: imageId
                x: 6; y: 4; width: parent.height - 10; height:width; color: "white"; smooth: true
                anchors.verticalCenter: parent.verticalCenter

                SpinnerImage {
                    source: imagePath; x: 0; y: 0
                    height:parent.height
                    width:parent.width
                    anchors.verticalCenter: parent.verticalCenter
                }
            }

            Text {
                x: imageId.width + 20
                y: 15
                width: mainScreen.width - x - 40
                text: title; color: "white"
                font { pixelSize: fontSize; bold: true }
                elide: Text.ElideRight; style: Text.Raised; styleColor: "black"
            }

            MouseArea {
                anchors.fill: parent
                onClicked: {
                    viewcontainer.x -= mainScreen.width
                }
            }
        }
    }
重新运行应用。我们发现,当我们点击listview中的每一项时,就会很快地切换到另外一个页面,并展示该图片。在实际体验中,这个可能并不是最好的,有时我们希望能看到一个平滑过度的中间状态,就像我们在其它平台中看到的那样。我们在这里可以使用QML中的状态来实现这个功能。在PictureListView.qml中,加入如下的代码(放在mainScreen):
    states: [
        State {
            name: "view"
            PropertyChanges {
                target: viewcontainer
                x:-mainScreen.width
            }
            PropertyChanges {
                target: backbutton
                opacity:1
            }
            PropertyChanges {
                target: inputcontainer
                opacity:0
            }
        }
    ]

    transitions: [
        Transition {
            NumberAnimation { target: viewcontainer; property: "x"; duration: 500
                easing.type:Easing.OutSine}
            NumberAnimation { target: inputcontainer; property: "opacity"; duration: 200}
            NumberAnimation { target: backbutton; property: "opacity"; duration: 200}
        }
    ]
在这里我们定义了一个新的状态“ view”。默认的状态为 "",即一个空字符串。在状态放生切换时我们可以使用transitions来实现动画的展示。在上面,我们使得在x发生改变时,需要500毫秒来完成。同样我们也使得backbutton及inputcontainer的opacity也发生改变。有兴趣的开发者可以调整一下时间的参数来看看这个变化的过程。这样我们就可以看到状态的变化。加入了状态后,我们重新改写listDelegate中MouseArea中的代码:
            MouseArea {
                anchors.fill: parent
                onClicked: {
                    viewscreen.source = imagePath.replace("_s", "_m")
                    mainScreen.state = "view"
                }
            }
在这里,我们同时也修改了imagePath中的内容,从而使得我们能够在展示详细图片时,使用的是“中”( m)等大小的图片而不是“小”( s)的图片。重新运行我们的应用:
        Image {
            id: backbutton
            opacity:0
            source: "images/back.png"
            anchors.verticalCenter:parent.verticalCenter
            anchors.verticalCenterOffset:0
            anchors.left:parent.left
            anchors.leftMargin:8

            MouseArea{
                anchors.fill:parent
                onClicked: mainScreen.state=""
                scale:4
            }
        }
在这里我们可以看到,当我们点击的时候,mainScreen的状态state有设为"",也就是应用最起始的状态。在x坐标发生变化时,我们可以通过transitions来实现动画的效果。
这个应用在手机的图片为:
整个应用的源码在如下地址可以找到:
bzr branch
lp:~liu-xiao-guo/debiantrial/flick5
5)更进一步完善应用
细心的开发者如果在手机上运行并输入字符串时,可能会发现跳出的键盘挡住了我们的输入框。我们可以通过打开在main.qml中的MainView中的如下的项:
anchorToKeyboard: true
更多的阅读可以参照 文章来详细了解。
另外,在ListView中,当照片还在下载时,我们也希望能够看到不断选择的spinner。我们可以把listDelegate中的imageId修改为:
            Rectangle {
                id: imageId
                x: 6; y: 4; width: parent.height - 10; height:width; color: "white"; smooth: true
                anchors.verticalCenter: parent.verticalCenter

                SpinnerImage {
                    source: imagePath; x: 0; y: 0
                    height:parent.height
                    width:parent.width
                    anchors.verticalCenter: parent.verticalCenter
                }
            }
我们可以在UbuntuListView中加入“
PullToRefresh”如下的代码:
        UbuntuListView {
            id: listView
            width: mainScreen.width
            height:mainScreen.height - toolbar.height

            model: feedModel
            delegate: listDelegate

            // let refresh control know when the refresh gets completed
            PullToRefresh {
                refreshing: listView.model.status === XmlListModel.Loading
                onRefresh: listView.model.reload()
            }

            Scrollbar {
                flickableItem: listView
            }
        }
这样,当我们往下拉ListView时,会自动更新我们的ListView中的内容。
我们也可以通过修改Flickr.png来实现我们自己的定制的icon。整个应用的最终版本在如下的地址可以找到:
bzr branch
lp:~liu-xiao-guo/debiantrial/flick6
6)加入Swipe功能
目前我们的应用应该还是比较地完善。我们还希望加入一个功能。当我们显示大的图片时,我们希望能够通过从左向右的滑动来回到以前的列表的画面。这样我们就不必使用点击屏幕左下方的箭头了。为了实现这个功能,我们复制我们的“SpinnerImage.qml”文件到当前的目录,并同时重新命名为“DetailedImage.qml”文件。我们回到SDK的Flickr的项目中来。我们发现项目已经自己找到这个文件了。这个功能是和CMake项目不太相同的地方。为了捕获Swipe的动作,我们在这个文件中加入对MouseArea的处理。整个源码如下:
import QtQuick 2.0

Image {
    id:image

    property bool loading:status != Image.Ready

    Image {
        id: container
        property bool on: false
        source: "images/spinner.png";
        visible: loading
        anchors.centerIn:parent
        NumberAnimation on rotation {
            running: loading ; from: 0; to: 360;
            loops: Animation.Infinite; duration: 2000
        }
    }

    // Create the detection of swipe
    signal swipeRight;
    signal swipeLeft;
    signal swipeUp;
    signal swipeDown;

    MouseArea {
        anchors.fill: parent
        property int startX;
        property int startY;

        onPressed: {
            startX = mouse.x;
            startY = mouse.y;
        }

        onReleased: {
            var deltax = mouse.x - startX;
            var deltay = mouse.y - startY;

            if (Math.abs(deltax) > 50 || Math.abs(deltay) > 50) {
                if (deltax > 30 && Math.abs(deltay) < 30) {
                    // swipe right
                    swipeRight();
                } else if (deltax < -30 && Math.abs(deltay) < 30) {
                    // swipe left
                    swipeLeft();
                } else if (Math.abs(deltax) < 30 && deltay > 30) {
                    // swipe down
                    swipeDown();
                } else if (Math.abs(deltax) < 30 && deltay < 30) {
                    // swipe up
                    swipeUp();
                }
            }
        }
    }
}
    Row {
        id:viewcontainer

        UbuntuListView {
            id: listView
            width: mainScreen.width
            height:mainScreen.height - toolbar.height

            model: feedModel
            delegate: listDelegate

            // let refresh control know when the refresh gets completed
            PullToRefresh {
                refreshing: listView.model.status === XmlListModel.Loading
                onRefresh: listView.model.reload()
            }

            Scrollbar {
                flickableItem: listView
            }
        }

        DetailedImage {
            id:viewscreen
            clip:true
            width:mainScreen.width
            height:mainScreen.height - toolbar.height
            smooth:true
            fillMode:Image.PreserveAspectFit

            onSwipeRight: {
                onClicked: mainScreen.state=""
            }
        }
    }
如果开发者不知道怎么部署应用到手机上,可以参考文章“ 怎么安装Ubuntu应用到Device中”。在手机上面显示的图片如下:
整个应用的源码在如下的地址可以找到:
bzr branch
lp:~liu-xiao-guo/debiantrial/flickr7
或在地址:git clone https://gitcafe.com/ubuntu/Flickr.git
另外一个更加复杂的版本在如下地址可以下载:
bzr branch
lp:~liu-xiao-guo/debiantrial/flickrfinal
