使用C++拓展QML 类型及Property binding!
我们知道QML虽然是很强大的,但是有时我们觉得它有些功能还是需要C++来拓展的话,这时我们可以使用IDE提供的plugin架构来创建一个新的plugin。这个plugin可以在QML里直接调用。它的使用就像先前定义好的控件一样。首先我们来看一下我们最终设计的界面。这里是一个交通灯的示范例程:
这时,我们可以关闭项目再打开项目,或者直接在项目框中点击右键,并运行“Run CMake”以使刚加入的文件在项目框中可见。
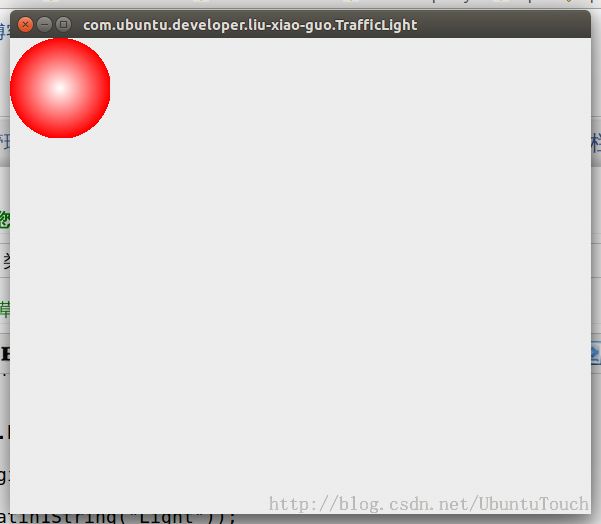
我们下面来做一个简单的实验,看TrafficLight是否被正确地调用。修改“TrafficLight.qml”文件如下:
在Desktop上运行,我们可以看到:
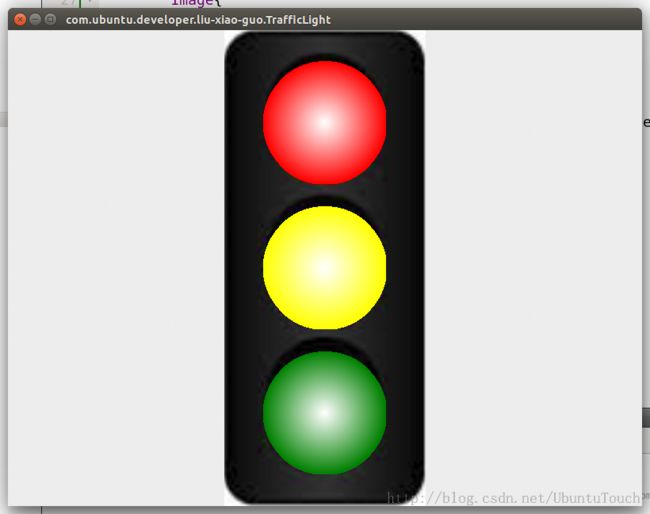
在这里我们使用了一个"Column"的layout管理器,它可以使得在它之内部件(Component)从上到下进行显示和管理。如果屏幕的尺寸发生变化,它也会帮我们自动适配及调整。你可以看出我们创建了从上到下的三个“红”,“黄”及“绿”的交通灯。你们也可看到我在这里也使用了一个背景的图片以使得显示效果更加逼真。如果开发者没有这个图片也没有关系。我在下面贴出来(右边的图)。如果确实没有,也没关系。运行时可能看不到背景的图片而已。开发者可以把图片考到和“trafficlight.qml”相同的目录。
在这里我们定义了4个不同的状态" red_on", " red_yellow_on", " yellow_on" 及“ green_on"。这几个状态显然我们常见的几个交通灯的状况。在每个状态下,我们可以看到各个灯的”开”及”关"的情况。
在这里我们定义了无论从哪种状态“*”到哪种状态“*”,我们变化的时间是1000毫秒,同时要使得它的scale,及颜色发生相应的渐变。这样可以产生我们所希望的动画效果。
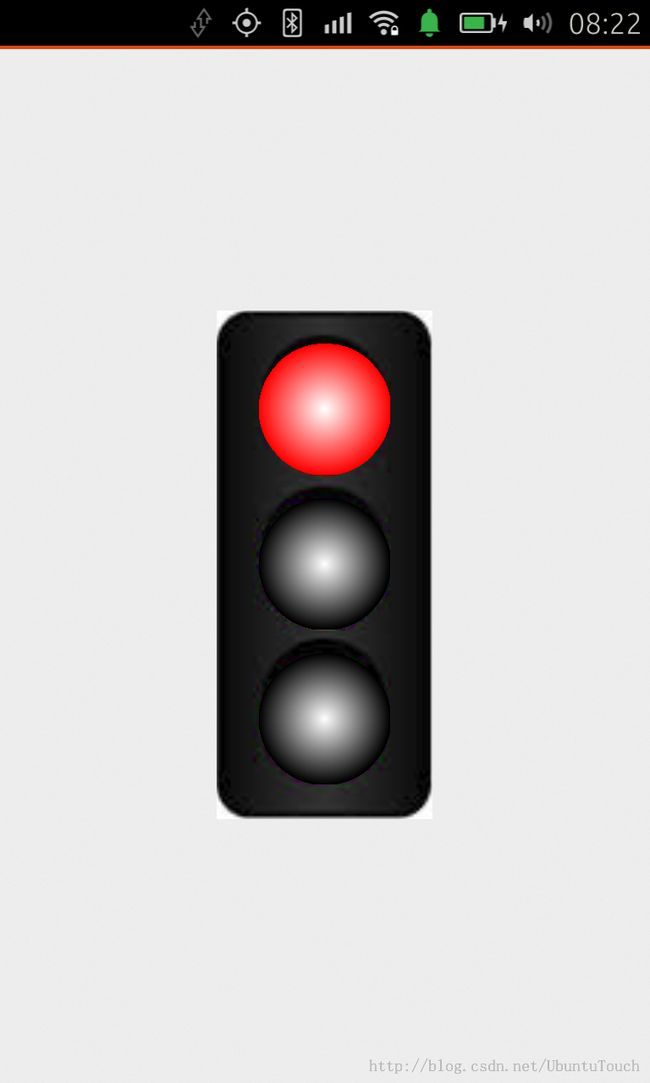
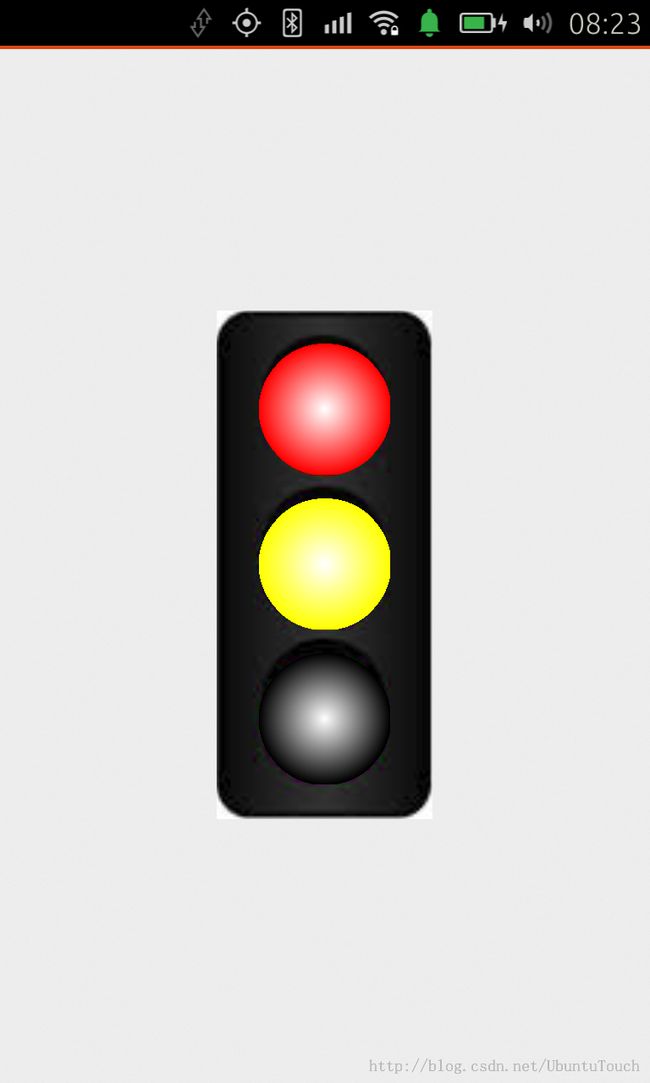
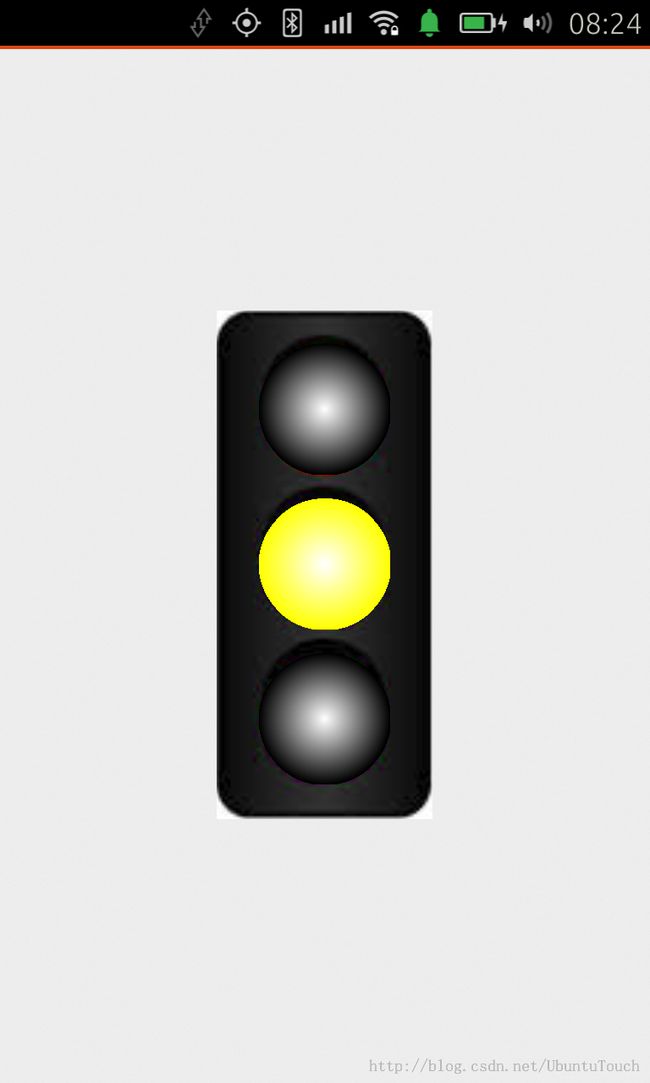
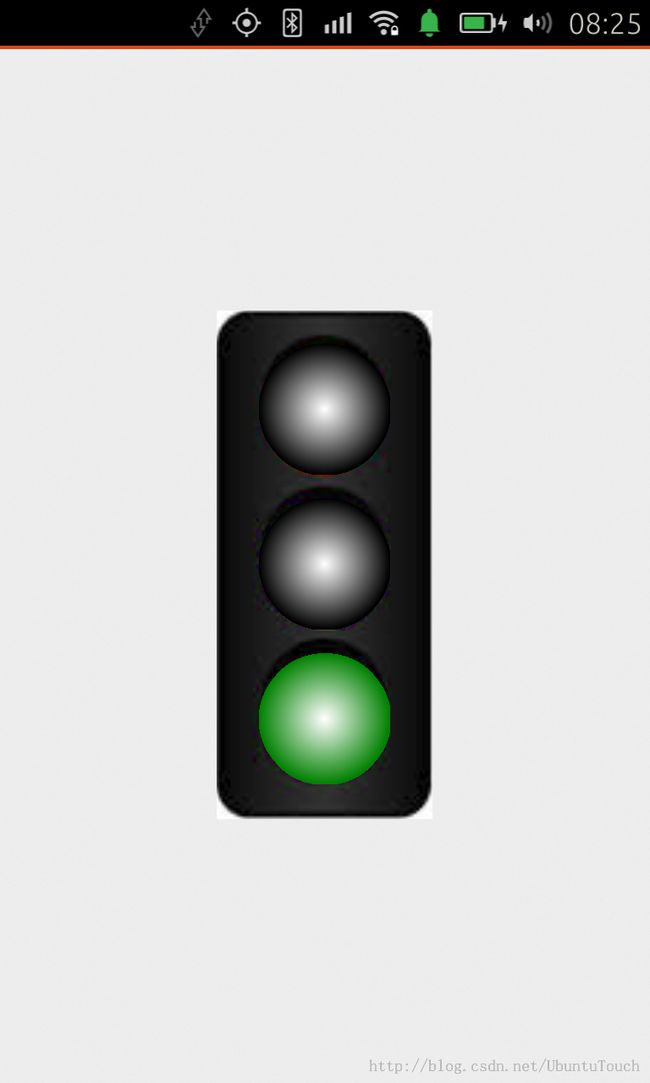
运行效果如下:
这里显示的是几个交通灯变化的画面。它们也同时对应我们现实生活中的交通灯变化的几个状态。
在这篇文章里,我们将学到如下的东西:
- 学习怎么制作一个plugin
- 学习property binding
- 学习QML的状态(state)及过渡(transition)
- 学习怎么制作Component
1) 创建一个基本的应用
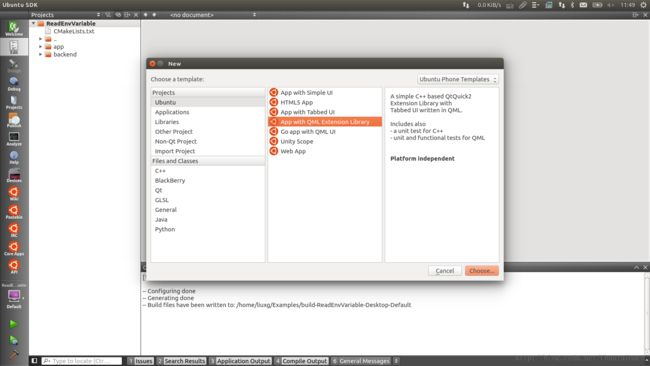
首先我们启动Qt Creator IDE,然后选择如下所示的template (App with QML extension Library):
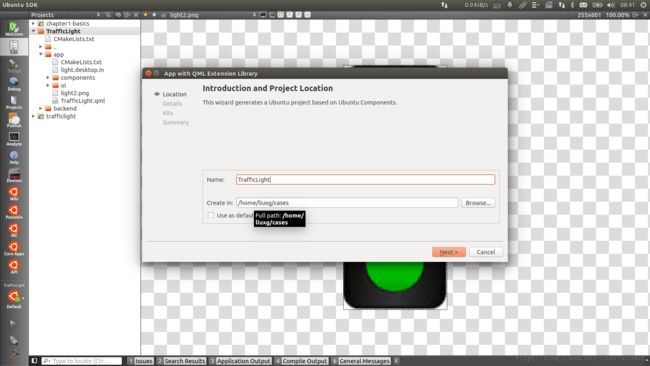
创建一个称作"TrafficLight"的项目:
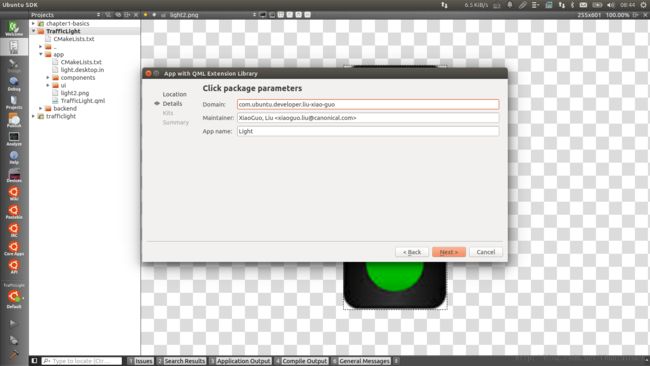
同时也把应用的名字设定为“Light":
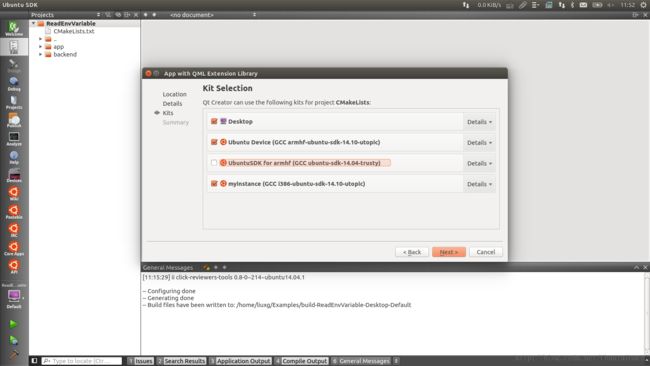
然后,我们按IDE提示的步骤完成以后的过程创建出我们的最原始的一个template应用。我们可以开始在desktop及"armhf"的环境中运行。如果我们还有问题,这可能是我们的安装程序有些问题。请参考我们的 SDK安装文章进行修正。
2) 完成TrafficLight plugin
我们知道QML提供了很好的图形控件。QML有一个称作LinearGradient的Gradient,但他不是我们想要的RadialGradient。经过寻扎,我们在C++中找到相应的QRadialGradient类,它可以实现我们想要的功能。我们怎来把它使用到我们的C++应用中呢?
首先我们找到项目中的文件目录“TrafficLight/backend/modules/Light”,创建“trafficlight.h"及“trafficlight.cpp"文件,并输入如下的代码
#ifndef TRAFFICLIGHT_H
#define TRAFFICLIGHT_H

#include <QtQuick/QQuickPaintedItem>
#include <QColor>

class TrafficLight : public QQuickPaintedItem
{
    Q_OBJECT
    Q_PROPERTY(QColor color READ color WRITE setColor NOTIFY colorChanged)

public:
    explicit TrafficLight(QQuickItem *parent = 0);
    void paint(QPainter *painter);

    QColor color() const;
    void setColor(const QColor &color);

signals:
    void colorChanged();

public slots:

private:
    QColor m_color;
};

#endif // TRAFFICLIGHT_H
<pre style="margin-top: 0px; margin-bottom: 0px;"><!--StartFragment--><span style=" color:#000080;"></span>
#include <QPainter>
#include <QRadialGradient>
#include "trafficlight.h"
TrafficLight::TrafficLight(QQuickItem *parent)
: QQuickPaintedItem(parent)
{
}
QColor TrafficLight::color() const
{
return m_color;
}
void TrafficLight::setColor(const QColor &color)
{
if ( color == m_color )
return;
else {
m_color = color;
update(); // repaint with the new color
emit colorChanged();
}
}
void TrafficLight::paint(QPainter *painter)
{
QRectF rect(boundingRect());
QPen pen;
pen.setWidthF( 0 );
pen.setColor(m_color);
painter->setPen( pen );
QRadialGradient g( rect.width()/2, rect.height()/2,
rect.width()/2, rect.width()/2, height()/2 );
g.setColorAt( 0.0, Qt::white );
g.setColorAt( 1.0, m_color );
painter->setBrush( g );
painter->drawEllipse(rect);
}这里我们定义了一个称作为“TrafficLight”的类。根据不同的颜色,用它来画一个“QRadialGradient”。我们可以看到在这个类中我们定义了一个称作“color"的property。
Q_PROPERTY(QColor color READ color WRITE setColor NOTIFY colorChanged)
在下面的QML语言中,我们可以直接通过绑定这个property,也可以对它进行修改从而使得界面发生改变。
我们找到"TrafficLight/backend/CMakeLists.txt"文件,并加入如下的语句:
set(
    Lightbackend_SRCS
    modules/Light/backend.cpp
    modules/Light/mytype.cpp
    modules/Light/trafficlight.cpp
)
这时,我们可以关闭项目再打开项目,或者直接在项目框中点击右键,并运行“Run CMake”以使刚加入的文件在项目框中可见。
找到“backend.cpp"文件,并加入如下语句:
#include <QtQml>
#include <QtQml/QQmlContext>
#include "backend.h"
#include "mytype.h"
#include "trafficlight.h"

void BackendPlugin::registerTypes(const char *uri)
{
    Q_ASSERT(uri == QLatin1String("Light"));

    qmlRegisterType<MyType>(uri, 1, 0, "MyType");
    qmlRegisterType<TrafficLight>(uri, 1, 0, "TrafficLight");
}

void BackendPlugin::initializeEngine(QQmlEngine *engine, const char *uri)
{
    QQmlExtensionPlugin::initializeEngine(engine, uri);
}
这里注册的目的是为了让“TrafficLight”类在QML文件中可以被实例化。第二个"TrafficLight"可以是任何你喜欢的名字,只要它可以和QML中的引用对应即可。
这样我们基本上完成了对plugin的设计。我们这时可以编译一下看一下有什么问题。如果没有的话,我们可以直接进入下面的章节。
3)在QML中引用TrafficLight类型
我们下面来做一个简单的实验,看TrafficLight是否被正确地调用。修改“TrafficLight.qml”文件如下:
import QtQuick 2.0
import Ubuntu.Components 0.1
import "ui"
import Light 1.0

MainView {
    // objectName for functional testing purposes (autopilot-qt5)
    objectName: "mainView"

    // Note! applicationName needs to match the "name" field of the click manifest
    applicationName: "com.ubuntu.developer.liu-xiao-guo.TrafficLight"

    /*
     This property enables the application to change orientation
     when the device is rotated. The default is false.
    */
    //automaticOrientation: true

    width: units.gu(100)
    height: units.gu(75)

  TrafficLight{
        id: redlight
        width: 100
        height: 100
        color:"red"
    }
}
在Desktop上运行,我们可以看到:
我们可以看到plugin是真的被调用了。我们可以改变图形的位置或颜色来看看有什么变化等。
4)应用设计
通过修改"TrafficLight.qml"文件,我们首先来看一看我们设计的程序如下:
import QtQuick 2.0
import Ubuntu.Components 0.1
import "ui"
import Light 1.0

MainView {
    // objectName for functional testing purposes (autopilot-qt5)
    objectName: "mainView"

    // Note! applicationName needs to match the "name" field of the click manifest
    applicationName: "com.ubuntu.developer.liu-xiao-guo.TrafficLight"

    /*
     This property enables the application to change orientation
     when the device is rotated. The default is false.
    */
    //automaticOrientation: true

    width: units.gu(100)
    height: units.gu(75)

    Page {
        id:main
        anchors.fill: parent
        property int radius: 155

        Image{
            anchors.horizontalCenter: parent.horizontalCenter
            height:parent.height
            source: "light2.png"
            fillMode: Image.PreserveAspectFit

            Column {
                anchors.horizontalCenter: parent.horizontalCenter
                anchors.verticalCenter: parent.verticalCenter

                spacing: 28

                TrafficLight{
                    id: redlight
                    width: main.radius
                    height: main.radius
                    color:"red"
                }

                TrafficLight{
                    id: yellowlight
                    width: main.radius
                    height: main.radius
                    color:"yellow"
                }

                TrafficLight{
                    id: greenlight
                    width: main.radius
                    height: main.radius
                    color:"green"
                }
            }
        }
    }
}
在这里我们使用了一个"Column"的layout管理器,它可以使得在它之内部件(Component)从上到下进行显示和管理。如果屏幕的尺寸发生变化,它也会帮我们自动适配及调整。你可以看出我们创建了从上到下的三个“红”,“黄”及“绿”的交通灯。你们也可看到我在这里也使用了一个背景的图片以使得显示效果更加逼真。如果开发者没有这个图片也没有关系。我在下面贴出来(右边的图)。如果确实没有,也没关系。运行时可能看不到背景的图片而已。开发者可以把图片考到和“trafficlight.qml”相同的目录。
5)加入状态及过渡
我们知道,上面显示的情况显然不是我们常见的交通灯的情况。现在我们来加入状态来在不同的情况下,让各个等在不同的状态下进行关掉或熄灭。程序如下:
                states: [
                    State {
                        name: "red_on"
                        PropertyChanges {
                            target: redlight
                            color:"red"
                            scale: 1.0
                        }
                        PropertyChanges {
                            target: greenlight
                            color: "black"
                        }
                        PropertyChanges {
                            target: yellowlight
                            color: "black"
                        }
                    },

                    State {
                        name: "red_yellow_on"
                        PropertyChanges {
                            target: redlight
                            color: "red"
                        }
                        PropertyChanges {
                            target: yellowlight
                            color: "yellow"
                        }
                        PropertyChanges {
                            target: greenlight
                            color: "black"
                        }
                    },

                    State {
                        name: "green_on"
                        PropertyChanges {
                            target: redlight
                            color: "black"
                        }
                        PropertyChanges {
                            target: yellowlight
                            color: "black"
                        }
                        PropertyChanges {
                            target: greenlight
                            color: "green"
                        }
                    },

                    State {
                        name: "yellow_on"
                        PropertyChanges {
                            target: redlight
                            color: "black"
                        }

                        PropertyChanges {
                            target: yellowlight
                            color: "yellow"
                        }

                        PropertyChanges {
                            target: greenlight
                            color: "black"
                        }
                    }
                ]
在这里我们定义了4个不同的状态" red_on", " red_yellow_on", " yellow_on" 及“ green_on"。这几个状态显然我们常见的几个交通灯的状况。在每个状态下,我们可以看到各个灯的”开”及”关"的情况。
QML也同时提供给我们在不同状态之间进行转换时的动画效果。我们可以通过过渡来实现:
                transitions: [
                    Transition {
                        from: "*"
                        to: "*"

                        PropertyAnimation {
                            target: redlight
                            properties: "scale, color"
                            duration: 1000
                            easing.type: Easing.InQuad
                        }
                        PropertyAnimation {
                            target: greenlight
                            properties: "scale, color"
                            duration: 1000
                            easing.type: Easing.InQuad
                        }
                        PropertyAnimation {
                            target: yellowlight
                            properties: "scale, color"
                            duration: 1000
                            easing.type: Easing.InQuad
                        }
                    }
                ]
在这里我们定义了无论从哪种状态“*”到哪种状态“*”,我们变化的时间是1000毫秒,同时要使得它的scale,及颜色发生相应的渐变。这样可以产生我们所希望的动画效果。
注意这两段代码必须是加到"Column"所在的块中。
6)加入逻辑使得他们在不同的状态之间转换
我们知道只通过简单的状态定义并不能使得应该在不同的状态之间转换。我们必须定义一个逻辑或事件使得它们在某种条件下转换。对于我们的例程,我们可以使用一个Timer来实现:
                Timer {
                    interval: 1000
                    running: true
                    repeat: true
                    property int count: 0

                    onTriggered: {
                        if (parent.state == "red_on" && count >= 5)
                        {
                            parent.state = "red_yellow_on"
                            count = 0
                        }
                        else if ( parent.state == "red_yellow_on" )
                        {
                            parent.state = "green_on"
                            count++
                        }
                        else if ( parent.state == "green_on" && count >= 5 )
                        {
                            parent.state = "yellow_on"
                            count ++
                        }
                        else if ( parent.state == "yellow_on" ) {
                            parent.state = "red_on"
                            count = 0
                        }
                        else {
                            count++
                        }
                    }
                }
这个Timer每一秒触发一次,onTriggered是以个callback方法。通过这个事件我们可以使得程序在不同的状态下转换。
至此,我们这个部分的程序已经设计完成。整个完整的代码可以在如下的地址下载:
bzr branch
lp:~liu-xiao-guo/debiantrial/trafficlight
7)为程序设计Component
我们刚才设计的程序在某种程度上能够完成我们的功能。但是,设想一下,如果我们想在程序中需要更多的交通灯怎么办呢?我们可以把刚才设计的程序改一下,重新包装成一个Component。这样这个控件在许多的程序中可以复用这个控件。
在"TrafficLight.qml"所在的目录中,我们重新生成一个新的文件叫做”MyLight.qml"。这里记得文件的名称一定要大写。同时我们删除在"TrafficLight.qml"中相应的部分的设计。把相关的代码移过去。
这样重新生成的代码如下:
import QtQuick 2.0
import Ubuntu.Components 0.1
import "ui"

MainView {
    // objectName for functional testing purposes (autopilot-qt5)
    objectName: "mainView"

    // Note! applicationName needs to match the "name" field of the click manifest
    applicationName: "com.ubuntu.developer.liu-xiao-guo.TrafficLight"

    /*
     This property enables the application to change orientation
     when the device is rotated. The default is false.
    */
    //automaticOrientation: true

    width: units.gu(120)
    height: units.gu(80)

    Page {
        id:main
        anchors.fill: parent

        Row {
            id: myrow
            anchors.horizontalCenter: parent.horizontalCenter
            anchors.verticalCenter: parent.verticalCenter
            spacing: units.gu(5)

            MyLight {
                id:light1
                width: main.width/5
                height: width*3
            }

            MyLight {
                id:light2
                width: main.width/5
                height: width*3
            }

            MyLight {
                id:light3
                width: main.width/5
                height: width*3
            }
        }

    }
}
MyLight.qml 代码
import QtQuick 2.0
import Ubuntu.Components 0.1
import Light 1.0

Item {
    width: units.gu(100)
    height: units.gu(75)

    Rectangle {
        id: background
        anchors.fill: parent
        color: "black"
        property int size: width*0.7

        Column {
            anchors.horizontalCenter: parent.horizontalCenter
            anchors.verticalCenter: parent.verticalCenter

            spacing: units.gu(3)

            TrafficLight{
                id: redlight
                width: background.size
                height: background.size
                color:"red"
            }

            TrafficLight{
                id: yellowlight
                width: background.size
                height: background.size
                color:"yellow"
            }

            TrafficLight{
                id: greenlight
                width: background.size
                height: background.size
                color:"green"
            }

            state: "red_on"

            states: [
                State {
                    name: "red_on"
                    PropertyChanges {
                        target: redlight
                        color:"red"
                        scale: 1.0
                    }
                    PropertyChanges {
                        target: greenlight
                        color: "black"
                    }
                    PropertyChanges {
                        target: yellowlight
                        color: "black"
                    }
                },

                State {
                    name: "red_yellow_on"
                    PropertyChanges {
                        target: redlight
                        color: "red"
                    }
                    PropertyChanges {
                        target: yellowlight
                        color: "yellow"
                    }
                    PropertyChanges {
                        target: greenlight
                        color: "black"
                    }
                },

                State {
                    name: "green_on"
                    PropertyChanges {
                        target: redlight
                        color: "black"
                    }
                    PropertyChanges {
                        target: yellowlight
                        color: "black"
                    }
                    PropertyChanges {
                        target: greenlight
                        color: "green"
                    }
                },

                State {
                    name: "yellow_on"
                    PropertyChanges {
                        target: redlight
                        color: "black"
                    }

                    PropertyChanges {
                        target: yellowlight
                        color: "yellow"
                    }

                    PropertyChanges {
                        target: greenlight
                        color: "black"
                    }
                }
            ]

            transitions: [
                Transition {
                    from: "*"
                    to: "*"

                    PropertyAnimation {
                        target: redlight
                        properties: "scale, color"
                        duration: 1000
                        easing.type: Easing.InQuad
                    }
                    PropertyAnimation {
                        target: greenlight
                        properties: "scale, color"
                        duration: 1000
                        easing.type: Easing.InQuad
                    }
                    PropertyAnimation {
                        target: yellowlight
                        properties: "scale, color"
                        duration: 1000
                        easing.type: Easing.InQuad
                    }
                }
            ]

            Timer {
                interval: 1000
                running: true
                repeat: true
                property int count: 0

                onTriggered: {
                    if (parent.state == "red_on" && count >= 5)
                    {
                        parent.state = "red_yellow_on"
                        count = 0
                    }
                    else if ( parent.state == "red_yellow_on" )
                    {
                        parent.state = "green_on"
                        count++
                    }
                    else if ( parent.state == "green_on" && count >= 5 )
                    {
                        parent.state = "yellow_on"
                        count ++
                    }
                    else if ( parent.state == "yellow_on" ) {
                        parent.state = "red_on"
                        count = 0
                    }
                    else {
                        count++
                    }
                }
            }
        }
    }
}
运行效果如下:
所有的源码可以在如下地方找到:
git clone https://gitcafe.com/ubuntu/trafficlight.git
