在centos5.4下监控工具cacti的安装和配置
安装需求:
CentOS5.6
MySQL
Apache
PHP
net-snmp
RRDTool
Spine --非必须
cacti
部署cacti需要的环境
【安装MySQL】
rpm -qa|grep -i mysql #系统自带
yum install mysql mysql-server mysql-devel #安装
【安装apache】
yum install httpd
【安装php】
yum install php php-mysql
启动服务:
/etc/init.d/httpd start
/etc/init.d/mysqld start #第一次启动会初始化MySQL的数据字典
或者
service httpd start
service mysqld start
设置自启动:
chkconfig httpd on
chkconfig mysqld on
ntsysv #设置自启动
检查mysql是否安装成功:
是否能进入mysql,然后设置root密码:
mysqladmin --user=root password mysql
mysqladmin --user=root --password reload
或者
set password for'root'@'localhost'=password('mysql'); #设置root密码
检查apache是否安装成功:
网址输入本机地址:http://localhost/ (成功如下图)
检查php是否安装成功:
新建文件info.php
touch /var/www/html/info.php
vi /var/www/html/info.php
文件内容如下:
<?php
phpinfo();
?>
在网址中输入:http://localhost/info.php (成功如下图)

依赖包安装:
yum install -y cairo-devellibxml2-devel pango-devel pango libpng-devel freetype freetype-devellibart_lgpl-devel pear pear-devel
【安装配置snmp】
Cacti使用SNMP从远程主机上获取数据。因此,所有启用了SNMP服务的主机都可以被Cacti监控
yum -y install net-snmp net-snmp-utils net-snmp-devel #安装
cp /etc/snmp/snmpd.conf /etc/snmp/snmp.conf
编辑文件修改 vi /etc/snmp/snmp.conf
将第41行default 修改成 127.0.0.1
com2sec notConfigUser 127.0.0.1 public
将第62行 systemview 改成all
access notConfigGroup "" any noauth exact all none none
取消第85行注释
view all included .1 80
/etc/init.d/snmpd start #启动服务
chkconfig snmpd on #开机自启动
【安装rrdtool】
Cacti使用的是RRDTool来存储数据,最令人称道的一个特性就是其画图功能
yum -y install ntp vim-enhanced gcc gcc-c++gcc-g77 flex bison autoconf automake bzip2-devel ncurses-devel zlib-devellibjpeg-devel libpng-devel libtiff-devel freetype-devel libXpm-develgettext-devel pam-devel libxml2-devel glib pango-devel pango cairo-devellibart_lgpl-devel
cd /usr/local
wgethttp://oss.oetiker.ch/rrdtool/pub/rrdtool-1.4.8.tar.gz
tar zxf rrdtool-1.4.8.tar.gz
mv rrdtool-1.4.8 rrdtool
cd rrdtool
./configure --prefix=/usr/local/rrdtool #指定目录安装
make && make install #编译
#PS:安装完毕可能会报错, yum -y install perl* 可以解决
ln -s /usr/local/rrdtool/bin/* /usr/local/bin/
【安装轮询器spine(非必须)】
出于效率原因,在大量采集数据时使用自带的cmd.php轮询器会比较慢,1分钟1次的采集频率可能无法完成轮询所有机器。这里为了优化,采用官方推荐的spine来高效轮询。
yum install openssl-devel mysql-develnet-snmp-devel
cd /usr/local
wget http://www.cacti.net/downloads/spine/cacti-spine-0.8.8a.tar.gz
tar zxf cacti-spine-0.8.8a.tar.gz
mv cacti-spine-0.8.8a/ spine
cd spine
./configure --prefix=/usr/local/spine #指定目录安装
############
#错误:
#error: Cannot find MySQL headers. Use --with-mysql= to specify non-defaultpath.
#解决:
yum installmysql-devel
yum installnet-snmp-devel
./configure --prefix=/usr/local/spine--with-results-buffer=2048
############
make && make install #编译
cp /usr/local/spine/etc/spine.conf/etc/spine.conf
或者:
cp /usr/local/spine/etc/spine.conf.dist/etc/spine.conf
vi /etc/spine.conf #末尾设置如下
DB_Host 127.0.0.1 --不能是localhost
DB_Database cacti
DB_User cacti
DB_Pass cacti
DB_Port 3306
DB_PreG 0
#设置mysql中用于cacti的数据库的户登录名。以下再创建
【安装cactid】
cactid是用C语言写的用来替代cmd.php产生图片的,性能更强,但是需要编译安装。 首先安装几个编译cactid需要的devel包:
yum -y install net-snmp-devel mysql-devel openssl-develgcc libtool
下载cacti,cacit官方网站:http://www.cacti.net/downloads/
cd /var/www/html/
wget http://www.cacti.net/downloads/cacti-0.8.8b.tar.gz
tar -zxvf cacti-0.8.8b.tar.gz
mv cacti-0.8.8b/ cacti
配置数据库
Mysql中创建cacti用户及数据库(之前都spine.conf配置为cacti用户):
mysql -uroot -p
mysql> insert intomysql.user(host,user,password) values ('localhost','cacti',password(' cacti '));
mysql> insert intomysql.user(host,user,password) values ('127.0.0.1','cacti',password(' cacti '));
mysql> create database cacti;
mysql> use cacti;
mysql> source /var/www/html/cacti/cacti.sql;
mysql> flush privileges;
mysql> grant all privileges on cacti.*to cacti@localhost identified by 'cacti';
mysql> grant all privileges on cacti.*to [email protected] identified by 'cacti';
mysql> flush privileges;
mysql> exit
添加cacti用户:
useradd cacti
echo"cacti"|passwd --stdin cacti
chgrp -R cacti /var/www/html/cacti/
chown -R cacti /var/www/html/cacti/rra
chown -R cacti /var/www/html/cacti/log
定时让Cacti的poller取数据:
vi /etc/crontab
*/1 * * * * /usr/bin/php /var/www/html/cacti/poller.php > /dev/null 2>&1
service crond restart
#cat /var/spool/cron/root
编辑配置文件(如果使用cacti用户则改为cacti用户):
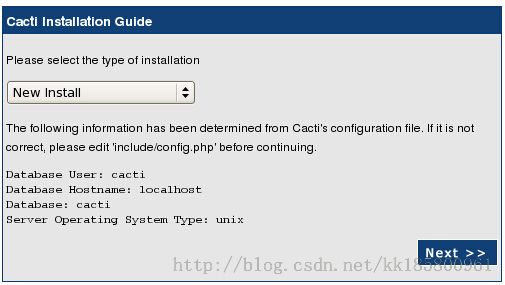
vi /var/www/html/cacti/include/config.php
$database_type = "mysql";
$database_default ="cacti";
$database_hostname ="localhost";
$database_username = "cacti";
$database_password = "cacti";
$database_port = "3306";
========*
http://localhost/cacti
报错:Apache/2.2.3(CentOS) Server at localhost Port 80
vi /etc/selinux/config
把SELINUX=enforcing改成permissive
========*
===============================完成!=================================
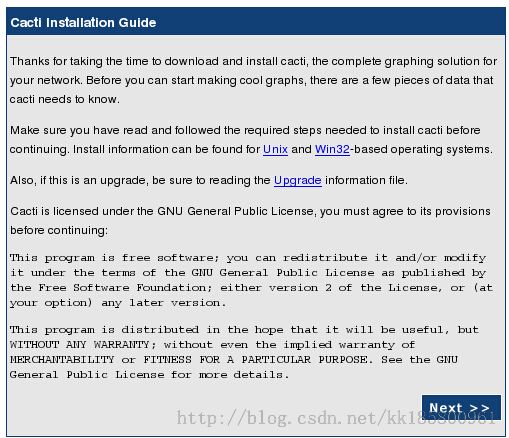
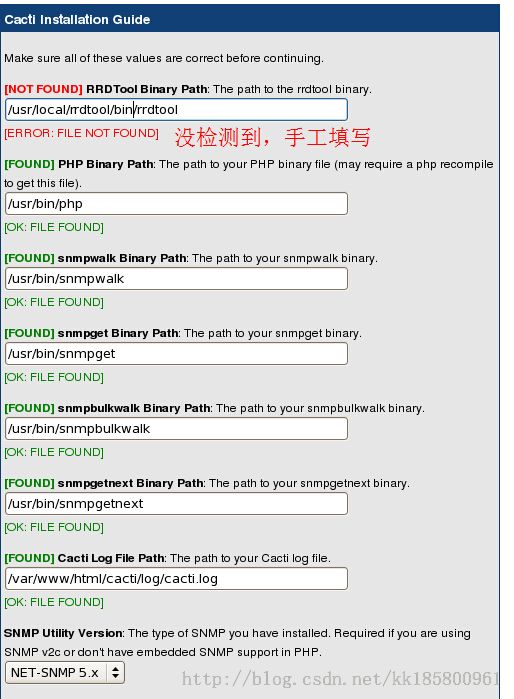
在浏览器上输入:http://localhost/cacti(Cacti服务器IP)
默认登录:
name: admin
Password : admin
登录后会直接修改密码。修改完密码后进入界面:

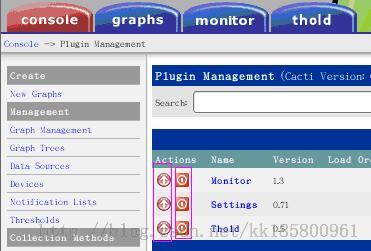
添加插件:
官网下载:http://docs.cacti.net/plugins
monitor-v1.3-1.tgz
settings-v0.71-1.tgz
thold-v0.5.0.tgz
需解压到cacti/plugins目录下:
cd /var/www/html/cacti/plugins
tar -zxf monitor-v1.3-1.tgz
tar -zxf settings-v0.71-1.tgz
tar -zxf thold-v0.5.0.tgz
mysql –uroot –pmysql cacti<monitor.sql
安装weathermap
cd /var/www/html/cacti/plugins
wgetwww.network-weathermap.com/files/php-weathermap-0.97c.zip
unzip php-weathermap-0.97c.zip
console——>plugine management——>激活,启动插件


