【xv6学习之lab3】User Environment
今天是2016年1月20日,距离回家过年不到10天了,我要尽快把这个lab做完,任务很艰巨!(真是呵呵了,现在已经是2月21日了,我还在写。。。)
注意:文中trap 在有的地方被认为是 Exception,特别是在与Interrupt平行出现时。
Part A: User Environments and Exception Handling
首先是如下三个变量:kern/env.c
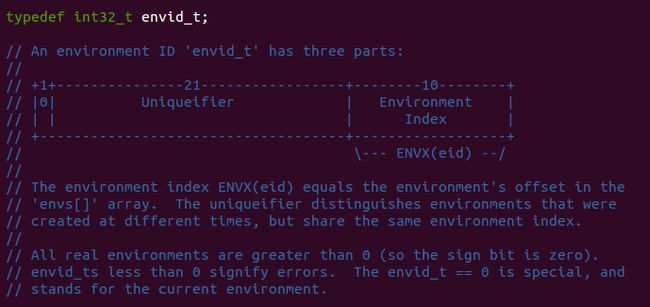
然后我们需要对 struct Env 有个较细致的理解:
inc/env.h
Allocating the Environments Array
这部分完全仿照 pages 即可。如下:
kern/pmap.c
Creating and Running Environments
要知道到目前为止,JOS是没有文件系统的,那么如果在JOS上运行用户程序怎么办?——直接和内核镜像结合在一起,在编译时期就做好。后面lab4就会让我们自己完善好文件系统.

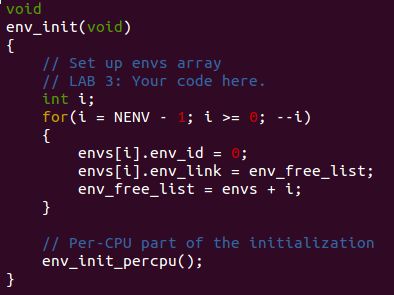
首先是 env_init() 函数:
接着是 env_setup_vm() 函数:
需要注意的是:
1)可以看出使用了 page2kva() 函数转化地址,也即默认当前 p 是在 0 ~ 256MB 的物理页上(注意 mem_init()函数将 256MB 的物理页映射到虚拟地址 0xf0000000 ~ 0xffffffff)。
2)拷贝从虚拟地址 kern_pgdir 开始的 PGSIZE 大小的内容到新的PD e->env_pgdir。
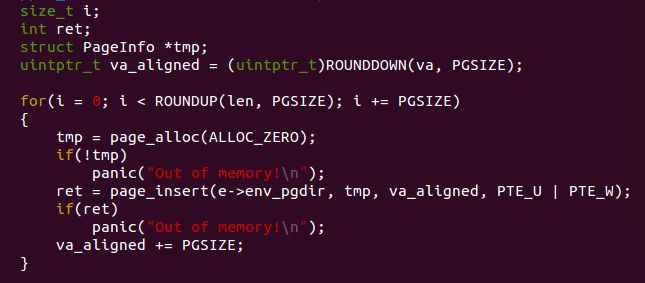
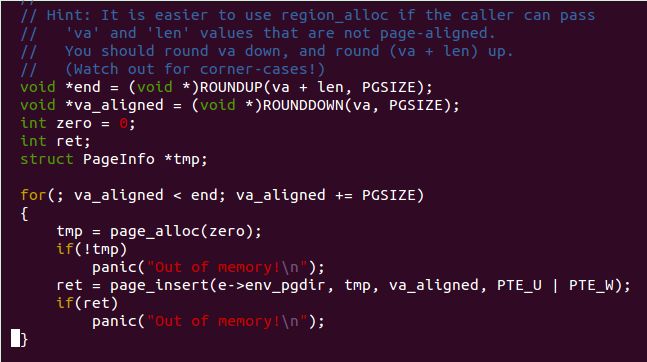
然后是 region_alloc() 函数:
开始我是这样写的,回头发现有问题,比如当 va 页不对齐时,而 le 刚好为一页时,此时可知实际分配了 ROUNDUP(len, PGSIZE) = PGSIZE ,不过是从 ROUNDDOWN(va, PGSIZE) 开始的,但是实际在使用时我们从虚拟地址 va 开始使用,也即此时我们分配的物理大小是不够用的。因此我们应该参照上面注释说的方法。如下:
这里需要注意区分与(static)静态映射概念,静态映射是指没有分配实际的物理页,通过boot_map_region()执行而非 page_insert()。boot_map_region()
的操作空间是内核虚拟地址空间,它提供的映射是静态映射,不涉及物理页的分配。而 page_alloc() 则是要对实际的物理页面分配映射到当前用户的虚拟地址空间中。(看了下代码,感觉没太多差别,主要是 page_insert() 函数会为新映射的 page 的pp_ref加一,而boot_map_region()不会)
接着是 load_icode() :
这部分代码相对陌生些,涉及到了 ELF 文件。这部分代码基本就是抄抄抄,很多地方还不懂。。
JOS到现在为止还没有文件系统,所以为了测试我们能运行用户程序,现在的做法是将用户程序编译以后和内核链接到一起(即用户程序紧接着内核后面放置)。所以这个函数的作用就是将嵌入在内核中的用户程序取出释放到相应链接器指定好的用户虚拟空间里。这里的binary指针,就是用户程序在内核中的开始位置的虚拟地址。
按照注释的提示,我们可以参照boot/main.c来完成相应的载入,但是有几个地方需要注意:
1、对于用户程序ELF文件的每个程序头ph,ph→p_memsz和ph→p_filesz是两个概念,前者是该程序头应在内存中占用的空间大小,而后者是实际该程序头占用的空间大小。它们俩的区别就是ELF文件中BSS节中那些没有被初始化的静态变量,这些变量不会被分配文件储存空间,但是在实际载入后,需要在内存中给与相应的空间,并且全部初始化为0。所以具体来讲,就是每个程序段ph,总共占用p_memsz的内存,前面p_filesz的空间从binary的对应内存复制过来,后面剩下的空间全部清0。
2、ph→p_va是该程序段应该被放入的虚拟空间地址,但是注意,在这个时候,虚拟地址空间应该是用户环境Env的虚拟地址空间。可是,在进入 load_icode() 时,是内核态进入的,所以虚拟地址空间还是内核的空间。所以我们使用 lcr3(PADDR(e->env_pgdir)) 指令载入用户环境的PD。其中的 e->env_pgdir 是在 env_setup_vm() 函数里面设置好的。但是仍要小心的是,对于ELF载入完毕以后,我们就不需要对用户空间进行操作了,所以在函数的最后要重新切回到内核虚拟地址空间来。
3、注释中还提到了要对程序的入口地址作一定的设置,这里对应的操作是 e->env_tf.tf_eip = elfhdr->e_entry 这里涉及到对struct Trapframe 结构的具体介绍,我们留到下一个函数 env_create() 的时候进行详细介绍。
还需要注意的是指针的计算。需要注意的是:void * 指针加一时,其值就是加一,同理uint8_t * 也是这样。所以以上的写法的结果与下面一样,但是下面写法才是对的,因为其应该是指针计算,而上面的写法在计算时ph->p_va类型是整型。
或者我们也可以使用这种写法:
这部分我也纠结了好久。。一定小心指针计算!
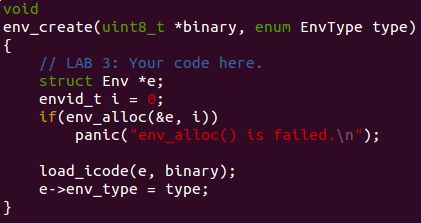
下面是 env_creat() 函数:
这个相对简单,注意 env_alloc() 函数里已经运行过 env_setup_vm()。
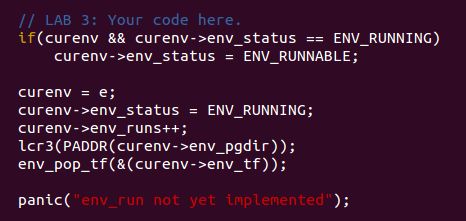
最后是 env_run() 函数:
这里的env_pop_tf实现了进程的真正切换,原理就是依据之前进程已经设置好的trapframe,然后把这个进程保存好的属于自己的trapframe通过弹栈的形式,输出到各个寄存器当中,实现进程环境的替换,而这里面也包括 eip,也就意味着,当从env_pop_tf里面的iret返回的时候,就开始从调用结构体e描述的进程开始运行了。
完成以上代码后,make 之后会发生 Triple fault 错误,不要怕,正常的。。。
在MIT的课程材料上解释了这样的原因。因为我们没有对中断表进行相应的设置,以至于用户程序在调用系统终端输出字符时产生了错误。但是我们需要认为的确认一下是否真的错误是由中断而不是其他设置造成的,所以我们启动GDB调试,选择在 env_pop_tf() 函数停下:
擦,今天新学一招,原来可以这样设置断点: b 函数名
好便利。如下两种断点设置方法(都怪当初不仔细看说明):
从这里开始单步跟踪,在 IRET 指令之前停下来,我们在这里查看寄存器的信息看是否都被设置好了:
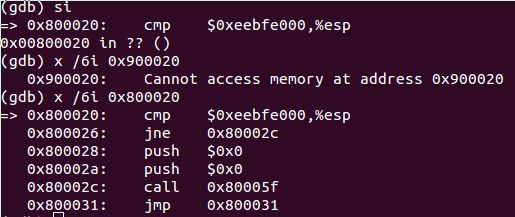
从EAX、ECX等寄存器中看到都被清0了,DS,ES寄存器内容为0x23,这个和我们在 env_alloc() 中看到的设置是一致的,但是在IRET执行之前CS和EIP两个寄存器都还看不到,不过没有关系,我们知道栈顶的接下来三个DWORD分别为EIP、CS和EFLAGS,我们查看一下栈顶的这三个DWORD:
可以看到EIP的值为0x00800020即用户程序的入口地址,我们可以打开user/user.ld文件查看一下:
发现是符合的。这就说明我们正确的将入口地址加载进来了,接下来我们看看是否正确载入了用户程序的ELF文件:
实际的用户程序hello的汇编代码可以在obj/user/hello.asm中找到:
发现是一致的,从这里可以知道我们的 load_icode() 的载入是正常工作的。
我们找到MIT教材中提到的 sys_cputs() 函数中的中断指令在用户程序中的位置:
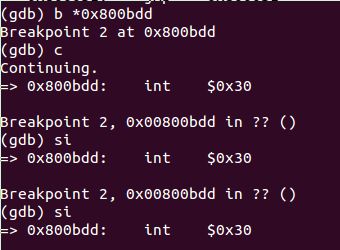
发现中断调用的地址为0x800bdd, 我们尝试着在这里设下断点,看JOS能否运行到这里:
可以看到JOS成功运行到了该断点,再执行一条指令,EIP没有发生变化,这个时候看QEMU的输出信息,发现已经产生Triple fault:
所以到目前为止,我们的JOS运行一切正常。
好吧,又要补知识了。。
看了一遍,但感觉还是晕啊。先往下看下吧
Basics of Protected Control Transfer
Exceptions and interrupts are both "protected control transfers," which cause the processor to switch from user to kernel mode (CPL=0) without giving the user-mode code any opportunity to interfere with the functioning of the kernel or other environments.In Intel's terminology, an interrupt is a protected control transfer that is caused by an asynchronous event usually external to the processor, such as notification of external device I/O activity. An exception, in contrast, is a protected control transfer caused synchronously by the currently running code, for example due to a divide by zero or an invalid memory access.
In order to ensure that these protected control transfers are actually protected, the processor's interrupt/exception mechanism is designed so that the code currently running when the interrupt or exception occurs does not get to choose arbitrarily where the kernel is entered or how. Instead, the processor ensures that the kernel can be entered only under carefully controlled conditions. On the x86, two mechanisms work together to provide this protection:
1、The Interrupt Descriptor Table. The processor ensures that interrupts and exceptions can only cause the kernel to be entered at a few specific, well-defined entry-points determined by the kernel itself, and not by the code running when the interrupt or exception is taken.
The x86 allows up to 256 different interrupt or exception entry points into the kernel, each with a different interrupt vector. A vector is a number between 0 and 255. An interrupt's vector is determined by the source of the interrupt: different devices, error conditions, and application requests to the kernel generate interrupts with different vectors. The CPU uses the vector as an index into the processor's interrupt descriptor table (IDT), which the kernel sets up in kernel-private memory, much like the GDT. From the appropriate entry in this table the processor loads:
- the value to load into the instruction pointer (EIP) register, pointing to the kernel code designated to handle that type of exception.
- the value to load into the code segment (CS) register, which includes in bits 0-1 the privilege level at which the exception handler is to run. (In JOS, all exceptions are handled in kernel mode, privilege level 0.)
2、The Task State Segment. The processor needs a place to save the old processor state before the interrupt or exception occurred, such as the original values of EIP and CS before the processor invoked the exception handler, so that the exception handler can later restore that old state and resume the interrupted code from where it left off. But this save area for the old processor state must in turn be protected from unprivileged user-mode code; otherwise buggy or malicious user code could compromise the kernel
-
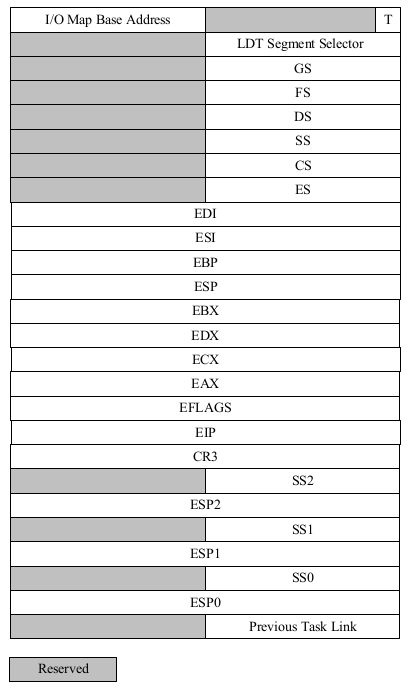
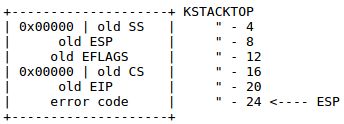
For this reason, when an x86 processor takes an interrupt or trap that causes a privilege level change from user to kernel mode, it also switches to a stack in the kernel's memory. A structure called the task state segment (TSS) specifies the segment selector and address where this stack lives. The processor pushes (on this new stack) SS, ESP, EFLAGS, CS, EIP, and an optional error code. Then it loads the CS and EIP from the interrupt descriptor, and sets the ESP and SS to refer to the new stack.
-
Although the TSS is large and can potentially serve a variety of purposes, JOS only uses it to define the kernel stack that the processor should switch to when it transfers from user to kernel mode. Since "kernel mode" in JOS is privilege level 0 on the x86, the processor uses the ESP0 and SS0 fields of the TSS to define the kernel stack when entering kernel mode. JOS doesn't use any other TSS fields.
Types of Exceptions and Interrupts
All of the synchronous exceptions that the x86 processor can generate internally use interrupt vectors between 0 and 31, and therefore map to IDT entries 0-31. For example, a page fault always causes an exception through vector 14. Interrupt vectors greater than 31 are only used by software interrupts, which can be generated by theint instruction, or asynchronous hardware interrupts, caused by external devices when they need attention.然后仔细看懂那个异常的例子。
user mode 下发生中断或异常的一般压栈(在kernel stack里)情况:
有的情况下还会压栈 error code(后面我们知道 error code 都会有,就算没有也要用补齐0来占位),如下:
Nested Exceptions and Interrupts
The processor can take exceptions and interrupts both from kernel and user mode. It is only when entering the kernel from user mode, however, that the x86 processor automatically switches stacks before pushing its old register state onto the stack and invoking the appropriate exception handler through the IDT. If the processor is already in kernel mode when the interrupt or exception occurs (the low 2 bits of the CS register are already zero), then the CPU just pushes more values on the same kernel stack. In this way, the kernel can gracefully handle nested exceptions caused by code within the kernel itself. This capability is an important tool in implementing protection, as we will see later in the section on system calls.
If the processor is already in kernel mode and takes a nested exception, since it does not need to switch stacks, it does not save the old SS or ESP registers. For exception types that do not push an error code, the kernel stack therefore looks like the following on entry to the exception handler:
There is one important caveat to the processor's nested exception capability. If the processor takes an exception while already in kernel mode, and cannot push its old state onto the kernel stack for any reason such as lack of stack space, then there is nothing the processor can do to recover, so it simply resets itself. Needless to say, the kernel should be designed so that this can't happen.
Setting Up the IDT
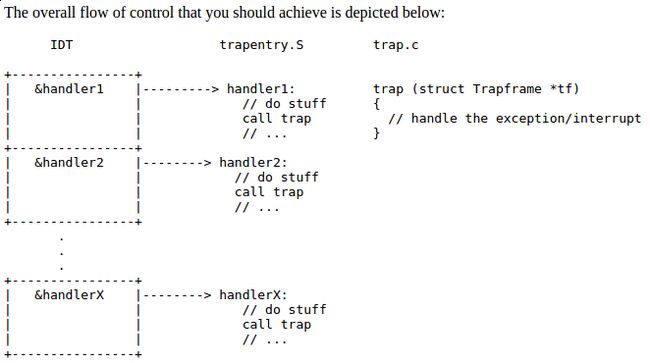
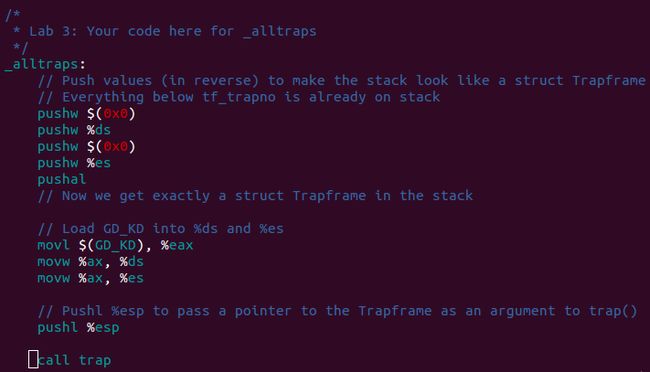
1. 在kern/trapentry.S中定义好每个中断对应的中断处理程序
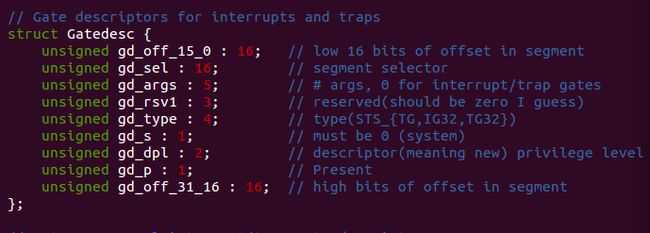
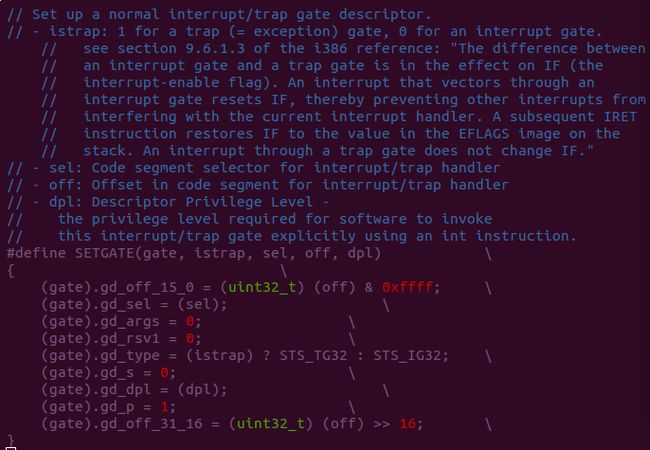
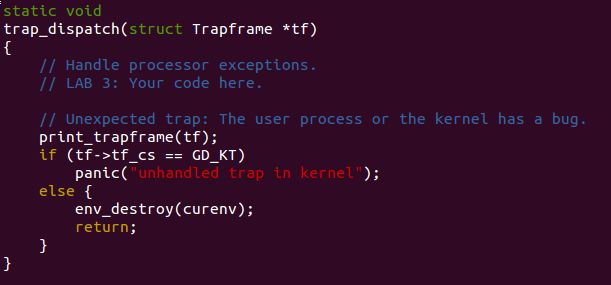
2. 在kern/trap.c的 idt_init() 中将那些第一步定义好的中断处理程序安装进IDT
这 “两段” 都是算软中断,后面是硬件触发的中断
"第三段”:定义各种硬件中断,这些硬件中断的计算方式是 IRQ_OFFSET + IRQ_Number
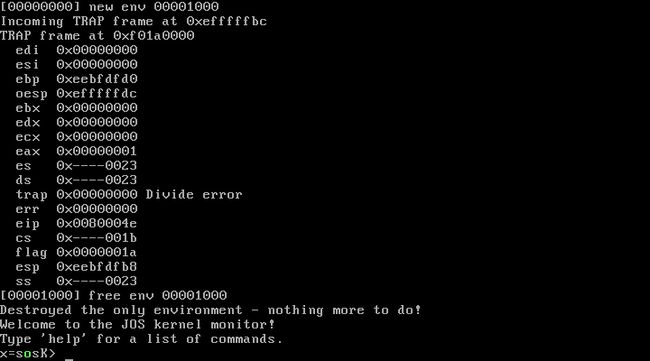
入的第一个程序设置为user_divzero:
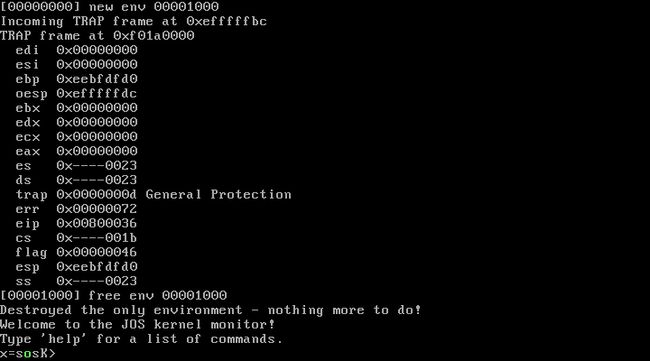
如果我们此时将 Page fault 的权限设置为3,得到以下结果,但请注意If allowed to directly call the INT 14 (page fault), the user can check without a kernel permission to allocate memory, which is a big loophole.:
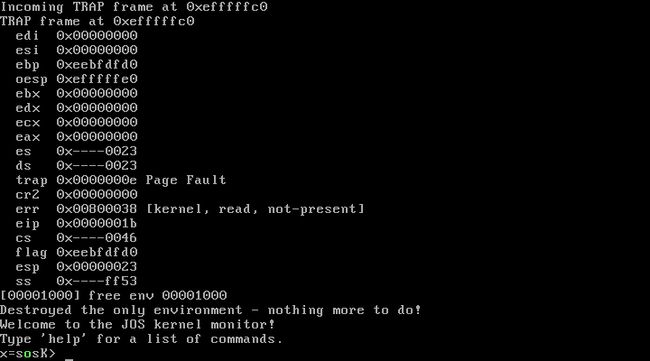
查阅中断向量的描述我们就可以知道 Page fault 中断是需要压入错误代码的!但是前面我们已经说过,用户用 int 指令调用中断是不会压入错误代码的。可是我们在 kern/trapentry.S 中为 Page fault 指定的中断处理程序默认认为系统为我们放入了错误码,所以不会补齐。那么当我们用int调用中断处理程序造成的后果是什么?栈中没有放入错误码 ! ! !
请注意上面打印出的信息,关于 err 开始,其实就发生了错位,err 是原本 eip 的值 0x00800038(是不是很眼熟?可以与前面那幅图对比下)下面都是依次错位的,原因就是栈中没有放入错误码。这里你可能有个疑问,为什么之前 Page fault 和 Divide Error 都是对的。Divide Error 正确是因为该中断本来就没有 Error code ,需要手动添加, Page fault 正确是因为执行 INT $(14) 时发生了权限异常,系统自行产生 General Protection fault ,系统会自行补充 Error code。总之,这两个不同的原因导致其栈里都在 Error code 所在位置填充了内容。
还记得前面说过内核栈的压入结构要对应 Trapframe 么?如果少了一个成员,我们再把这个 Trapframe 传到 trap () 中进行处理,那么在访问 Trapframe 中的最后一个 DWORD (也就是访问 ss 寄存器时),肯定就访问到 KSTACKTOP 之上的空间上去了!!在 inc/memlayout.h 中可以看到,KSTACKTOP 上的空间为 KERNBASE,该部分正好对应实际物理地址0x00000000,所以打印的 ss 实际是物理地址 0x00000000 处的内容。
Part B: Page Faults, Breakpoints Exceptions, and System Calls
The Breakpoint Exception
4、没看懂o(╯□╰)o
System calls
User-mode startup
Page faults and memory protection
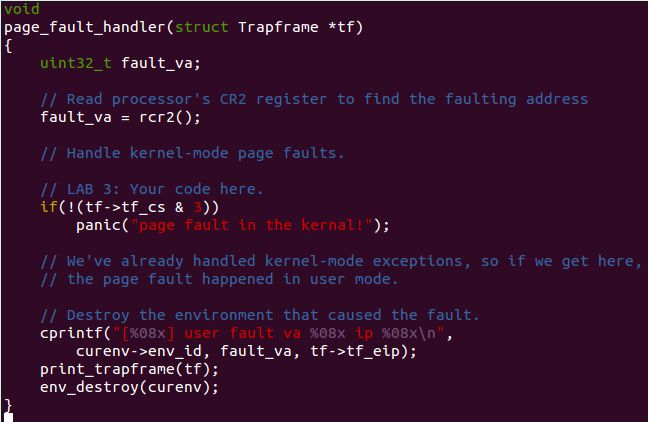
1、A page fault in the kernel is potentially a lot more serious than a page fault in a user program. If the kernel page-faults while manipulating its own data structures, that's a kernel bug, and the fault handler should panic the kernel (and hence the whole system). But when the kernel is dereferencing pointers given to it by the user program, it needs a way to remember that any page faults these dereferences cause are actually on behalf of the user program.
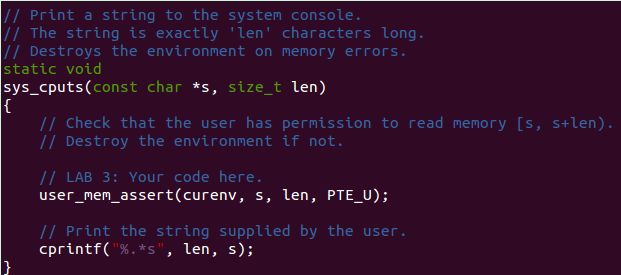
2、The kernel typically has more memory permissions than the user program. The user program might pass a pointer to a system call that points to memory that the kernel can read or write but that the program cannot. The kernel must be careful not to be tricked into dereferencing such a pointer, since that might reveal private information or destroy the integrity of the kernel.
Thus, the kernel will never suffer a page fault due to dereferencing a user-supplied pointer. If the kernel does page fault, it should panic and terminate.


