SharpDevelop安装与配置
SharpDevelop官方下载地址: http://www.icsharpcode.net/OpenSource/SD/Download/
注意:最新的5.1不支持XP,如果想在XP上使用,建议下载4.4版
安装SharpDevelop之前必须安装.NetFramework
.NET Framework4.5.1下载地址:http://www.microsoft.com/zh-CN/download/details.aspx?id=40772
IIS Express 8.0下载地址:http://www.microsoft.com/zh-cn/download/details.aspx?id=34679
更多的下载地址,SharpDevelop下载页面有链接
一、安装篇
1.安装.NET Framework4.5.1
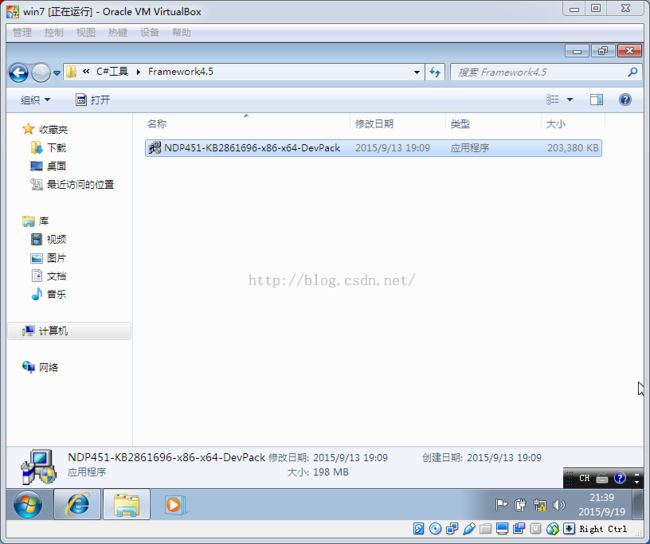
双击之后需要一段时间解压,之后弹出安装界面
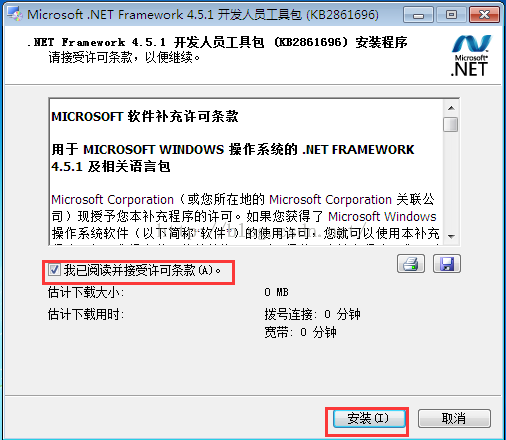
点击我已阅读并接受许可条款前的复选框,点击安装
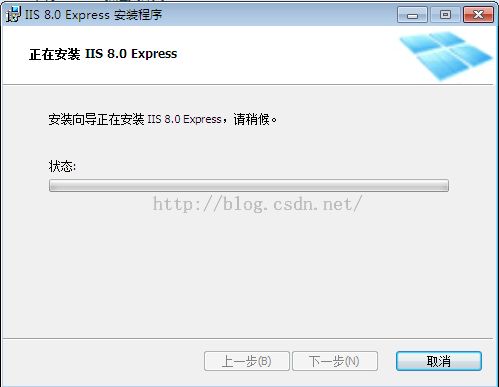
接下来就是等待安装
这段安装时间比较长,本人8G内存真机安装了半个小时,虚拟机安了1个小时,再看最后两张图
2.安装SharpDevelop
双击SharpDevelop
下面这个页面可以改安装路径
点击Install等进度条走完基本就安装完了
3.安装IIS Express
双击iisexpress
后面基本傻瓜式了
二、配置篇
1.语言设置
初始界面
Tool-->Option
在Option窗口中,选择General-->UI Language,然后选择右侧的Chinese
之后就变成中文界面了
SharpDevelop安装完成之后的图标
启动画面
初始画面
三、测试功能用的例子
1.C#控制台程序
文件-->新建--解决方案
在弹出的窗口中,类别一栏选择C#-->Windows应用程序,模板版本选择:.NET Framework 4.0,然后点击控制台应用程序,在名称中填写HelloWorld,位置自己改,点击建立
SharpDevelop会自动生成一个HelloWorld项目
自动生成的Program.cs代码如下:
/*
 * 由SharpDevelop创建。
 * 用户: LENOVO
 * 日期: 2015/9/19
 * 时间: 20:09
 *
 * 要改变这种模板请点击 工具|选项|代码编写|编辑标准头文件
 */
using System;

namespace HelloWorld
{
	class Program
	{
		public static void Main(string[] args)
		{
			Console.WriteLine("Hello World!");

			// TODO: Implement Functionality Here

			Console.Write("Press any key to continue . . . ");
			Console.ReadKey(true);
		}
	}
}
点击工具栏中的绿色小箭头运行
运行结果:
再来个例子
/*
 * 由SharpDevelop创建。
 * 用户: LENOVO
 * 日期: 2015/9/13
 * 时间: 20:04
 *
 * 要改变这种模板请点击 工具|选项|代码编写|编辑标准头文件
 */
using System;

namespace HelloWorld
{
	class Program
	{
		public static void Main(string[] args)
		{
			Console.WriteLine("Hello World!");
			int a = 2;
			int b = 3;
			Console.WriteLine("{0}+{1}={2}",a,b,a+b);


			// TODO: Implement Functionality Here

			Console.Write("Press any key to continue . . . ");
			Console.ReadKey(true);
		}
	}
}

2.C#控制台+网络下载的例子
新建解决方案名称为WebRequestApp
更改Program.cs如下:
/*
 * 由SharpDevelop创建。
 * 用户: LENOVO
 * 日期: 2015/9/14
 * 时间: 17:07
 *
 * 要改变这种模板请点击 工具|选项|代码编写|编辑标准头文件
 */
using System;
using System.Net;
using System.IO;
using System.Text;

namespace WebRequesterApp
{
	class Program
	{
		public static void Main(string[] args)
		{
			WebRequest req = WebRequest.Create("http://www.baidu.com");
			WebResponse resp = req.GetResponse();
			StreamReader reader = new StreamReader(resp.GetResponseStream(),Encoding.UTF8);
			Console.WriteLine(reader.ReadToEnd());
			Console.Write("Press any key to continue . . . ");
			Console.ReadKey(true);
		}
	}
}
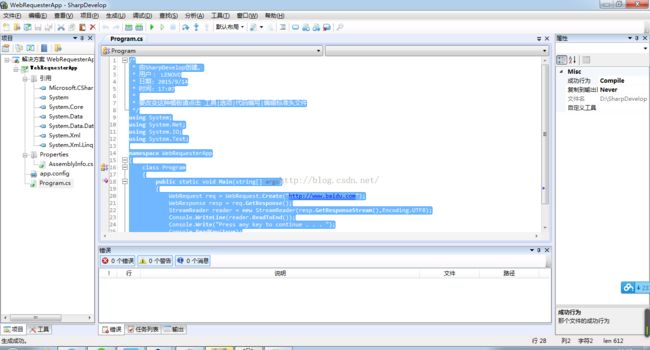
运行结果:
如果出现如下System.Net.WebException异常,请首先检查IE代理设置,因为WebRequest会自动使用IE设置的代理,建议首先把你要访问的网址放到IE浏览器里访问:
System.Net.WebException: 无法连接到远程服务器 ---> System.Net.Sockets.SocketException: 由于目标计算机积极拒绝,无法连接。

   在 System.Net.Sockets.Socket.DoConnect(EndPoint endPointSnapshot, SocketAddress socketAddress)
   在 System.Net.Sockets.Socket.InternalConnect(EndPoint remoteEP)
   在 System.Net.ServicePoint.ConnectSocketInternal(Boolean connectFailure, Socket s4, Socket s6, Socket& socket, IPAddress& address, ConnectSocketState state, IAsyncResult asyncResult, Exception& exception)
   --- 内部异常堆栈跟踪的结尾 ---
   在 System.Net.HttpWebRequest.GetResponse()
   在 WebRequesterApp.Program.Main(String[] args) 位置 d:\SharpDevelop Projects\WebRequesterApp\WebRequesterApp\Program.cs:行号 21
为了防止上述异常,建议在调用GetResponse()之前加一句req.Proxy=null;
修改后的代码如下:
/*
 * 由SharpDevelop创建。
 * 用户: LENOVO
 * 日期: 2015/9/14
 * 时间: 17:07
 *
 * 要改变这种模板请点击 工具|选项|代码编写|编辑标准头文件
 */
using System;
using System.Net;
using System.IO;
using System.Text;

namespace WebRequesterApp
{
	class Program
	{
		public static void Main(string[] args)
		{

			WebRequest req = WebRequest.Create("http://www.baidu.com");
			req.Proxy=null;
			WebResponse resp = req.GetResponse();
			StreamReader reader = new StreamReader(resp.GetResponseStream(),Encoding.UTF8);
			Console.WriteLine(reader.ReadToEnd());
			Console.Write("Press any key to continue . . . ");
			Console.ReadKey(true);
		}
	}
}
这样就不会自动设置为IE的代理了。
3.C#窗口程序
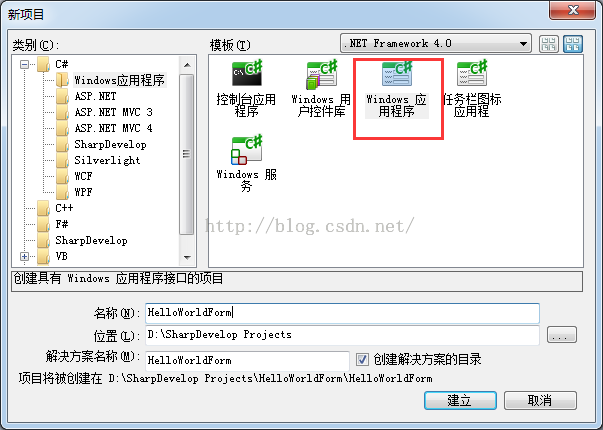
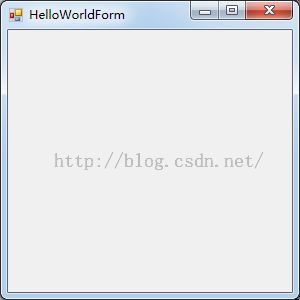
依然是新建解决方案,名称这里填HelloWorldForm,只不过我们这次选择模板类型Windows 应用程序
软件会自动生成一部分代码,我们在这里加一句
MessageBox.Show("HelloWorld","Messsage from C#");

运行结果:
点击确定,回到这个窗口
4.ASP.NET程序GET提交
新建解决方案,类型选C#中的ASP.NET,模板选ASP.Net 网页项目,名称任意
程序会自动生成Default.aspx,这里不管它
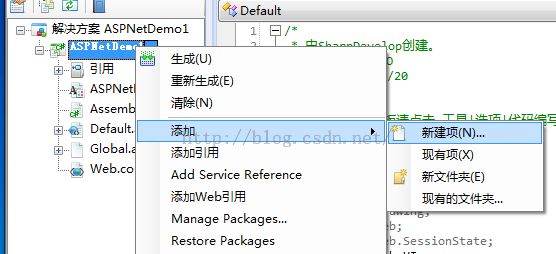
在解决方案名称上,右键-->添加-->新建项
类别选择Web,模板选择空HTML页,名称填index,html
在index.html写如下代码:
<!DOCTYPE html PUBLIC "-//W3C//DTD XHTML 1.0 Transitional//EN" "http://www.w3.org/TR/xhtml1/DTD/xhtml1-transitional.dtd">
<html xmlns="http://www.w3.org/1999/xhtml">
<head>
    <title>ASP.NET简单登录</title>
    <meta http-equiv="content-type" content="text/html; charset=utf-8" />
    <style type="text/css">
        body{font:100 15px/20px "宋体";}
        #maxdiv{width:300px;height:140px;border:1px solid red;margin-top:20%;margin-left:40%}
        .divcenter{text-align:center;margin-top:10px}
        .text{border:1px solid #b4b4b4;width:180px;height:20px}
        .btnsubmit{width:80px;height:25px;color:blue}
    </style>
</head>
<body>
    <div id="maxdiv">
        <div class="divcenter">
        	<form method="get" action="tijiao.aspx">
            <span>用户名:</span>
            <input type="text" name="name" value="aaaa" class="text" />
            <br /><br />
            <span>密  码:</span>
            <input type="password" name="password" value="bbbb" class="text" />
            <br /><br />
            <input type="submit" value="提  交" class="btnsubmit" />
            </form>
        </div>
    </div>
</body>
</html>
然后新建一个aspx页。
在解决方案名称上,右键-->添加-->新建项,然后类别选择C#中的ASP.NET,模板选择ASP.NET Web窗体,名称填tijiao.aspx
在tijiao.aspx写如下代码:
<%@Page Language="C#" %>

<!DOCTYPE html PUBLIC "-//W3C//DTD XHTML 1.0 Transitional//EN" "http://www.w3.org/TR/xhtml1/DTD/xhtml1-transitional.dtd">
<html xmlns="http://www.w3.org/1999/xhtml">
<head>
    <title>ASP.NET登录结果</title>
    <meta http-equiv="content-type" content="text/html; charset=utf-8" />
</head>
<body>
    <%
    string n1=Request.QueryString["name"];
    string n2=Request.QueryString["password"];
    Response.Write("你的用户名:");
    %></br>
    <%Response.Write(n1);
    %></br>
    <%Response.Write("你的密码:");
    %></br>
    <%Response.Write(n2);
    %></br>
    </body>
</html>
点击保存。
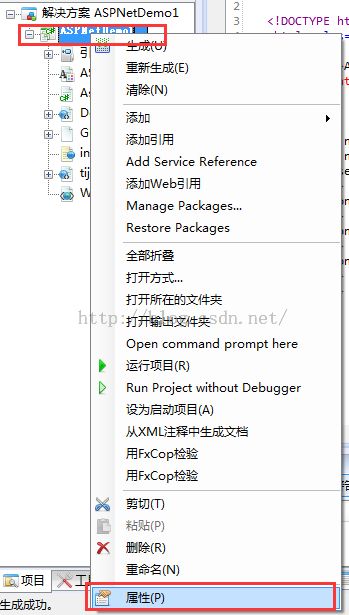
解决方案名称-->右键-->属性
生成选项卡的目标CPU选择32为Intel处理器
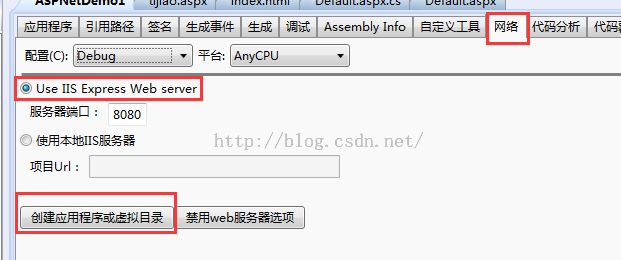
在网络选项卡中配置IIS服务器,选择Use IIS Express Web Server,最后点击创建应用程序或虚拟目录
在调试选项卡中,选中在URL中启动浏览器,并填上初始访问地址:http://localhost:8080/index.html
保存,最后点击绿色三角形运行
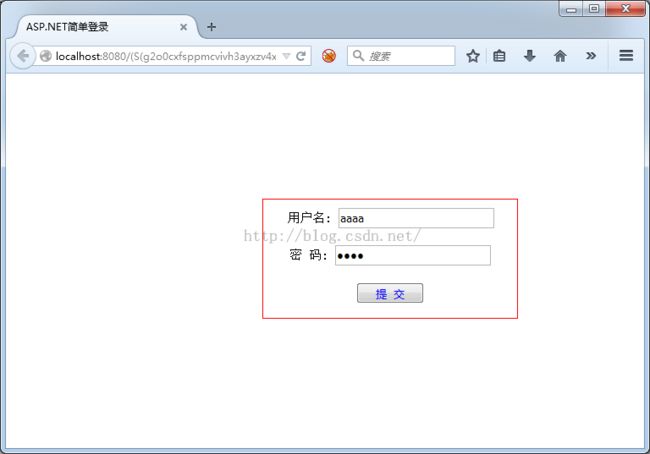
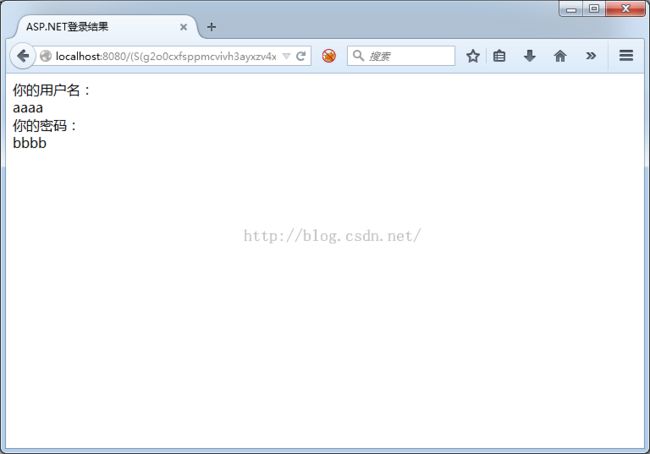
运行结果如图:
5.ASP.NET程序POST提交
在ASP.NET中的html页面通过form表单POST提交时,不能提交到其他页,但是aspx页面的form表单可以。
将4中的index.html直接改名为index.aspx,代码如下:
<%@Page Language="C#" %>

<!DOCTYPE html PUBLIC "-//W3C//DTD XHTML 1.0 Transitional//EN" "http://www.w3.org/TR/xhtml1/DTD/xhtml1-transitional.dtd">
<html xmlns="http://www.w3.org/1999/xhtml">
<head>
    <title>ASP.NET简单登录</title>
    <meta http-equiv="content-type" content="text/html; charset=utf-8" />
    <style type="text/css">
        body{font:100 15px/20px "宋体";}
        #maxdiv{width:300px;height:140px;border:1px solid red;margin-top:20%;margin-left:40%}
        .divcenter{text-align:center;margin-top:10px}
        .text{border:1px solid #b4b4b4;width:180px;height:20px}
        .btnsubmit{width:80px;height:25px;color:blue}
    </style>
</head>
<body>
    <div id="maxdiv">
        <div class="divcenter">
        	<form method="post" action="tijiao.aspx">
            <span>用户名:</span>
            <input type="text" name="name" value="aaaa" class="text" />
            <br /><br />
            <span>密  码:</span>
            <input type="password" name="password" value="bbbb" class="text" />
            <br /><br />
            <input type="submit" value="提  交" class="btnsubmit" />
            </form>
        </div>
    </div>
</body>
</html>
tijiao.aspx代码如下:
<%@Page Language="C#" %>

<!DOCTYPE html PUBLIC "-//W3C//DTD XHTML 1.0 Transitional//EN" "http://www.w3.org/TR/xhtml1/DTD/xhtml1-transitional.dtd">
<html xmlns="http://www.w3.org/1999/xhtml">
<head>
    <title>ASP.NET登录结果</title>
    <meta http-equiv="content-type" content="text/html; charset=utf-8" />
</head>
<body>
    <%
	string n1=Request.Form["name"];
	string n2=Request.Form["password"];
    Response.Write("你的用户名:");
    %></br>
    <%Response.Write(n1);
    %></br>
    <%Response.Write("你的密码:");
    %></br>
    <%Response.Write(n2);
    %></br>
    </body>
</html>
运行结果如图,注意与上一个例子地址栏的区别
