公开图像识别匹配技术之一 Bow方式 过程讲解。
今天 我主要讲一下 这个过程,以及运行的结果 ,这是我创业自己研发的图像匹配之一的Bow的进化搜索方式,
后面还有更好的方式,本章节主要讲实现过程,境界到了的人 自然能看懂LSH 怎么搜索,怎么提取,因为我还有部分深度学习核心代码,不过某些觉得我什么都不懂的,我可以给你看所有代码,欢迎您来审查审查。
由于一些核心代码我还不能公开 。很多都写在一块,后面我慢慢的抽离开来时候,我会将该项目开源到Github上 ,以后大家图像搜索匹配 ,百度识图 相关的技术的话 比如blippAR 亮风台AR 还有 voforia 咔嚓购物等以为轮廓搜索的都差不多,换成以为一维特征就行了 ,你们就不再需要使用他们的技术了,直接按照我的过程来吧。
首先第一步使用Opencv提取特征
这里我才用了 spark 所以我把它变成了 spark中的vector 稠密向量 。也可以变成double[]
final static FeatureDetector detector = FeatureDetector.create(FeatureDetector.ORB);//ORB
final static DescriptorExtractor extractor = DescriptorExtractor.create(DescriptorExtractor.ORB);//BRIEF
public static List<Vector> readFeature(InputStream datas) throws IOException{
MatOfKeyPoint keypoints = new MatOfKeyPoint();
Mat mat = OpenCVUtil.bufferedImageToMat(ImageIO.read(datas));
Mat descriptors = new Mat();
detector.detect(mat, keypoints);
extractor.compute(mat, keypoints, descriptors);
int numPoints = (int) keypoints.rows();
int descrpnum = (int) descriptors.rows();
List<Vector> descriptions = Lists.newArrayList();
for (int i = 0; i < descriptors.rows(); i++) {
int cols = descriptors.cols();
double[] desc = new double[cols];
for (int j = 0; j < cols; j++) {
desc[j] = descriptors.get(i, j)[0];
}
descriptions.add(Vectors.dense(desc));
}
return descriptions;
}
上面的OpencvUtils 是一个工具类,其实文件的可以直接ImgCodes.read了 ,
public static Mat bufferedImageToMat(BufferedImage myBufferedImage){
BufferedImage image = myBufferedImage;
byte[] data = ((DataBufferByte) image.getRaster().getDataBuffer()).getData();
Mat mat = new Mat(image.getHeight(), image.getWidth(), CvType.CV_8UC3);//RGB 3通道 Highgui.imread(imgName,0)
mat.put(0, 0, data);
return mat;
}
2. 下面我们使用Kmean 进行聚类
这是Bovw的使用方式。。。这种方式也是一种不错的方式 还有Vlad 向量聚合器
其实就是提取一千万个bov词汇,然后把一张图像用这其中的10000个词汇来表示
比如 c1c2c3c4c5c6c7c8c9c....c10000
vectors.persist(StorageLevel.MEMORY_AND_DISK_SER());
int numClusters = 1000000;
int numIterations = 1000;
//long startTime = System.nanoTime();
KMeansModel clusters = KMeans.train(vectors.rdd(), numClusters,
numIterations);
//double WSSSE = clusters.computeCost(vectors.rdd());
//long endTime = System.nanoTime();
//System.out.println("Execution Time: " + (endTime - startTime) / 1000000
//+ " ms");
//System.out.println("Within Set Sum of Squared Errors = " + WSSSE);
//clusters.toPMML("/tmp/kmeans.xml")
// Export the model to a directory on a distributed file system in PMML format
//clusters.toPMML(sc,"/tmp/kmeans")
//clusters.save(context, "");sc.parallelize(Seq(model), 1).saveAsObjectFile("hdfs:///user/root/linReg.model")
clusters.save(context.sc(), AliyunOSSUtils.BASEURL+"/bovw/bovwaggrate.clusters");
Vector[] vs = clusters.clusterCenters();
double[][] dd=new double[vs.length][];
int i=0;
for (Vector vector : vs) {
dd[i++]=vector.toArray();
}
vectors.unpersist();
BovwAggrate bovwAggrate=new BovwAggrate(dd,10000);
其实 这里用户可以做余弦定理运算了,也可以直接TF-IDF ,但是我们不需要
我们使用LSH本地敏感Hash 比如 sign-random-projection 用来做cos运算
Locality Sensitive Hashing
这里我将不变展示全部源代码了。大致结构就是这样的。
RDD<CosHashFunctions> functions
RDD<HashTable> tables
Random rand  = new Random();
randomProjection = new Vector(dimensions);
for(int d=0; d<dimensions; d++) {
double val = rand.nextGaussian();
randomProjection.set(d, val);
}
然后分别将上面的存储到Hbase中。为什么存储Hbase中,因为Hbase列数据库 行号代表索引id 列代表每个HashTable 的bucket 的 w 等相应部分
然后就是LSH 的hash查找了 ,这个很简单。
下面我们来进一步进化。。。怎么让bov更加高效
我们使用AutoEncoder 自动编码机 或者 深度学习DNN。来提取特征 来代替 词汇,一样可以达到效果,我们进入caffe
下面是googleNet识别图像的模型的部分,caffe源码里面有,
https://github.com/BVLC/caffe 下面 然后训练大量数据。进行模型训练
name: "GoogleNet"
layer {
  name: "googlenet"
  type: "MemoryData"
  top: "data"
  top: "label"
  memory_data_param {
    batch_size: 32
    channels: 3
    height: 224
    width: 224
  }
}
layer {
  name: "conv1/7x7_s2"
  type: "Convolution"
  bottom: "data"
  top: "conv1/7x7_s2"
  param {
    lr_mult: 1
    decay_mult: 1
  }
  param {
    lr_mult: 2
    decay_mult: 0
  }
  convolution_param {
    num_output: 64
    pad: 3
    kernel_size: 7
    stride: 2
    weight_filler {
      type: "constant"
      std: 0.1
    }
    bias_filler {
      type: "constant"
      value: 0.2
    }
  }
}
layer {
  name: "conv1/relu_7x7"
  type: "ReLU"
  bottom: "conv1/7x7_s2"
  top: "conv1/7x7_s2"
}
layer {
  name: "pool1/3x3_s2"
  type: "Pooling"
  bottom: "conv1/7x7_s2"
  top: "pool1/3x3_s2"
  pooling_param {
    pool: MAX
    kernel_size: 3
    stride: 2
  }
}
layer {
  name: "pool1/norm1"
  type: "LRN"
  bottom: "pool1/3x3_s2"
  top: "pool1/norm1"
  lrn_param {
    local_size: 5
    alpha: 0.0001
    beta: 0.75
  }
}
layer {
  name: "conv2/3x3_reduce"
  type: "Convolution"
  bottom: "pool1/norm1"
  top: "conv2/3x3_reduce"
  param {
    lr_mult: 1
    decay_mult: 1
  }
  param {
    lr_mult: 2
    decay_mult: 0
  }
  convolution_param {
    num_output: 64
    kernel_size: 1
    weight_filler {
      type: "constant"
      std: 0.1
    }
    bias_filler {
      type: "constant"
      value: 0.2
    }
  }
}
layer {
  name: "conv2/relu_3x3_reduce"
  type: "ReLU"
  bottom: "conv2/3x3_reduce"
  top: "conv2/3x3_reduce"
}
layer {
  name: "conv2/3x3"
  type: "Convolution"
  bottom: "conv2/3x3_reduce"
  top: "conv2/3x3"
  param {
    lr_mult: 1
    decay_mult: 1
  }
  param {
    lr_mult: 2
    decay_mult: 0
  }
  convolution_param {
    num_output: 192
    pad: 1
    kernel_size: 3
    weight_filler {
      type: "constant"
      std: 0.03
    }
    bias_filler {
      type: "constant"
      value: 0.2
    }
  }
}
layer {
  name: "conv2/relu_3x3"
  type: "ReLU"
  bottom: "conv2/3x3"
  top: "conv2/3x3"
}
layer {
  name: "conv2/norm2"
  type: "LRN"
  bottom: "conv2/3x3"
  top: "conv2/norm2"
  lrn_param {
    local_size: 5
    alpha: 0.0001
    beta: 0.75
  }
}
layer {
  name: "pool2/3x3_s2"
  type: "Pooling"
  bottom: "conv2/norm2"
  top: "pool2/3x3_s2"
  pooling_param {
    pool: MAX
    kernel_size: 3
    stride: 2
  }
}
layer {
  name: "inception_3a/1x1"
  type: "Convolution"
  bottom: "pool2/3x3_s2"
  top: "inception_3a/1x1"
  param {
    lr_mult: 1
    decay_mult: 1
  }
  param {
    lr_mult: 2
    decay_mult: 0
  }
  convolution_param {
    num_output: 64
    kernel_size: 1
    weight_filler {
      type: "constant"
      std: 0.03
    }
    bias_filler {
      type: "constant"
      value: 0.2
    }
  }
}
layer {
  name: "inception_3a/relu_1x1"
  type: "ReLU"
  bottom: "inception_3a/1x1"
  top: "inception_3a/1x1"
}
layer {
  name: "inception_3a/3x3_reduce"
  type: "Convolution"
  bottom: "pool2/3x3_s2"
  top: "inception_3a/3x3_reduce"
  param {
    lr_mult: 1
    decay_mult: 1
  }
  param {
    lr_mult: 2
    decay_mult: 0
  }
  convolution_param {
    num_output: 96
    kernel_size: 1
    weight_filler {
      type: "constant"
      std: 0.09
    }
    bias_filler {
      type: "constant"
      value: 0.2
    }
  }
大概过程类似于上面的深度残差网络,听到了吧。我跟你说152层 而不说深度残差 不是我说的太泛,而是对你说这些你也不知道听不听的动
我们知道这是图像分类 怎么来进行图像搜索匹配呢 怎么从定性用于定量呢===============
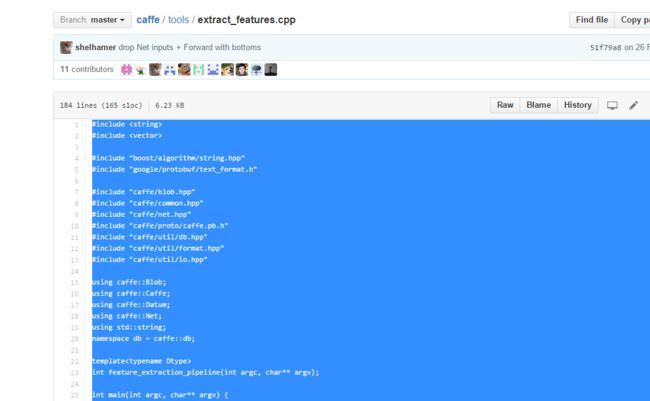
下面看看 caffe 中有一个extrctor抽取特征的一个工具类,能够抽取每一层输出特征 ,我们知道 卷积层 ---池化层 -------relu激活层 --------梯度下降层 -------------然后最后的全连接层 输出的是Nx1x1x1的shape特征 。好了 我们就是需要这个全连接层的第一层输出,这种方式 需要大量的图像进行训练,因为图像提取最后一层的是当前图像的特征,所以只有大量图像情况下 才有代表意义。,其实自动编码器 可以用来做特征值的进一步抽取的,所以一样可以用来做替代Kmean聚类,dbscan 方式我没有尝试,有兴趣的可以尝试尝试。
使用方法请自行百度。。extract_feature fc
这个需要C++工程师配合了 。得到的这个就是一个特征 ,这个特征 比bow更好哦 ,每次使用该模型的输出特征 具有很明显的物体区分的特征规则,用它来做bow 词汇也能很好的进行图像搜索哦,后面一样呢,进行cos 余弦定理的LSH搜索 就可以了。
我上面说的是一种很普通的Bow的图像搜索的方法,最后面选取前面几个进行比较就可以知道是否匹配了
java版本
FastQueue<SurfFeature> descTemplate = createQueue(template,100);
        FastQueue<SurfFeature> descRegion = createQueue(template,100);
        //DetectDescribePoint<ImageFloat32, SurfFeature> df=getDesc(src)
        describeImage(template, descTemplate);
        describeImage(region, descRegion);
        AssociateDescription<SurfFeature> associate = greedy(defaultScore(SurfFeature.class), Double.MAX_VALUE, true);
        associate.setSource(descTemplate);
        associate.setDestination(descRegion);
        associate.associate();
        FastQueue<AssociatedIndex> matches = associate.getMatches();
        float sumScore = 0;
        float average = Float.MAX_VALUE;
        for(int i = 0; i < matches.size(); i++){
        sumScore += matches.get(i).fitScore;
        }

//        System.out.println("sumScore: " + sumScore);
//        System.out.println("matches: " + matches.size());
        if(matches.size() > 0){
        average = (sumScore/matches.size());
        }
OpenCV版本
这种方式太过精确 ,实际中需要进行一些阈值调整,比如grabcut 以及轮廓的提取
List<DMatch> matches_original = matches.toList();
List<DMatch> matches_filtered = new ArrayList<DMatch>();
int DIST_LIMIT = 30;
// Check all the matches distance and if it passes add to list of filtered matches
//System.out.println("DISTFILTER ORG SIZE:" + matches_original.size() + "");
int org=matches_original.size();
for (int i = 0; i < matches_original.size(); i++) {
DMatch d = matches_original.get(i);
//System.out.println("=============="+d.distance);
if (Math.abs(d.distance) <= DIST_LIMIT) {
matches_filtered.add(d);
}
}
int filter=matches_filtered.size();
//System.out.println("DISTFILTER FIL SIZE:" + matches_filtered.size() + "");
//MatOfDMatch mat = new MatOfDMatch();
//mat.fromList(matches_filtered);
return filter/(org*1.0);
上面只是一种简单的方式,还有一种方式就是使用TF-IDF ,搜索比重大的 然后进行比较就可以了。这种方式已经被人申请了专利。所以 我也不在叙述了,上面的bow 只是讲解一个流程。如果哪位觉得我乱七八糟的说的话,我可以那电脑给你看源码一步一步讲解给你看。看看我是不是你说的能力太差,2年前你可以说我水平很烂,今天你要是觉得没有面试过我 就说我水平很差,我们可以PK一下 。后面章节开始讲解VLAD向量的使用
这上面是截图。
http://www.evervc.com/startups/48257 这有更详细的截图。。。大家可以看看。至于支持多少量搜索,根据LSH 以及你的spark的集群。这都不是问题。
