Add a Sensor to a Robot
本教程演示了用户如何通过用<include> 标志 和<joint>连接一个复杂模型的不同部分,从gazebo模型数据库中的其他模型,来生成复杂的模型。
Adding a Laser
给机器人或者如何模型添加激光,只是简单的在模型中包括传感器。1.进入以前教程中的目录下:
cd ~/.gazebo/models/my_robot
2.打开model.sdf
3.在</model>标记上边(文件最后)添加如下内容:
    <include>
      <uri>model://hokuyo</uri>
      <pose>0.2 0 0.2 0 0 0</pose>
    </include>
    <joint name="hokuyo_joint" type="revolute">
      <child>hokuyo::link</child>
      <parent>chassis</parent>
      <axis>
        <xyz>0 0 1</xyz>
        <limit>
          <upper>0</upper>
          <lower>0</lower>
        </limit>
      </axis>
    </joint>
即model.sdf变成如下:
<?xml version='1.0'?>
<sdf version='1.4'>
  <model name="my_robot">
   <static>false</static>
          <link name='chassis'>
            <pose>0 0 .1 0 0 0</pose>

            <collision name='collision'>
              <geometry>
                <box>
                  <size>.4 .2 .1</size>
                </box>
              </geometry>
            </collision>

    <visual name='visual'>
     <pose>0 0 0.05 0 0 0</pose>
      <geometry>
        <mesh>
          <uri>model://pioneer2dx/meshes/chassis.dae</uri>
          <scale>0.9 0.5 0.5</scale>
        </mesh>
      </geometry>
    </visual>
          <collision name='caster_collision'>
            <pose>-0.15 0 -0.05 0 0 0</pose>
            <geometry>
                <sphere>
                <radius>.05</radius>
              </sphere>
            </geometry>

            <surface>
              <friction>
                <ode>
                  <mu>0</mu>
                  <mu2>0</mu2>
                  <slip1>1.0</slip1>
                  <slip2>1.0</slip2>
                </ode>
              </friction>
            </surface>
          </collision>

          <visual name='caster_visual'>
            <pose>-0.15 0 -0.05 0 0 0</pose>
            <geometry>
              <sphere>
                <radius>.05</radius>
              </sphere>
            </geometry>
          </visual>


          </link>
      <link name="left_wheel">
        <pose>0.1 0.13 0.1 0 1.5707 1.5707</pose>
        <collision name="collision">
          <geometry>
            <cylinder>
              <radius>.1</radius>
              <length>.05</length>
            </cylinder>
          </geometry>
        </collision>
        <visual name="visual">
          <geometry>
            <cylinder>
              <radius>.1</radius>
              <length>.05</length>
            </cylinder>
          </geometry>
        </visual>
      </link>
      <link name="right_wheel">
        <pose>0.1 -0.13 0.1 0 1.5707 1.5707</pose>
        <collision name="collision">
          <geometry>
            <cylinder>
              <radius>.1</radius>
              <length>.05</length>
            </cylinder>
          </geometry>
        </collision>
        <visual name="visual">
          <geometry>
            <cylinder>
              <radius>.1</radius>
              <length>.05</length>
            </cylinder>
          </geometry>
        </visual>
      </link>
      <joint type="revolute" name="left_wheel_hinge">
        <pose>0 0 -0.03 0 0 0</pose>
        <child>left_wheel</child>
        <parent>chassis</parent>
        <axis>
          <xyz>0 1 0</xyz>
        </axis>
      </joint>

      <joint type="revolute" name="right_wheel_hinge">
        <pose>0 0 0.03 0 0 0</pose>
        <child>right_wheel</child>
        <parent>chassis</parent>
        <axis>
          <xyz>0 1 0</xyz>
        </axis>
</joint>
    <include>
      <uri>model://hokuyo</uri>
      <pose>0.2 0 0.2 0 0 0</pose>
    </include>
    <joint name="hokuyo_joint" type="revolute">
      <child>hokuyo::link</child>
      <parent>chassis</parent>
      <axis>
        <xyz>0 0 1</xyz>
        <limit>
          <upper>0</upper>
          <lower>0</lower>
        </limit>
      </axis>
      </joint>
  </model>
</sdf>
<include>块告诉gazebo找模型,并且将它插入到相对于父模型的给定的<pose>上。在这种情况下,我们将hokuyo激光安放在前边,并且在机器人上边。<uri>块告诉gazebo在模型库中的哪里找到模型(注意,你可以在这些教程中看到模型数据库的列表uri和相应的mercurial库)。
新的<joint>连接hokuyou激光到机器人机体上。关节有<upper>和<lower>零的限制,来阻止机器人运动。
<clild>在关节中的名字来自于hokuyo模型的SDF,
    <?xml version="1.0" ?>
    <sdf version="1.4">
      <model name="hokuyo">
        <link name="link">
当hokuyo模型被插入后,hokuyo的链接以它们的模型名字来命名。在这种情况下,模型名为hokuyo,所以hokuyo模型中的每个链接前缀为hokuyo::
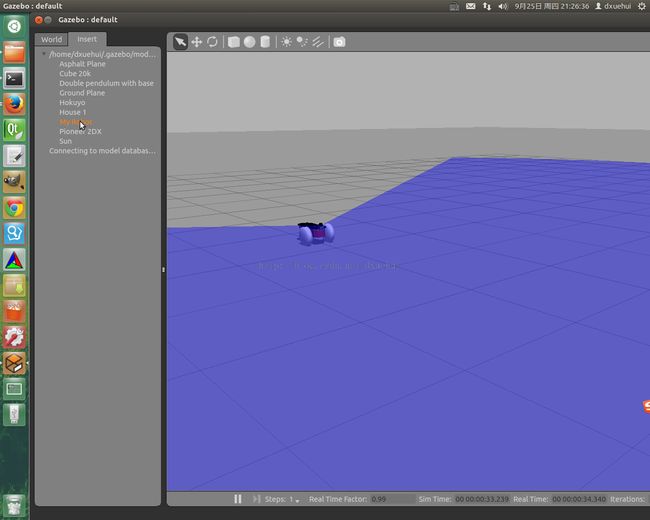
4.现在启动gazebo,使用用户界面中的insert tab将机器人添加到模拟器中。你将看到有激光的机器人。
1.(可选)尝试给机器人增加摄像头。机器人摄像头的URI为model://camera,它应该提供本地缓存:
ls ~/.gazebo/models/camera/