Centos 6.5 安装icingaweb1 中文版部署
ICINGA项目是 由MichaelLuebben、HendrikB?cker和JoergLinge等人发起的,他们都是现有的Nagios项目社区委员会的成员,他们承诺,新的开源项 目将完全兼容以前的Nagios应用程序及扩展功能。在新项目的网站上,他们是如此定义ICINGA的,这将是一个介于Nagios社区版和企业版间的产 品。特别将致力于解决Nagios项目现在的问题,比如不能及时处理Nagios项目的bug、新功能不能及时添加等。还有在新的ICINGA项目中,将 更好的实现数据库集成方面的功能,标准化第三发应用程序的接口等。
centos6.5(x64)
icinga环境包下载
icinga-cn-1.12.2.tar.xz
wget http://jaist.dl.sourceforge.net/project/icinga-cn/icinga-cn/icinga-cn-1.12/icinga-cn-1.12.2.tar.xz
nagios-cn-plugins-2.0.3.tar.xz
wget http://ncu.dl.sourceforge.net/project/icinga-cn/icinga%20plugins/nagios-cn-plugins-2.0.3.tar.xz
icinga-nrpe-2.14.tar.gz
wget http://jaist.dl.sourceforge.net/project/icinga-cn/icinga%20plugins/icinga-nrpe-2.14.tar.gz
依赖开发包安装
yum clean all
yum makecache -y
yum install -y httpd* gcc* glibc* gd* libjpeg* libpng*mysql* libdbi*
创建用户和用户组
/usr/sbin/useradd -m icinga
passwd icinga
/usr/sbin/groupadd icinga-cmd
/usr/sbin/usermod -a -G icinga-cmd icinga
/usr/sbin/usermod -a -G icinga-cmd apache
vim /etc/httpd/conf/httpd.conf
#ServerName www.example.com:80 找到
ServerName *:80 修改
编译安装icinga-cn-1.12.2.tar.xz
tar xvf icinga-cn-1.12.2.tar.xz
cd icinga-cn-1.12.2
./configure --with-command-group=icinga-cmd --enable-idoutils
make all
make fullinstall
make install-config
启动MYSQL 更改MYSQL 密码
service mysqld restart
mysqladmin -uroot password 123456
mysql -uroot -p
CREATE DATABASE icinga;
GRANT SELECT, INSERT, UPDATE, DELETE, DROP, CREATE VIEW, INDEX, EXECUTE ONicinga.* TO 'icinga'@'localhost' IDENTIFIED BY 'icinga';
cd icinga-cn-1.12.2/module/idoutils/db/mysql/
mysql -uroot -p icinga < mysql.sql
vim /usr/local/icinga/etc/ido2db.cfg 查看四行配置
db_servertype=mysql
db_port=3306
db_user=icinga
db_pass=icinga
cd icinga-cn-1.12.2
make cgis
make install-cgis
make install-html
make install-webconf
设置登录icinga密码设置密码为HanZheng.123
htpasswd -c /usr/local/icinga/etc/htpasswd.users icingaadmin
service httpd restart
编译安装nagios-cn-plugins-2.0.3.tar.xz
tar xvf nagios-cn-plugins-2.0.3.tar.xz
cd nagios-cn-plugins-2.0.3
./configure --prefix=/usr/local/icinga --with-cgiurl=/icinga/cgi-bin--with-nagios-user=icinga --with-nagios-group=icinga
make
make install
编译安装icinga-nrpe-2.14.tar.gz
tar xvf icinga-nrpe-2.14.tar.gz
cd icinga-nrpe-2.14
./configure
make
make install
make install-plugin
make install-init
make install-xinetd
make install-daemon-config
关闭selinux
vim /etc/sysconfig/selinux
SELINUX=disabled
setenforce 0 立即生效
sed -i 's/SELINUX=enforcing/SELINUX=disabled/' /etc/selinux/config
启动相应服务
/etc/rc.d/init.d/ido2db restart
/etc/rc.d/init.d/icinga restart
chkconfig --level 35 ido2db on
chkconfig --level 35 icinga on
chkconfig httpd on
chkconfig mysqld on
运行命令检测配置
/usr/local/icinga/bin/icinga -v /usr/local/icinga/etc/icinga.cfg
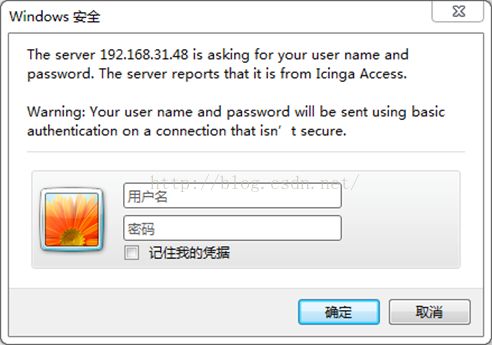
登入web界面测试 http://192.168.31.48/icinga 用户名 icingaadmin密码HanZheng.123设置的密码
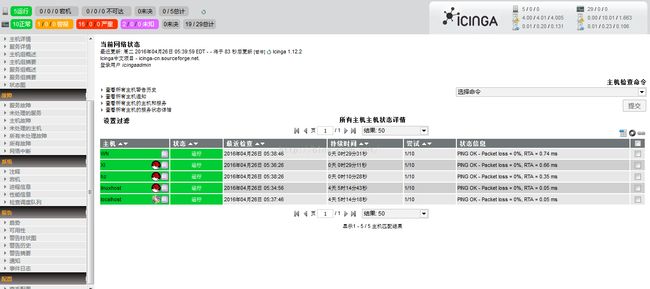
进入界面
添加主机
打开网页后,发现只能看到监控localhost,所以需要监控其他host。没有web UI可以完成这个功能。需要到icinga server上操作。
vi /usr/local/icinga/etc/objects/linux.cfg
添加主机IP
use linux-server ; Inherit default values from a template
host_name WN ; The name we're giving to this host
alias static filer server ; A longer name associated with the host
address 192.168.31.158 ; IP address of the host
contact_groups admins ; Host groups this host is associated with
}
define host{
use linux-server ; Inherit default values from a template
host_name XI ; The name we're giving to this host
alias hanzheng ; A longer name associated with the host
address 192.168.31.172 ; IP address of the host
contact_groups admins ; Host groups this host is associated with
icon_image vendors/redhat.gif
statusmap_image vendors/redhat.gd2
}
define host{
use linux-server ; Inherit default values from a template
host_name hz ; The name we're giving to this host
alias xq ; A longer name associated with the host
address 192.168.31.33 ; IP address of the host
contact_groups admins ; Host groups this host is associated with
icon_image vendors/redhat.gif
statusmap_image vendors/redhat.gd2
}
添加主机服务
define service {
use generic-service
host_name XI,WN,hz
service_description check_load
check_command check_nrpe!check_load
}
define service {
use generic-service
host_name XI,WN,hz
service_description check_users
check_command check_nrpe!check_users
}
define service {
use generic-service
host_name XI,WN,hz
service_description check_total
check_command check_nrpe!check_total_procsi
}
use generic-service
host_name XI,WN,hz
service_description check_hda1
check_command check_nrpe!check_hda1
service_description HTTP
check_command check_nrpe!check_http
service_description PING
servicegroups Linux-Ping
check_command check_ping!100.0,20%!500.0,60%
service_description Swap Usage
check_command check_nrpe!check_swap
cfg_file=/usr/local/icinga/etc/objects/linux.cfg
运行命令检测配置
/usr/local/icinga/bin/icinga -v /usr/local/icinga/etc/icinga.cfg
重启icinga 服务
service icinga reload
yum install gcc openssl-devel
客户端主机的配置
添加用户(普通账户)icinga
/usr/sbin/useradd icinga
passwd icinga
客户端编译和安装Icinga插件
wget http://netix.dl.sourceforge.net/project/icinga-cn/icinga%20plugins/nagios-cn-plugins-1.5.tar.bz2
tar jxvf nagios-cn-plugins-1.5.tar.bz2
cd nagios-cn-plugins-1.5
./configure -prefix=/usr/local/icinga \
--with-package-name=icinga-plugins \
--with-nagios-user=icinga --with-nagios-group=icinga
make
make install
客户端编译和安装Nrpe
wget http://ncu.dl.sourceforge.net/project/icinga-cn/icinga%20plugins/icinga-nrpe-2.14.tar.gz
tar xvzf icinga-nrpe-2.14.tar.gz
cd icinga-nrpe-2.14
./configure --prefix=/usr/local/icinga --with-nrpe-user=icinga --with-nrpe-group=icinga \
--with-icinga-user=icinga --with-icinga-group=icinga
make all
make install
make install-plugin
make install-daemon
make install-daemon-config
make install-init
配置客户端Nrpe
添加nrpe服务器地址,允许服务器对其读取信息
vi /usr/local/icinga/etc/nrpe.cfg
allowed_hosts=127.0.0.1,192.168.31.48
增加command字段来添加要监控的服务
command[check_users]=/usr/local/icinga/libexec/check_users -w 5 -c 10
command[check_load]=/usr/local/icinga/libexec/check_load -w 15,10,5 -c 30,25,20
command[check_hda1]=/usr/local/icinga/libexec/check_disk -w 20% -c 10% -p /dev/hda1
command[check_zombie_procs]=/usr/local/icinga/libexec/check_procs -w 5 -c 10 -s Z
command[check_total_procs]=/usr/local/icinga/libexec/check_procs -w 150 -c 200
command[check_ssh]=/usr/local/icinga/libexec/check_ssh -H localhost
command[check_swap]=/usr/local/icinga/libexec/check_swap -w 20% -c 10%
command[check_mysql]=/usr/local/icinga/libexec/check_mysql -H localhost -uroot -ptomcat2008
command[check_apache]=/usr/local/icinga/libexec/check_apachestatus -H localhost -p 80
command[check_ntp]=/usr/local/icinga/libexec/check_ntp -H localhost -w 0.5 -c 1
command[check_snmp]=/usr/local/icinga/libexec/check_snmp_service -H localhost -C monitor_energysh
启动Nrpe
service icinga-nrpe start
服务端查看
检测服务端check_nrpe与客户端运行的nrpedaemon之间的通信
/usr/local/icinga/libexec/check_nrpe -H 192.168.31.33
NRPE v2.14
Windows 客户端部署
官方推荐NSClient++ addon
下载http://sourceforge.net/projects/nscplus/ 或者 http://jaist.dl.sourceforge.net/project/nscplus/nscplus/NSClient%2B%2B%200.4.1/NSCP-0.4.1.73-x64.msi
双击安装即可。这里下载的版本是NSCP-0.4.1.73-x64.msi
设置Agent
设置allowed hosts
配置文件在:C:\Program Files\NSClient++\nsclient.ini
[/settings/default]
; ALLOWED HOSTS - A comaseparated list of allowed hosts. You can use netmasks (/ syntax) or * to create ranges.
allowed hosts = 192.168.31.48


