Activiti demo+解说深入了解Activiti
上一篇文章中已经简单介绍了下Activiti在Eclipse中的安装,这篇文章来详细了解下Activiti 5.13的使用,如何部署、如何启动流程、查询个人任务和完成任务。
配置和项目建立
关于Activiti环境的配置,所需要的jar包,可以从在上篇博客下载资料中找到,目录一般为:
注意:Activiti默认的是mybatis,而不是Hibernate

建立Activiti Project,如下:
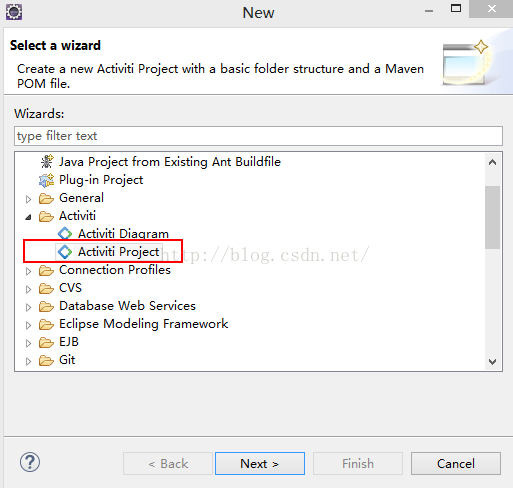
建立后的项目如下:
从这个目录,可以看出,由此建立的Activiti Project是一个Maven项目。

建立activiti.cfg.xml
<beans xmlns="http://www.springframework.org/schema/beans"
       xmlns:xsi="http://www.w3.org/2001/XMLSchema-instance"
       xsi:schemaLocation="http://www.springframework.org/schema/beans   http://www.springframework.org/schema/beans/spring-beans.xsd">
	<bean id="processEngineConfiguration" class="org.activiti.engine.impl.cfg.StandaloneProcessEngineConfiguration">
		<property name="jdbcDriver" value="com.mysql.jdbc.Driver" />
		<property name="jdbcUrl" value="jdbc:mysql://127.0.0.1:3306/activiti?useUnicode=true&characterEncoding=UTF-8" />
		<property name="jdbcUsername" value="root" />
		<property name="jdbcPassword" value="123456" />
		<property name="databaseSchemaUpdate" value="true" />
	</bean>
</beans>
建立流程图

所对应的XML如下:
<?xml version="1.0" encoding="UTF-8"?>
<definitions xmlns="http://www.omg.org/spec/BPMN/20100524/MODEL" xmlns:xsi="http://www.w3.org/2001/XMLSchema-instance" xmlns:xsd="http://www.w3.org/2001/XMLSchema" xmlns:activiti="http://activiti.org/bpmn" xmlns:bpmndi="http://www.omg.org/spec/BPMN/20100524/DI" xmlns:omgdc="http://www.omg.org/spec/DD/20100524/DC" xmlns:omgdi="http://www.omg.org/spec/DD/20100524/DI" typeLanguage="http://www.w3.org/2001/XMLSchema" expressionLanguage="http://www.w3.org/1999/XPath" targetNamespace="http://www.activiti.org/test">
  <process id="helloworld" name="helloworldProcess" isExecutable="true">
    <startEvent id="startevent1" name="Start"></startEvent>
    <endEvent id="endevent1" name="End"></endEvent>
    <userTask id="usertask1" name="提交申请" activiti:assignee="张三"></userTask>
    <userTask id="usertask2" name="审批【部门经理】" activiti:assignee="李四"></userTask>
    <userTask id="usertask3" name="审批【总经理】" activiti:assignee="王五"></userTask>
    <sequenceFlow id="flow1" sourceRef="startevent1" targetRef="usertask1"></sequenceFlow>
    <sequenceFlow id="flow2" sourceRef="usertask1" targetRef="usertask2"></sequenceFlow>
    <sequenceFlow id="flow3" sourceRef="usertask2" targetRef="usertask3"></sequenceFlow>
    <sequenceFlow id="flow4" sourceRef="usertask3" targetRef="endevent1"></sequenceFlow>
  </process>
  <bpmndi:BPMNDiagram id="BPMNDiagram_helloworld">
    <bpmndi:BPMNPlane bpmnElement="helloworld" id="BPMNPlane_helloworld">
      <bpmndi:BPMNShape bpmnElement="startevent1" id="BPMNShape_startevent1">
        <omgdc:Bounds height="35.0" width="35.0" x="375.0" y="41.0"></omgdc:Bounds>
      </bpmndi:BPMNShape>
      <bpmndi:BPMNShape bpmnElement="endevent1" id="BPMNShape_endevent1">
        <omgdc:Bounds height="35.0" width="35.0" x="375.0" y="350.0"></omgdc:Bounds>
      </bpmndi:BPMNShape>
      <bpmndi:BPMNShape bpmnElement="usertask1" id="BPMNShape_usertask1">
        <omgdc:Bounds height="55.0" width="105.0" x="340.0" y="110.0"></omgdc:Bounds>
      </bpmndi:BPMNShape>
      <bpmndi:BPMNShape bpmnElement="usertask2" id="BPMNShape_usertask2">
        <omgdc:Bounds height="55.0" width="105.0" x="340.0" y="190.0"></omgdc:Bounds>
      </bpmndi:BPMNShape>
      <bpmndi:BPMNShape bpmnElement="usertask3" id="BPMNShape_usertask3">
        <omgdc:Bounds height="55.0" width="105.0" x="340.0" y="270.0"></omgdc:Bounds>
      </bpmndi:BPMNShape>
      <bpmndi:BPMNEdge bpmnElement="flow1" id="BPMNEdge_flow1">
        <omgdi:waypoint x="392.0" y="76.0"></omgdi:waypoint>
        <omgdi:waypoint x="392.0" y="110.0"></omgdi:waypoint>
      </bpmndi:BPMNEdge>
      <bpmndi:BPMNEdge bpmnElement="flow2" id="BPMNEdge_flow2">
        <omgdi:waypoint x="392.0" y="165.0"></omgdi:waypoint>
        <omgdi:waypoint x="392.0" y="190.0"></omgdi:waypoint>
      </bpmndi:BPMNEdge>
      <bpmndi:BPMNEdge bpmnElement="flow3" id="BPMNEdge_flow3">
        <omgdi:waypoint x="392.0" y="245.0"></omgdi:waypoint>
        <omgdi:waypoint x="392.0" y="270.0"></omgdi:waypoint>
      </bpmndi:BPMNEdge>
      <bpmndi:BPMNEdge bpmnElement="flow4" id="BPMNEdge_flow4">
        <omgdi:waypoint x="392.0" y="325.0"></omgdi:waypoint>
        <omgdi:waypoint x="392.0" y="350.0"></omgdi:waypoint>
      </bpmndi:BPMNEdge>
    </bpmndi:BPMNPlane>
  </bpmndi:BPMNDiagram>
</definitions>
然后前期准备工作就准备好了,紧接着就可以进行部署等操作了。如下:
部署流程
ProcessEngine processEngine=ProcessEngines.getDefaultProcessEngine();

	//部署流程
	@Test
	public void deploymentProcessDefinition(){
		Deployment deployment=processEngine.getRepositoryService() //与流程定义和部署对象相关的service
						.createDeployment() //创建一个部署对象
						.name("activiti之helloworld入门")
						.addClasspathResource("diagrams/helloword.bpmn")//从classpath资源中加载,一次只能加载一个文件
						.addClasspathResource("diagrams/helloword.png")
						.deploy();
		System.out.println("部署ID:"+deployment.getId());
		System.out.println("部署ID:"+deployment.getName());
	}
流程部署完毕后,mysql数据库表中出现23张表,如下:

ACT_RE_*:
“RE”表示repository(存储),RepositoryService接口所操作的表。带此前缀的表包含的是静态信息,如,流程定义,流程的资源(图片,规则等)。
ACT_RU_*:
“RU”表示runtime,运行时表—RuntimeService。这是运行时的表存储着流程变量,用户任务,变量,职责(job)等运行时的数据。Activiti只存储实例执行期间的运行时数据,当流程实例结束时,将删除这些记录。这就保证了这些运行时的表小且快。ACT_ID_*:
“ID”表示identity (组织机构),IdentityService接口所操作的表。用户记录,流程中使用到的用户和组。这些表包含标识的信息,如用户,用户组等等。
ACT_HI_*:
“HI”表示history,历史数据表,HistoryService。就是这些表包含着流程执行的历史相关数据,如结束的流程实例,变量,任务,等等 ACT_GE_*: 全局通用数据及设置(general),各种情况都使用的数据。
启动流程
流程启动就代表任务已经开始,即进入第一个任务—提交申请。
//启动流程实例
	@Test
	public void startProcessInstance(){
		//流程定义的key
		String processDefinitionKey="helloworld";

		ProcessInstance pi=processEngine.getRuntimeService()//正在执行的流程实例和执行对象相关的service
										.startProcessInstanceByKey(processDefinitionKey); //用key来启动流程实例
		System.out.println("流程实例ID:"+pi.getId());
		System.out.println("流程定义ID:"+pi.getProcessDefinitionId());
	}
查询个人任务
//查询当前个人任务
	@Test
	public void findMyProcessTask(){
		String assignee="张三";
		List<Task> list=processEngine.getTaskService()//正在执行的任务管理相关的service
					.createTaskQuery()//创建任务查询任务
					.taskAssignee(assignee)//指定个人任务查询,指定帮办理人
					.list();
		if(list.size()>0){
			for (Task task : list) {
				System.out.println("任务ID:"+task.getId());
				System.out.println("任务名称:"+task.getName());
				System.out.println("任务创建时间:"+task.getCreateTime());
				System.out.println("任务办理人:"+task.getAssignee());
				System.out.println("流程实例ID:"+task.getProcessDefinitionId());
				System.out.println("执行对象ID:"+task.getExecutionId());
			}
		}
	}
完成任务
完成某一个任务的时候,就代表下一个任务的开始,例如:当提交申请的任务完成时,下一个任务—审批【部门经理】的任务启动,当最后一个任务—审批【总经理】完成时,代表流程结束,此时,工作流结束。
//完成任务
	@Test
	public void completeMyPersonalTask(){
		String taskId="104";
		processEngine.getTaskService()
					.complete(taskId);//完成任务
	}
总结
其实,activitie就是提供一系列服务,上面的代码+图的解说应该就对工作流有一个深入的理解了,其实工作流就是在载取配置文件activiti.cfg.xml后,开启ProcessEngine,从ProcessEngine中获取各种服务,进而启动流程,操作流程,获取任务等。