CentOS 7 设置集中备份服务器
Amanda (Advanced Maryland Automatic Network Disk Archiver) is the most popular open source backup and recovery software in the world that protects more than a million servers and desktops running various versions of Linux, UNIX, BSD, Mac OS-X and Microsoft Windows operating systems worldwide. Amanda supports tapes, disks, optical media and changers. It gives us the capability to use disk storage as backup media. Configuring, initiating and verifying a backup will complete the backup cycle within 30 minutes. Amanda has been used successfully in environments from one standalone machine to hundreds of clients. It can save you from expensive proprietary backup software and those custom backup scripts that have a propensity to break at the worst times.
In this article we will show how you can :
- Install and configure the Amanda backup server.
- Set backup parameters.
- Verify the configuration and Verify the backup.
- Install and configure the Amanda Linux clients for backup.
Step 1: Installing Amanda on CentOS 7
We are going to start from our first step by installing Amanda backup server on CentOS 7 server. Open the command line terminal of your CentOS 7 host using your root user credentials and setup its IP and FQDN. Run the following commands to setup the hostname of your Amanda backup server.
# hostnamectl set-hostname amanda-server
# vi /etc/hosts
192.168.10.177 amanda-server amanda-server.linoxide.com
Make sure that you are connected to the Internet for installing updates and Amanda server packages. Run the following command to update your system with latest updates and patches.
# yum update
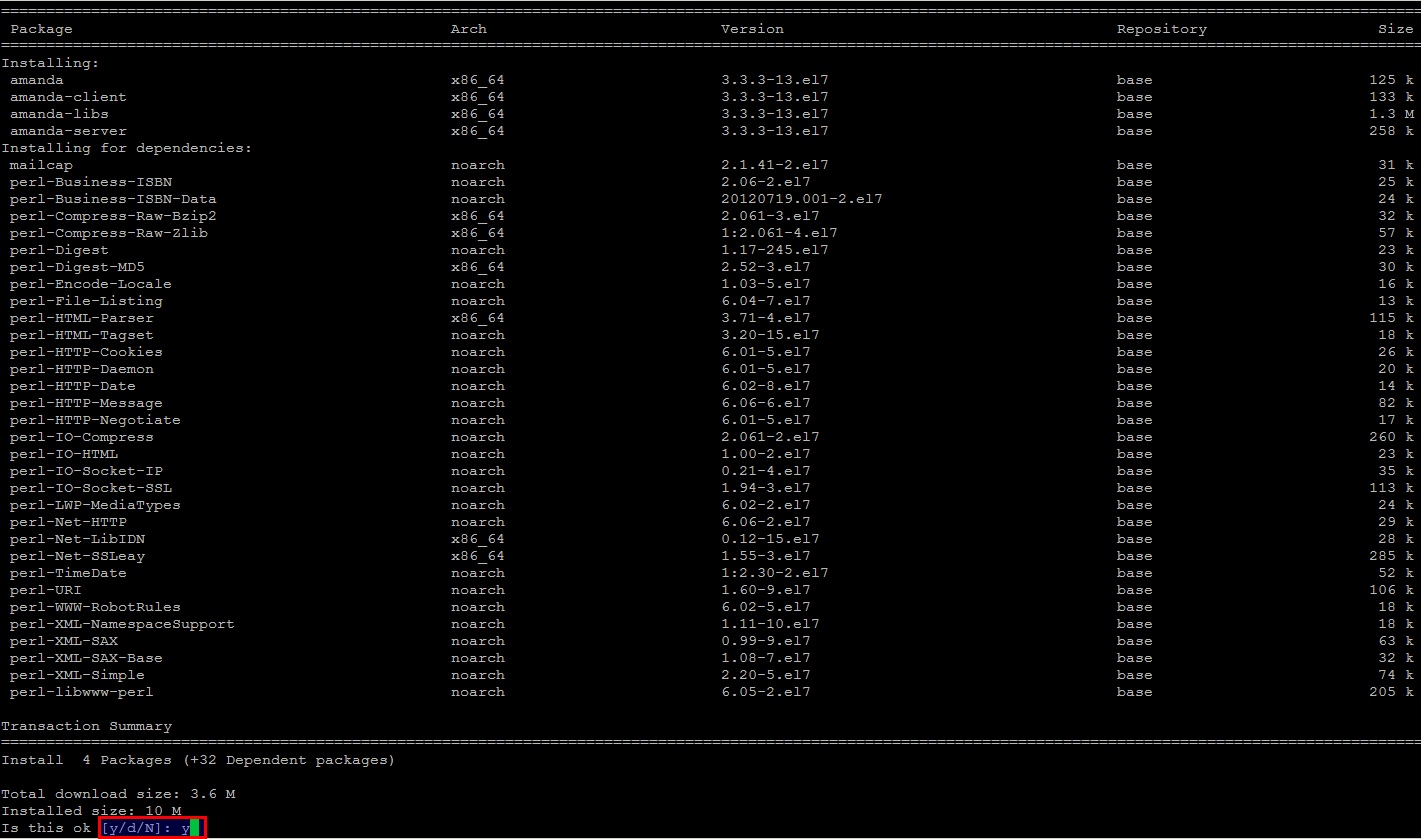
Once your system is updated you can start installation of Amanda Backup Server using 'yum' command as its packages are available its default EPEL repository. Go ahead by running the following command and press 'y' key to proceed its installation including its dependencies.
[root@amanda-server ~]# yum install amanda*
Amanda will be executed by xinetd, so we need to install this along with some of its required packages for Amanda on the system.
# yum install xinetd gnuplot perl-ExtUtils-Embed
Step 2: Starting Xinetd Service
Now we have xinetd and Amanda backup server installed on our CentOS 7 Operating system. Let's start the 'xinetd' service using the command as shown below.
[root@amanda ~]# service xinetd restart
Verify the amanda installation after its successful installation using the following command.
[root@amanda ~]# amadmin --version
amadmin-3.3.3
Step 3: Amanda Configurations Setup
First we will make some directories uisng the root user, but make sure and confirm your Amanda user, that probably "amandabackup" or "amanda" or "backup", depending on how you installed Amanda. We are using the default 'amandabackup' here to assign the ownership of the following directory structure.
[root@amanda ~]# mkdir -p /amanda /etc/amanda
[root@amanda ~]# chown amandabackup /amanda /etc/amand
Now switch to your 'amandabackup' user and run the following commands.
[root@amanda ~]# su - amandabackup
-bash-4.2$ mkdir -p /amanda/vtapes/slot{1,2,3,4}
-bash-4.2$ mkdir -p /amanda/holding
-bash-4.2$ mkdir -p /amanda/state/{curinfo,log,index}
-bash-4.2$ mkdir -p /etc/amanda/MyConfig
So, all of the data will be under '/amanda' folder but you can put them wherever you would like to do. Now, we are going to add an 'amanda.conf' file at '/etc/amanda/MyConfig/' directory with the following contents.
This is the main configuration file for Amanda, the Advanced Maryland Automatic Network Disk Archiver. Lets open this configuration file using your best editor and put the following contents in it. Keep in mind that you should edit 'dumpuser' appropriately if your Amanda user has another name.
-bash-4.2$ vi /etc/amanda/MyConfig/amanda.conf
org "MyConfig"
infofile "/amanda/state/curinfo"
logdir "/amanda/state/log"
indexdir "/amanda/state/index"
dumpuser "amandabackup"tpchanger "chg-disk:/amanda/vtapes"
labelstr "MyData[0-9][0-9]"
autolabel "MyData%%" EMPTY VOLUME_ERROR
tapecycle 4
dumpcycle 3 days
amrecover_changer "changer"tapetype "TEST-TAPE"
define tapetype TEST-TAPE {
length 100 mbytes
filemark 4 kbytes
}define dumptype simple-gnutar-local {
auth "local"
compress none
program "GNUTAR"
}holdingdisk hd1 {
directory "/amanda/holding"
use 50 mbytes
chunksize 1 mbyte
}
There are a number of configuration parameters that control the behavior of the Amanda programs. All have default values, so you need not specify the parameter in amanda.conf if the default is suitable. You can find the orginal Amanda configuration file under the '/etc/amanda/DailySet1/' directory.
Next, we will add a 'disklist' file with a single disk list entry (DLE). The 'disklist' file determines which disks will be backed up by Amanda. The file contains includefile directive or disklist entry (DLE). General usage was to describe a DLE as a partition, or file system.
-bash-4.2$ vi /etc/amanda/MyConfig/disklist
localhost /etc simple-gnutar-local
Save and close the file using ':wq!' when you are using 'vi' or 'vim' editor. So, we have done the configurations let's move to the next step.
Step 4: Check Amanda Configuration
Amanda has a nice utility called 'amcheck' which can check a configuration for you. Running it on to test configuration that gives you the results of your configurations. Note that almost all Amanda commands take the configuration name as the first argument like in our case it is "MyConfig".
Let's run the following command to check the Tape Host Server configurations.
-bash-4.2$ amcheck MyConfig
Amcheck runs a number of self-checks on both the Amanda tape server host and the Amanda client hosts.
On the tape server host, amcheck can go through the same tape checking used at the start of the nightly amdump run to verify the correct tape for the next run is mounted. It can also do a self-check on all client hosts to make sure each host is running and that permissions on filesystems to be backed up are correct.
You can specify many host/disk expressions, only disks that match an expression will be checked. All disks are checked if no expressions are given.
Step 5: Run Test Backup
The test results are positive as we have seen that there is no such error found that forced us to move forward. The tool to run backups is 'amdump'. It takes only the configuration name which doesn't print anything to the terminal in its out put. Let's run as the Amanda user as shown below.
-bash-4.2$ amdump MyConfig
It will took few seconds then you probably will get not output. On the very next line, run the following command and that should give '0' in output. if you see something other than zero, then the backup failed.
-bash-4.2$ echo $?
0
Amdump is the main interface to the Amanda backup process. It loads the specified configuration and attempts to back up every disk specified by the 'disklist'. Amdump is normally run by 'cron' that we will show you in next steps.
But, if you see something other than the zero, then it means you backup failed. In that case, you can see a handy report of what happened to the backup by using the 'amreport' command along with your configuration file.
-bash-4.2$ amreport MyConfig
Amreport will generates a summary report of an Amanda backup run as shown in the below image.
Step 6: Amanda Backup Scheduling
For daily execution of 'amdump', it can be scheduled via cron daemon. Nobody wants to remember to run the backups every night. That's why we have cron! Let's Add the following lines .
-bash-4.2$ crontab -e
0 17 * * * amandabackup /usr/sbin/amcheck -m MyConfig
15 2 * * * amandabackup /usr/sbin/amdump MyConfig
Save and close the crontab editor. These lines will schedule a backup everyday at 17:00 and 2:15.
If you login to your root user then you can use the following command to add cron job for your Amada user.
# su amadabackup -c "crontab -e"
But depending on how you've installed Amanda, you may need to change '/usr/sbin' to something else after finding out where your distro has put the Amanda tool. You can use 'which amcheck' on the command line to find the process location.
# which amcheck
/usr/sbin/amcheck
Amcheck can email you for problems for what we have used the '-m' flag in the crontab, and amdump will happily email you a report every night. Automation is no good if you never find out something is broken. So, just add a 'mailto' configuration to your 'amanda.conf' file.
-bash-4.2$ vi /etc/amanda/MyConfig/amanda.conf
mailto "[email protected]"
:wq!
Step 7: Amanda Backup Client Installation
In this section we will describes on how to install and configure our virtual machines in order to get backed up by the Amanda backup servers we have just setup in previous steps.
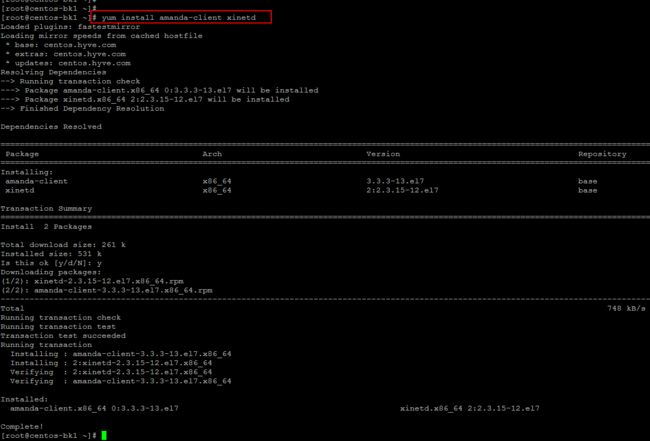
We are going to use another CentOS 7 server to setup Amanda Client backup installation. To install the amanda Client package run the following command.
[root@centos-bk1 ~]# yum install amanda-client xinetd
Step 8: Amanda Backup Client Configuration
The '/var/lib/amanda/.amandahosts' file used to specify Amanda server location, open the same file using your editor and add the following entry and then save the changes.
[root@centos-bk1 ~]# vi /var/lib/amanda/.amandahosts
amanada_server amandabackup
:wq!
Then make sure that the same file '/var/lib/amanda/.amandahosts' must contain entries with the hostname of each AMANDA client that is allowed to use the amrecover command and 'amrecover' must be run as root.
Conclusion
Amanda simplifies the life of a System Administrator who can easily set up a single server to back up multiple networked clients to a tape- or disk-based storage system. A unique scheduler optimizes backup level for different clients in such a way that total backup time is about the same for every backup run. It frees the System Administrators from having to guess the rate of data change in their environments. I hope have have found this article much helpful, but still there are many things left to do and we will discuss those in next articles. Thank you for reading and don't forget to leave your valuable comments.


