Android PullZoomView:PullToZoomScrollViewEx(2)
Android PullZoomView:PullToZoomScrollViewEx(2)
在附录文章1中,介绍了Android PullZoomView在ListView中的实现:PullToZoomListViewEx,事实上,Android PullZoomView亦可在ScrollView实现,Android PullZoomView在ScrollView的实现是:PullToZoomScrollViewEx。本文介绍PullToZoomScrollViewEx。
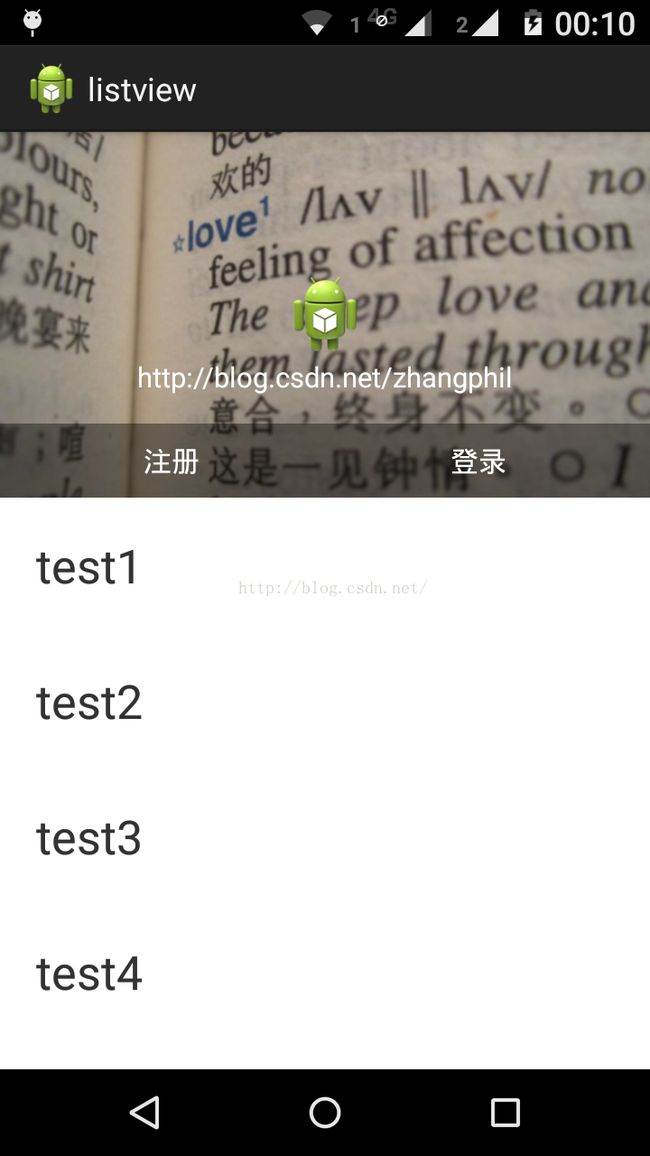
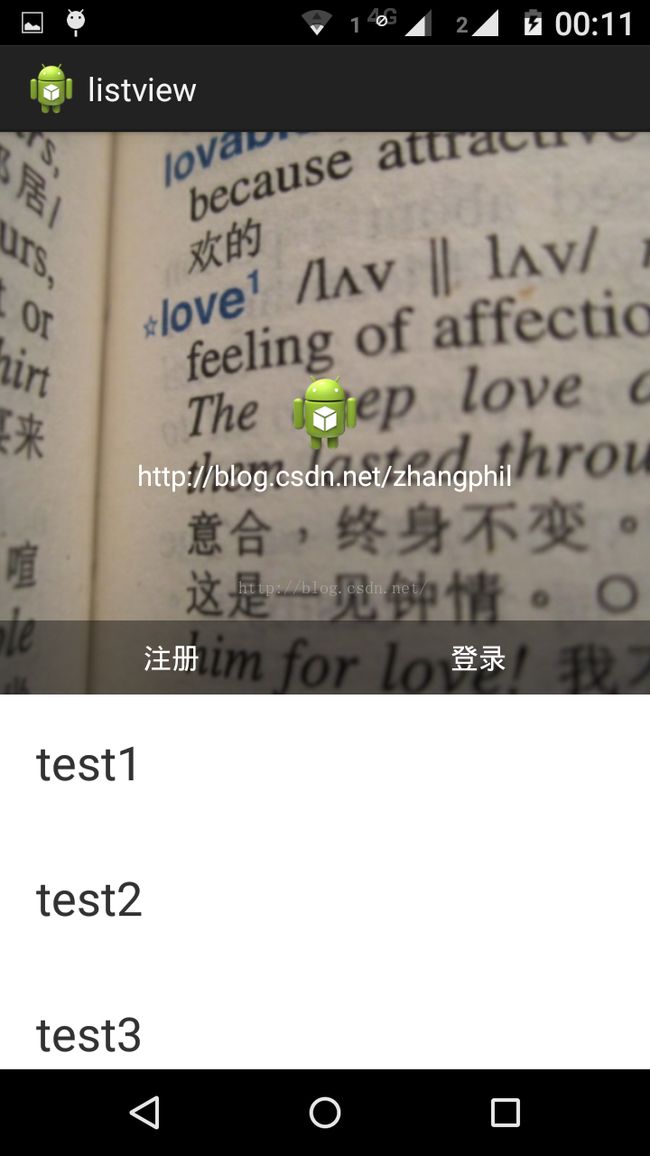
PullToZoomScrollViewEx运行效果如图所示:
在附录文章1中,PullToZoomListViewEx 是在xml布局文件中,写头部View以及zoom的View,而本文要说的PullToZoomScrollViewEx则以另外一种方式在Java代码中动态的为PullZoomView装载View:
private void loadViewForPullToZoomScrollView(PullToZoomScrollViewEx scrollView) {

		View headView = LayoutInflater.from(this).inflate(R.layout.head_view, null);
		View zoomView = LayoutInflater.from(this).inflate(R.layout.head_zoom_view, null);
		View contentView = LayoutInflater.from(this).inflate(R.layout.content_view, null);
		scrollView.setHeaderView(headView);
		scrollView.setZoomView(zoomView);
		scrollView.setScrollContentView(contentView);
	}
两点内容需要注意:
(1)所有Android PullZoomView的头部及缩放效果都可以关闭或者开启,具体方式就是通过改变设置各种方法的true或false值。以下是比较重要的几个方法:
setParallax(boolean b);
true则有视差效果,false则无。
setHideHeader(boolean b);
true则隐藏自己定义的head view,false则显示。
setZoomEnabled(boolean b);
true支持缩放,false不支持缩放。
默认的,
setParallax(true);
setHideHeader(false);
setZoomEnabled(true);
(2)PullZoomView中嵌套的子View,需要通过getPullRootView().findViewById(R.id.xxxx)这样的方式找出来,而不是直接的findViewById()。
下面给出一个完整例子加以说明。
先写一个布局:
<RelativeLayout xmlns:android="http://schemas.android.com/apk/res/android"
    xmlns:tools="http://schemas.android.com/tools"
    xmlns:custom="http://schemas.android.com/apk/res-auto"
    android:layout_width="match_parent"
    android:layout_height="match_parent"
    tools:context="zhangphil.listview.MainActivity" >

    <com.ecloud.pulltozoomview.PullToZoomScrollViewEx
        android:id="@+id/scroll_view"
        android:layout_width="match_parent"
        android:layout_height="match_parent" />

</RelativeLayout>
Java代码:
package zhangphil.listview;

import com.ecloud.pulltozoomview.PullToZoomScrollViewEx;

import android.app.Activity;
import android.os.Bundle;
import android.util.DisplayMetrics;
import android.util.Log;
import android.view.LayoutInflater;
import android.view.View;
import android.widget.LinearLayout;

public class MainActivity extends Activity {

	@Override
	protected void onCreate(Bundle savedInstanceState) {
		super.onCreate(savedInstanceState);

		setContentView(R.layout.activity_main);
		PullToZoomScrollViewEx scrollView = (PullToZoomScrollViewEx) findViewById(R.id.scroll_view);
		loadViewForPullToZoomScrollView(scrollView);//注意初始化顺序,不要弄乱,否则抛出运行时空指针

		scrollView.getPullRootView().findViewById(R.id.tv_test1).setOnClickListener(new View.OnClickListener() {
			@Override
			public void onClick(View v) {
				Log.d("PullToZoomScrollViewEx", "onClick");
			}
		});

		scrollView.getPullRootView().findViewById(R.id.tv_test2).setOnClickListener(new View.OnClickListener() {
			@Override
			public void onClick(View v) {
				Log.e("PullToZoomScrollViewEx", "onClick");
			}
		});

		scrollView.getPullRootView().findViewById(R.id.tv_test3).setOnClickListener(new View.OnClickListener() {
			@Override
			public void onClick(View v) {
				Log.d("PullToZoomScrollViewEx", "onClick");
			}
		});

		setPullToZoomViewLayoutParams(scrollView);
	}

	private void loadViewForPullToZoomScrollView(PullToZoomScrollViewEx scrollView) {

		View headView = LayoutInflater.from(this).inflate(R.layout.head_view, null);
		View zoomView = LayoutInflater.from(this).inflate(R.layout.head_zoom_view, null);
		View contentView = LayoutInflater.from(this).inflate(R.layout.content_view, null);
		scrollView.setHeaderView(headView);
		scrollView.setZoomView(zoomView);
		scrollView.setScrollContentView(contentView);
	}

	// 设置头部的View的宽高。
	private void setPullToZoomViewLayoutParams(PullToZoomScrollViewEx scrollView) {
		DisplayMetrics localDisplayMetrics = new DisplayMetrics();
		getWindowManager().getDefaultDisplay().getMetrics(localDisplayMetrics);
		int mScreenHeight = localDisplayMetrics.heightPixels;
		int mScreenWidth = localDisplayMetrics.widthPixels;
		LinearLayout.LayoutParams localObject = new LinearLayout.LayoutParams(mScreenWidth,
				(int) (9.0F * (mScreenWidth / 16.0F)));
		scrollView.setHeaderLayoutParams(localObject);
	}
}
java代码需要的子布局:
head_view.xml:
<RelativeLayout xmlns:android="http://schemas.android.com/apk/res/android"
    android:id="@+id/layout_view"
    android:layout_width="match_parent"
    android:layout_height="match_parent"
    android:layout_gravity="bottom"
    android:gravity="bottom">

    <ImageView
        android:id="@+id/iv_user_head"
        android:layout_width="wrap_content"
        android:layout_height="wrap_content"
        android:layout_centerInParent="true"
        android:src="@drawable/ic_launcher" />

    <TextView
        android:id="@+id/tv_user_name"
        android:textSize="12sp"
        android:layout_width="wrap_content"
        android:layout_height="wrap_content"
        android:layout_below="@id/iv_user_head"
        android:layout_centerHorizontal="true"
        android:text="http://blog.csdn.net/zhangphil"
        android:textColor="#ffffff" />

    <LinearLayout
        android:id="@+id/ll_action_button"
        android:layout_width="match_parent"
        android:layout_height="wrap_content"
        android:background="#66000000"
        android:layout_alignParentBottom="true"
        android:padding="10dip">

        <TextView
            android:id="@+id/tv_register"
            android:layout_width="match_parent"
            android:layout_height="wrap_content"
            android:text="注册"
            android:layout_weight="1"
            android:textSize="12sp"
            android:gravity="center"
            android:layout_gravity="center"
            android:textColor="#ffffff" />

        <TextView
            android:id="@+id/tv_login"
            android:layout_width="match_parent"
            android:layout_height="wrap_content"
            android:text="登录"
            android:layout_weight="1"
            android:textSize="12sp"
            android:gravity="center"
            android:layout_gravity="center"
            android:textColor="#ffffff" />
    </LinearLayout>
</RelativeLayout>
head_zoom_view.xml:
<?xml version="1.0" encoding="utf-8"?>
<ImageView xmlns:android="http://schemas.android.com/apk/res/android"
    android:id="@+id/imageView"
    android:layout_width="match_parent"
    android:layout_height="match_parent"
    android:layout_gravity="center_horizontal"
    android:scaleType="centerCrop"
    android:src="@drawable/image" />
head_zoom_view其实就放了一张可供缩放拉伸的图片。
content_view.xml:
<?xml version="1.0" encoding="utf-8"?>
<LinearLayout xmlns:android="http://schemas.android.com/apk/res/android"
    android:layout_width="match_parent"
    android:layout_height="match_parent"
    android:background="#ffffff"
    android:orientation="vertical" >

    <TextView
        android:id="@+id/tv_test1"
        android:layout_width="match_parent"
        android:layout_height="wrap_content"
        android:gravity="center_vertical"
        android:padding="20dp"
        android:text="test1"
        android:textSize="20sp" />

    <TextView
        android:id="@+id/tv_test2"
        android:layout_width="match_parent"
        android:layout_height="wrap_content"
        android:gravity="center_vertical"
        android:padding="20dp"
        android:text="test2"
        android:textSize="20sp" />

    <TextView
        android:id="@+id/tv_test3"
        android:layout_width="match_parent"
        android:layout_height="wrap_content"
        android:gravity="center_vertical"
        android:padding="20dp"
        android:text="test3"
        android:textSize="20sp" />

    <TextView
        android:layout_width="match_parent"
        android:layout_height="wrap_content"
        android:gravity="center_vertical"
        android:padding="20dp"
        android:text="test4"
        android:textSize="20sp" />

    <TextView
        android:layout_width="match_parent"
        android:layout_height="wrap_content"
        android:gravity="center_vertical"
        android:padding="20dp"
        android:text="test5"
        android:textSize="20sp" />

    <TextView
        android:layout_width="match_parent"
        android:layout_height="wrap_content"
        android:background="#eeeeee" />

    <TextView
        android:layout_width="match_parent"
        android:layout_height="wrap_content"
        android:gravity="center_vertical"
        android:padding="20dp"
        android:text="test1"
        android:textSize="20sp" />

    <TextView
        android:layout_width="match_parent"
        android:layout_height="wrap_content"
        android:gravity="center_vertical"
        android:padding="20dp"
        android:text="test2"
        android:textSize="20sp" />

    <TextView
        android:layout_width="match_parent"
        android:layout_height="wrap_content"
        android:gravity="center_vertical"
        android:padding="20dp"
        android:text="test3"
        android:textSize="20sp" />

    <TextView
        android:layout_width="match_parent"
        android:layout_height="wrap_content"
        android:gravity="center_vertical"
        android:padding="20dp"
        android:text="test4"
        android:textSize="20sp" />

    <TextView
        android:layout_width="match_parent"
        android:layout_height="wrap_content"
        android:gravity="center_vertical"
        android:padding="20dp"
        android:text="test5"
        android:textSize="20sp" />

</LinearLayout>
实际开发中,如果确定要用ScrollView包括自己项目中的子View,那么content_view.xml就是其他View的装载“父”布局。重点需要在content_view.xml中展开。
静态截图1,初始化状态:
下拉状态:
素材Image.jpg的原图:
代码运行效果如前文动图所示。
附录:
【1】《Android PullZoomView:PullToZoomListViewEx(1)》链接地址:http://blog.csdn.net/zhangphil/article/details/50199833
【2】Android PullZoomView在github上的项目主页:https://github.com/Frank-Zhu/PullZoomView


