Android开发学习笔记(三)Android应用界面编程 Toast/SubMenu学习
我主要是看了密西西比河谷州立大学的Android视频,这是那个视频上的第二个实例程序。因为网上找不到相关的源代码,我就自己写了一个,不太一样,但是功能都有。
Toast的功能是弹出一个消息框。我主要是利用了Toast来实现下面的应用。
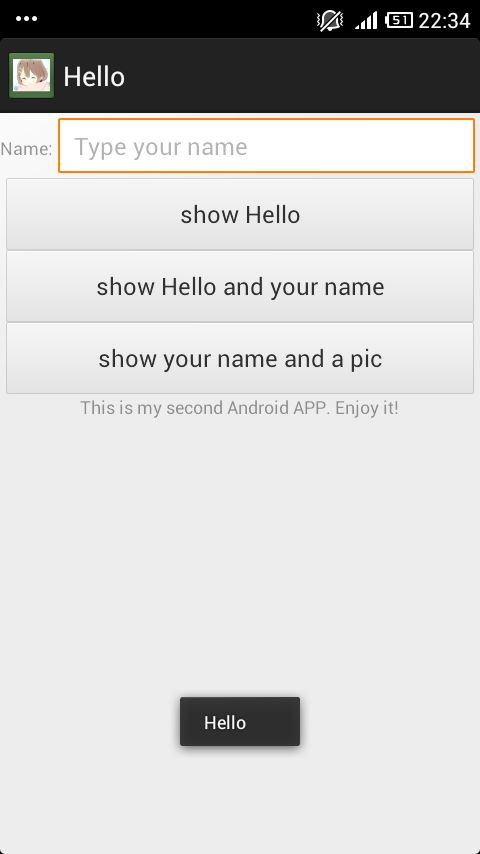
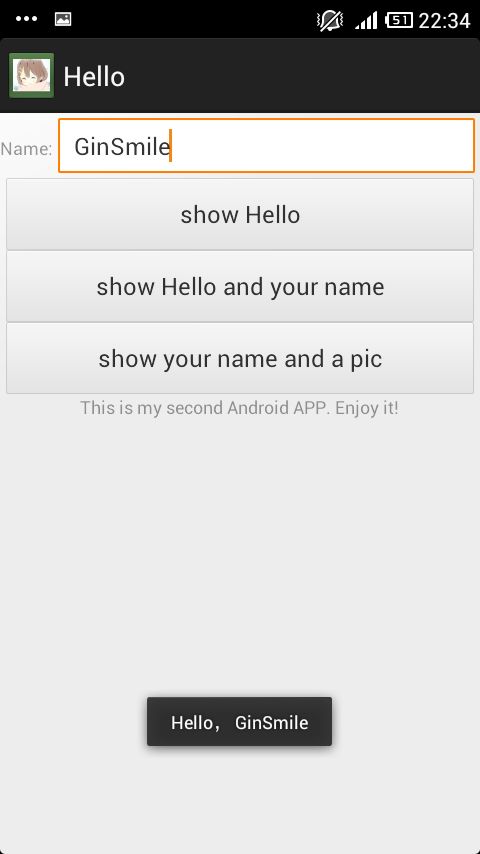
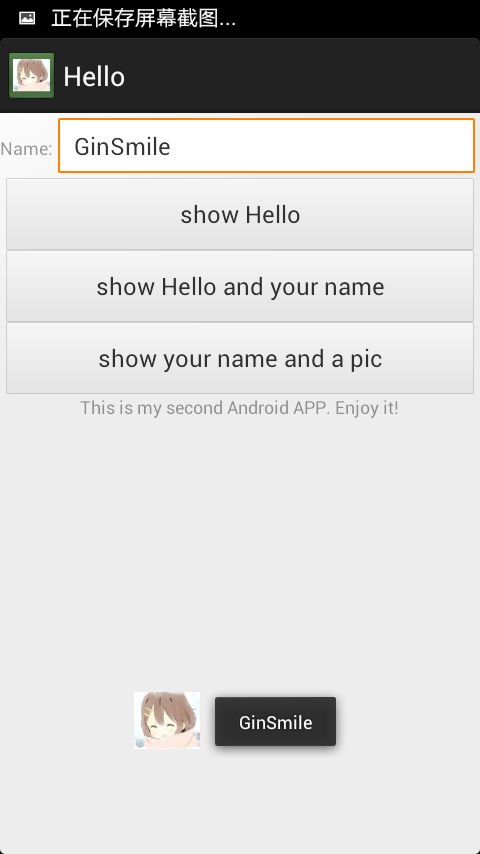
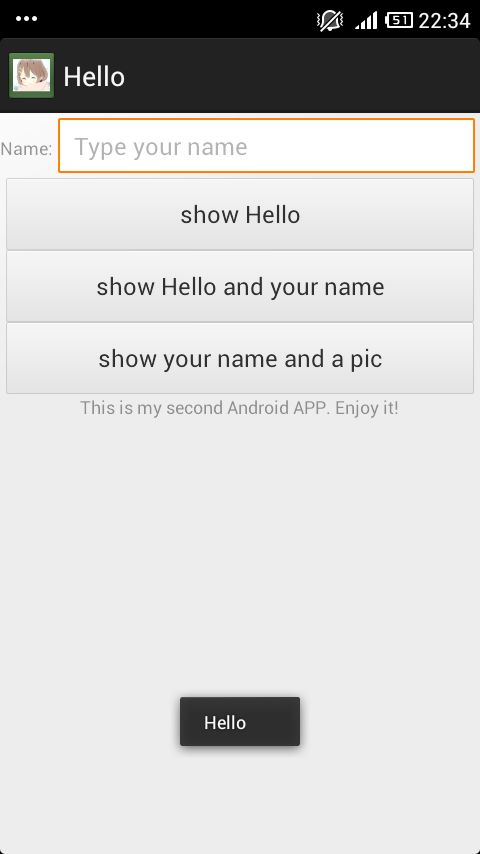
实现的界面如下:
点击 show Hello,就会弹出一个Hello的消息框,
点击 show Hello and your name,就会弹出一个Hello以及键入的名字的消息框,
点击 show your name and a pic,就会弹出一个图片和键入的名字的消息框。
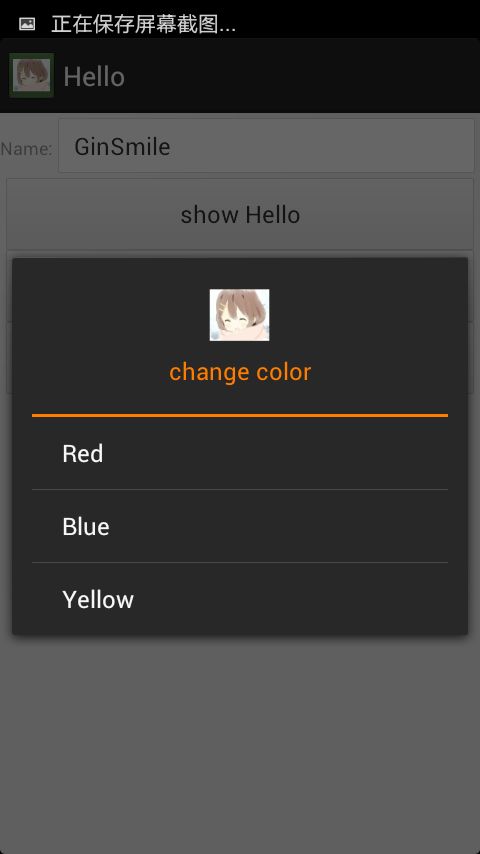
实现菜单功能,可以改变字体颜色,可以退出。
下面是源代码,其中,布局文件activity_main.xm和java源代码MainActivity.java以及strings.xml是最终结果。
布局文件activity_main.xm
<LinearLayout xmlns:android="http://schemas.android.com/apk/res/android"
    xmlns:tools="http://schemas.android.com/tools"
    android:layout_width="match_parent"
    android:layout_height="match_parent"
    android:orientation="vertical"
    >
    <!-- normal edit text,you can type some strings here -->

    <LinearLayout
        xmlns:android="http://schemas.android.com/apk/res/android"
        xmlns:tools="http://schemas.android.com/tools"
        android:layout_width="match_parent"
        android:layout_height="wrap_content"
        android:orientation="horizontal" >

    <TextView
        android:layout_width="wrap_content"
        android:layout_height="wrap_content"
        android:text="Name:"
        />
    <EditText
        android:id="@+id/text"
        android:layout_width="fill_parent"
        android:layout_height="wrap_content"
        android:hint="@string/type"
        />
    </LinearLayout>
   <Button
       android:id="@+id/btn"
       android:layout_width="fill_parent"
       android:layout_height="wrap_content"
       android:text="@string/OK1"
    />
     <Button
       android:id="@+id/btn2"
       android:layout_width="fill_parent"
       android:layout_height="wrap_content"
       android:text="@string/OK2"
    />
     <Button
       android:id="@+id/btn3"
       android:layout_width="fill_parent"
       android:layout_height="wrap_content"
       android:text="@string/OK3"
    />

     <TextView
         android:layout_width="wrap_content"
         android:layout_height="wrap_content"
         android:layout_gravity="center"
         android:text="This is my second Android APP. Enjoy it!" />

</LinearLayout>
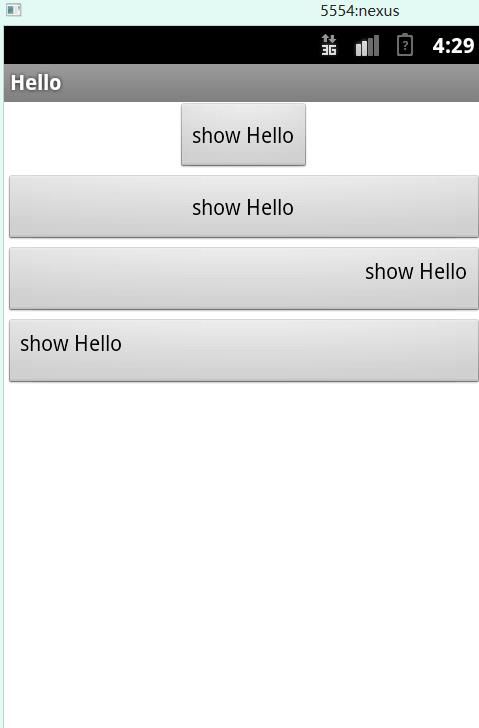
在写最后一个TextView的时候,我发现了一个易混点,就是android:layout_gravity 和android:gravity一定要区别开来。
android:gravity用于设置View中内容相对于View组件的对齐方式,而android:layout_gravity用于设置View组件相对于Container的对齐方式。
比如说,设置一个Button的android:gravity为left,那么这个Button的内容就会在Button的左边。
这里我弄了一个测试。
显示效果:
上图布局源代码:
main.xml
<LinearLayout xmlns:android="http://schemas.android.com/apk/res/android"
    android:layout_width="fill_parent"
    android:layout_height="fill_parent"
    android:orientation="vertical" >
<Button
       android:id="@+id/btn1"
       android:layout_width="wrap_content"
       android:layout_height="wrap_content"
       android:text="@string/OK1"
       android:layout_gravity="center"
    />
<Button
       android:id="@+id/btn2"
       android:layout_width="match_parent"
       android:layout_height="wrap_content"
       android:text="@string/OK1"
       android:gravity="center"
    />
<Button
       android:id="@+id/btn3"
       android:layout_width="match_parent"
       android:layout_height="wrap_content"
       android:text="@string/OK1"
       android:gravity="right"
    />
<Button
       android:id="@+id/btn4"
       android:layout_width="match_parent"
       android:layout_height="wrap_content"
       android:text="@string/OK1"
       android:gravity="left"
    />

</LinearLayout>
java源文件,MainActivity.java
package com.xujin.hello;

import android.os.Bundle;
import android.app.Activity;
import android.graphics.Color;
import android.text.Editable;
import android.view.Gravity;
import android.view.Menu;
import android.view.MenuItem;
import android.view.SubMenu;
import android.widget.Button;
import android.widget.EditText;
import android.widget.ImageView;
import android.widget.LinearLayout;
import android.widget.Toast;
import android.view.View.OnClickListener;
import android.view.View;

public class MainActivity extends Activity {

	private static final int FONT_RED = 0x110;
	private static final int FONT_BLUE = 0x111;
	private static final int FONT_YELLOW = 0x112;
	private static final int EXIT = 0x113;
	private EditText txtName ;

	@Override
	public void onCreate(Bundle savedInstanceState) {
		super.onCreate(savedInstanceState);
		//载入布局文件
		setContentView(R.layout.activity_main);
		//获取键入的名字,存入name变量中
		txtName = (EditText)findViewById(R.id.text);
		final Editable name = txtName.getText();
		//为but绑定一个事件监听器
		Button myBtn = (Button)findViewById(R.id.btn);
		myBtn.setOnClickListener(new OnClickListener()
		{
			@Override
			public void onClick(View source)
			{
				//使用Toast.makeText的方法,弹出一个消息框
				Toast toast = Toast.makeText(MainActivity.this, "Hello", Toast.LENGTH_SHORT);
				toast.show();
			}
		});
		Button myBtn2 = (Button)findViewById(R.id.btn2);
		myBtn2.setOnClickListener(new OnClickListener()
		{
			@Override
			public void onClick(View source)
			{
				Toast toast = Toast.makeText(MainActivity.this, "Hello, " + name, Toast.LENGTH_SHORT);
				toast.show();
			}
		});
		Button myBtn3 = (Button)findViewById(R.id.btn3);
		myBtn3.setOnClickListener(new OnClickListener()
		{
			@Override
			public void onClick(View source)
			{
				Toast toast = Toast.makeText(MainActivity.this,name, Toast.LENGTH_SHORT);
				//toast.setGravity(Gravity.CENTER, 0 ,0);
				//获取toast提示里原有的view
				View toastView = toast.getView();
				//创建一个ImageView
				ImageView image = new ImageView(MainActivity.this);
				image.setImageResource(R.drawable.ic_launcher);
				//创建一个LinearLayout容器
				LinearLayout ll = new LinearLayout(MainActivity.this);
				//向LinearLayout中添加图片和原有的view
				ll.addView(image);
				ll.addView(toastView);
				toast.setView(ll);
				toast.show();
			}
		});
	}

	@Override
	public boolean onCreateOptionsMenu(Menu menu) {
		// Inflate the menu; this adds items to the action bar if it is present.
		SubMenu colorMenu = menu.addSubMenu("change color");
		colorMenu.setHeaderTitle("change color");
		colorMenu.setHeaderIcon(R.drawable.ic_launcher);
		colorMenu.add(0, FONT_RED, 0, "Red");
		colorMenu.add(0, FONT_BLUE, 0, "Blue");
		colorMenu.add(0, FONT_YELLOW, 0, "Yellow");
		menu.add(0, EXIT, 0, "Exit");
		return super.onCreateOptionsMenu(menu);
	}

	@Override
	public boolean onOptionsItemSelected(MenuItem mi){
		switch (mi.getItemId()){
			case FONT_RED:
				txtName.setTextColor(Color.RED);
				break;
			case FONT_BLUE:
				txtName.setTextColor(Color.BLUE);
				break;
			case FONT_YELLOW:
				txtName.setTextColor(Color.YELLOW);
				break;
			case EXIT:
				finish();
				break;
		}
		return true;
	}

}
我重写了onCreateOptionsMenu函数,当用户点击物理键盘上的menu的时候就会触发这个事件。
SubMenu colorMenu = menu.addSubMenu("change color");
colorMenu.setHeaderTitle("change color"); 设置菜单头的标题
colorMenu.setHeaderIcon(R.drawable.ic_launcher); 设置菜单头的图标
colorMenu.add(0, FONT_RED, 0, "Red"); 添加菜单项
colorMenu.add(0, FONT_BLUE, 0, "Blue");
colorMenu.add(0, FONT_YELLOW, 0, "Yellow");
menu.add(0, EXIT, 0, "Exit");
strings.xml
<?xml version="1.0" encoding="utf-8"?>
<resources>

    <string name="app_name">Hello</string>
    <string name="OK1">show Hello</string>
    <string name="OK2">show Hello and your name</string>
    <string name="OK3">show your name and a pic</string>
	<string name="type">Type your name</string>
	<string name="name">Name</string>

</resources>
点击三个按钮后的最终结果:
点击物理键盘的menu后,选择change color,选择Blue。
