Gradle入门
Gradle广告时间
- 如果你嫌Ant太低级
- 如果你觉得Maven太复杂
- 如果你认为XML过于繁琐
- 如果你想在build脚本里写真正的代码
那么一定要试试Gradle
安装Gradle
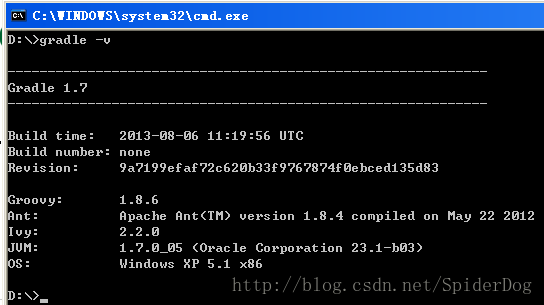
很简单,看这个网页就行了,安装完毕后,执行gradle -v命令以证明安装成功:
MyGroovyConsole工程
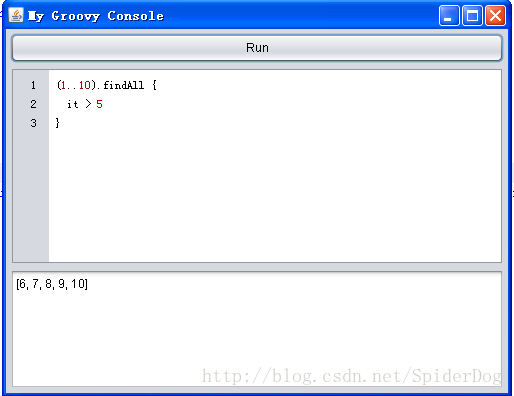
为了演示Gradle的基本功能,我创建了一个简单的Java Swing应用程序,这个程序类似Groovy自带的GroovyConsole,只不过更简单而已。截图:
创建MyGroovyConsole
Gradle按照Convention over configuration原则设计,所以只要我们也遵守这个原则,创建下面的目录结构,一个标准Java工程就诞生了:
Gradle build脚本
build.gradle是Gradle默认的build脚本,类似于Ant的build.xml或者Maven的pom.xml:
apply plugin: 'java'

sourceCompatibility = '1.7'
[compileJava, compileTestJava]*.options*.encoding = 'UTF-8'

mainClassName = 'com.xxx.MyGroovyConsole'

repositories {
    mavenCentral()
}

dependencies {
    compile group: 'org.codehaus.groovy', name: 'groovy-all', version: '2.1.7'
    testCompile group: 'junit', name: 'junit', version: '4.10'
}
这其实就是一个Groovy脚本,只不过里面写的是Gradle的 DSL。
apply plugin: 'java'这行代码告诉Gradle加载java插件。
repositories {
    mavenCentral()
}
这段代码说我们想从 Maven Central Repository获取依赖。
dependencies {
    compile group: 'org.codehaus.groovy', name: 'groovy-all', version: '2.1.7'
    testCompile group: 'junit', name: 'junit', version: '4.10'
}
这段代码说明项目依赖groovy-all-2.1.7.jar和junit-4.10.jar
添加MyGroovyConsole.java
MyGroovyConsole项目很小,只有一个Java文件:
package com.xxx;

import groovy.lang.GroovyShell;
import groovy.ui.ConsoleTextEditor;
import java.awt.BorderLayout;
import java.awt.event.ActionEvent;
import java.awt.event.ActionListener;
import javax.swing.BorderFactory;
import javax.swing.JButton;
import javax.swing.JFrame;
import javax.swing.JPanel;
import javax.swing.JTextArea;
import javax.swing.UIManager;
import javax.swing.UnsupportedLookAndFeelException;
import javax.swing.plaf.nimbus.NimbusLookAndFeel;

public class MyGroovyConsole extends JFrame {

    private JButton runScriptButton;
    private JTextArea output;
    private ConsoleTextEditor scriptEditor;

    public MyGroovyConsole() {
        super("My Groovy Console");
        super.setDefaultCloseOperation(JFrame.EXIT_ON_CLOSE);

        createComponents();
        super.setContentPane(createContentPane());
        super.pack();
        super.setLocationRelativeTo(null);
    }

    private void createComponents() {
        scriptEditor = new ConsoleTextEditor();
        scriptEditor.getTextEditor().setPreferredSize(
                new JTextArea(10, 40).getPreferredSize());

        output = new JTextArea(6, 40);
        output.setEditable(false);

        runScriptButton = new JButton("Run");
        runScriptButton.addActionListener(new ActionListener() {

            @Override
            public void actionPerformed(ActionEvent e) {
                String text = scriptEditor.getTextEditor().getText();
                if (text != null && !text.trim().isEmpty()) {
                    GroovyShell shell = new GroovyShell();
                    //shell.setProperty("output", output);
                    //shell.evaluate("def log(arg) { output.append(arg); }");

                    Object result = shell.evaluate(text);
                    if (result != null) {
                        output.append(result + "");
                    }
                }
            }

        });
    }

    private JPanel createContentPane() {
        JPanel panel = new JPanel(new BorderLayout(4, 4));
        panel.setBorder(BorderFactory.createEmptyBorder(4, 4, 4, 4));
        panel.add(runScriptButton, BorderLayout.PAGE_START);
        panel.add(scriptEditor, BorderLayout.CENTER);
        panel.add(output, BorderLayout.PAGE_END);
        return panel;
    }

    public static void main(String[] args) throws UnsupportedLookAndFeelException {
        UIManager.setLookAndFeel(new NimbusLookAndFeel());
        new MyGroovyConsole().setVisible(true);
    }

}
把这个Java文件放到src\main\java\com\xxx目录下。代码比较简单,就不做说明了。
Build MyGroovyConsole
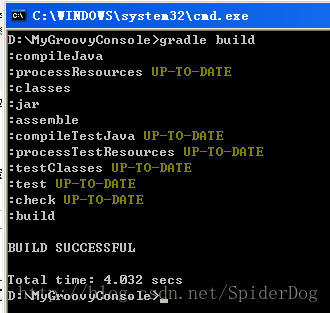
打开命令行窗口,cd到MyGroovyConsole工程目录,执行gradle build命令,可以看到类似下面的输出:
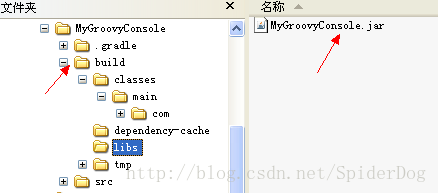
build任务(task)是java插件提供的,可以看到,Gradle先后执行了很多任务。build成功后,MyGroovyConsole工程目录下面会多一个标准的build子目录:
运行MyGroovyConsole
添加application插件:
apply plugin: 'java'
apply plugin: 'application'
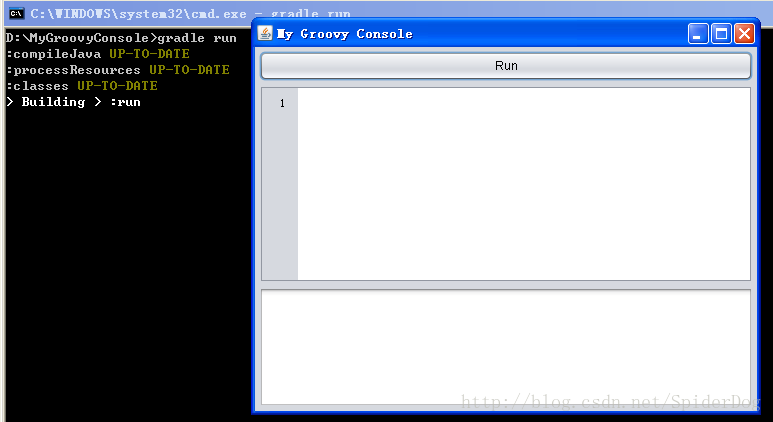
在命令行里执行 gradle run:
发布MyGroovyConsole
执行installApp任务:gradle installApp,执行完后,build目录下会多出一个install目录:
Gradle的application插件为我们创建了这个目录,甚至还生成了Windows版和Unix/Linux版启动脚本。在Windows下,双击MyGroovyConsole.bat即可启动程序。
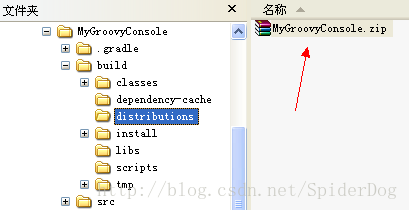
如果想以压缩包的形式发布程序,只要执行distZip任务即可,执行完后,可以在build/distributions目录下找到MyGroovyConsole.zip:
后记
MyGroovyConsole项目太简单了,没有演示到单元测试部分,但Gradle对JUnit和TestNG的支持也相当的好,值得一试。
MyGroovyConsole工程的压缩包可以从这里下载。
以上只是Gradle强大功能的冰山一角,更详细的介绍请参考Gradle官方文档。
虽然我自己接触Gradle时间也不长,但已经彻底喜欢上它了。再见Ant。再见Maven。
