DrawerLayoutACtionBar
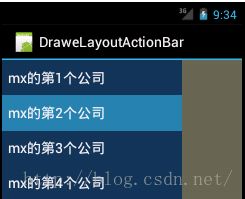
先看一下效果图
在DrawerLayout出现之前我们是如何实现侧滑菜单这一功能,其中有一个开源库叫做SlidingMenu,它被托管在github上,有兴趣的同学可与去github官网上去看一看,其中有library和example,可以下载下来进行学习,或者去其他网站搜索,接下来说一说本片文章的主角DrawerLayout
DrawerLayout是2013年在GoogleIO开发大会上由Google官方发布的,它被包含在support.v4这个包下,完全可以替代SlidingMenu来实现策划菜单的功能供开发者使用
布局文件中最外层是以DrawerLayout为根视图(android.support.v4.widget.Drawerlayout),而下面紧接着的FramLayout是主要内容的视图(当导航菜单隐藏的时候用户所能看到的视图),第二个视图是导航抽屉的视图,这里是一个ListView
注意这个属性android:layout_gravity="start",当为start(left)的时候表示从左向右划,当为end(right)的时候表示从右往左划
不需要项与项之间的分割条,所以用定义好的透明色属性android:divider="@android:color/transparent"与分割条为android:dividerHeight="0dp"
main.xml
<android.support.v4.widget.DrawerLayout xmlns:android="http://schemas.android.com/apk/res/android"
    android:id="@+id/drawer_layout"
    android:layout_width="fill_parent"
    android:layout_height="fill_parent"
    android:background="#ffffcc" >
 <!-- 没有命名空间的话需要手写命名空间 xmlns:android="http://schemas.android.com/apk/res/android" -->
    <!-- 主/根视图 主页面 -->

    <FrameLayout
        android:id="@+id/content_frame"
        android:layout_width="fill_parent"
        android:layout_height="fill_parent" >
    </FrameLayout>
    <!-- 导航视图 -->
    <!-- choiceMode="singleChoice" 单选模式 -->

    <ListView
        android:id="@+id/left_drawer"
        android:layout_width="240dp"
        android:layout_height="fill_parent"
        android:layout_gravity="start"
        android:background="#123456"
        android:choiceMode="singleChoice"
        android:divider="@android:color/transparent"
        android:dividerHeight="0dp" >
    </ListView>
<!--
        android:choiceMode  选中状态
                none              值为0,表示无选择模式;
                singleChoice      值为1,表示最多可以有一项被选中;
                multipleChoice    值为2,表示可以多项被选中。
     -->
</android.support.v4.widget.DrawerLayout>
这里我们设置子视图的宽为240dp,总屏幕的宽为320dp,为了让客户看到一些主内容的视图而设置不铺满屏幕
效果图:
在这里为ListView添加内容,所以我们需要一个ArrayList
DraweLayoutActionBarActivity.java
package com.abc.drawer;

import java.util.ArrayList;

import android.app.Activity;
import android.os.Bundle;
import android.support.v4.widget.DrawerLayout;
import android.widget.ArrayAdapter;
import android.widget.ListView;

public class DraweLayoutActionBarActivity extends Activity {
	/** Called when the activity is first created. */
	private DrawerLayout mDrawerLayout;
	private ListView mDrawerList;
	private ArrayList<String> menuList;// 存放ListView集合内容
	private ArrayAdapter<String> adapter;//

	@Override
	public void onCreate(Bundle savedInstanceState) {
		super.onCreate(savedInstanceState);
		setContentView(R.layout.main);
		mDrawerLayout = (DrawerLayout) findViewById(R.id.drawer_layout);
		mDrawerList = (ListView) findViewById(R.id.left_drawer);
		menuList = new ArrayList<String>();// 初始化集合menuList
		for (int i = 1; i < 7; i++) {
			menuList.add("mx的第" + i + "个公司");
			adapter = new ArrayAdapter<String>(this,
					android.R.layout.simple_list_item_1, menuList);// 初始化adapter,第三个参数为集合menuList进行适配器的数据填充

			mDrawerList.setAdapter(adapter);// 为listview设置adapter
		}
	}
}
再看一下效果图:
但是当我们点击的时候没有任何反应,是因为我们还没有为当前的ListView添加监听事件,所以接下来我们将为其添加监听事件,调用setOnItemClickListener
每当点击一个item的时候动态的插入一个fragment到Framelayout中去,所以我们需要创建一个Fragment,但是为了区分每一个Fragment都不一样,所以我们创建一个TextView,并通过使用Bundle携带相应的参数(这里我们传递的是ListView列表的值),一个Fragment创建好了,我们还需要创建一个FragmentManager,其中为当前的Fragment开启一个事务beginTransaction()后需要调用replace方法,因为需要让当前的Fragment替换掉原来的,所以我们需要调用replace方法, replace(int containerViewId, Fragment fragment)
containerViewId:将当前的fragment填充到那个(主/FrameLayout)视图中这里我们指定为R.id.content_fram
fragment : 要插入的新的fragment
Fragment_content.java
package com.abc.drawer;

import java.util.zip.Inflater;
import android.app.Fragment;
import android.os.Bundle;
import android.view.LayoutInflater;
import android.view.View;
import android.view.ViewGroup;
import android.widget.TextView;

public class Fragment_content extends Fragment {
private TextView textview;
	@Override
	public View onCreateView(LayoutInflater inflater, ViewGroup container,
			Bundle savedInstanceState) {

	View view=	inflater.inflate(R.layout.fragment_content, container, false);
	textview=(TextView) view.findViewById(R.id.textview);

	String text=getArguments().getString("text");//接受传递进来的参数的值
	textview.setText(text);
	return view;
	}
}
fragment_content.xml
<?xml version="1.0" encoding="utf-8"?>
<LinearLayout xmlns:android="http://schemas.android.com/apk/res/android"
    android:layout_width="match_parent"
    android:layout_height="match_parent"
    android:orientation="vertical" >
<TextView
     android:layout_width="match_parent"
      android:layout_height="wrap_content"

      android:textSize="25sp"
      android:textColor="@android:color/black"
      android:id="@+id/textview"
    />


</LinearLayout>
注意:当为Fragment添加一个事务的时候,一定要进行提交commit(),否则事务不会生效
而修改后的代码为
成了初始化导航列表,并且为这个列表设置监听事件,使得点击不同的列表项能够插入不同的Fragmentpackage com.abc.drawer; import java.util.ArrayList; import android.app.Activity; import android.app.Fragment; import android.app.FragmentManager; import android.os.Bundle; import android.support.v4.widget.DrawerLayout; import android.view.View; import android.widget.AdapterView; import android.widget.ArrayAdapter; import android.widget.ListView; import android.widget.AdapterView.OnItemClickListener; public class DraweLayoutActionBarActivity extends Activity { /** Called when the activity is first created. */ private DrawerLayout mDrawerLayout; private ListView mDrawerList; private ArrayList<String> menuList;// 存放ListView集合内容 private ArrayAdapter<String> adapter;// @Override public void onCreate(Bundle savedInstanceState) { super.onCreate(savedInstanceState); setContentView(R.layout.main); mDrawerLayout = (DrawerLayout) findViewById(R.id.drawer_layout); mDrawerList = (ListView) findViewById(R.id.left_drawer); menuList = new ArrayList<String>();// 初始化集合menuList for (int i = 1; i < 7; i++) { menuList.add("mx的第" + i + "个公司"); adapter = new ArrayAdapter<String>(this, android.R.layout.simple_list_item_1, menuList);// 初始化adapter,第三个参数为集合menuList进行适配器的数据填充 mDrawerList.setAdapter(adapter);// 为listview设置adapter } mDrawerList.setOnItemClickListener(new OnItemClickListener() { // 为每个listview设置监听事件 public void onItemClick(AdapterView<?> arg0, View arg1, int position, long arg3) { // 每当点击一个item的时候动态的插入一个fragment到Framelayout中去 Fragment fragment = new Fragment_content();// Fragment_content()自己创建的Fragment Bundle args = new Bundle();// 为了区分每一个fragment都不一样,让当前的fragment携带上参数 args.putString("text", menuList.get(position));// 当前点击的菜单项的值 fragment.setArguments(args);// 让contentFragment携带上这个参数 FragmentManager fm = getFragmentManager(); fm.beginTransaction().replace(R.id.content_frame, fragment) .commit(); // R.id.content_frame将当前的fragment填充到那个(主/FrameLayout)视图中 // contentFragment要插入的fragment mDrawerLayout.closeDrawer(mDrawerList);// 点击一个选项之后当前的导航菜单就需要隐藏了 } }); } // 监听DrawerLayout的监听事件 }// 监听ListView的点击事件
ActionBarDrawerTaggle是DrawerLayout.DrawerListener的具体实现类,它是链接ActionBar与DrawerLayout的一个纽带,其作用有三点:
1)改变android.R.id.home的图标,也就是右上角的返回图标(通过构造方法实现)
2)Drawer拉出或隐藏的时候,带有android.R.id.home的动画效果(syncState())
3)监听Drawer拉出或隐藏事件(覆写onDrawerOpened()和onDrawerClosed)
注*
同时也应该覆写Activity的onPostCreate()方法和onConfigurationChanged()方法
之所以覆写onPostCreate(),是为了结合syncState()来实现左上角图标的动画效果
当设备的一些参数发生变化的时候,比如说屏幕旋转了,就会调用onConfigurationChanged()方法
第四个和第五个参数是drawer打开或关闭时的内容资源,这里我们在string.xml中添加两个对于的字符串,
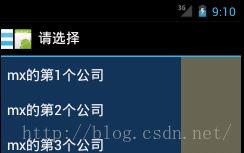
接下来先看一下带有动画效果的Drawer
只需要添加抽屉的点击事件
 mDrawerLayout.setDrawerListener(mDrawerToggle); //为mDrawerToggle设置监听事件,将mDrawerToggle传递进来
			mDrawerToggle = new ActionBarDrawerToggle(this, mDrawerLayout,
					R.drawable.icon_app, R.string.Drawer_Open,
					R.string.Drawer_Close){

				 public void onDrawerOpened(View drawerView) {
						// 打开抽屉的方法
						super.onDrawerOpened(drawerView);
						getActionBar().setTitle("请选择");//动态标题的改变
						//重新对actionbar上的menu进行操作invalidateOptionsMenu
						//invalidateOptionsMenu();//当调用此方法的时候系统会自动调用onPrepareOptionsMenu()
					}
					public void onDrawerClosed(View drawerView) {
						//关闭抽屉的方法
						super.onDrawerClosed(drawerView);
						getActionBar().setTitle(mTitle);//关闭drawer后的标题选择最初的标题getTitle()
						//invalidateOptionsMenu();
					}
			};
因为右上角图标其实是一个OptionsMenu,所以我们覆写 onPrepareOptionsMenu,onCreateOptionsMenu这两个方法,根据drawer是显示或隐藏来显示右上角图标的显示或隐藏,首先我们需要创建一个menu.xml(如果对ActionBar不太熟悉,可以看一下我之前写的ActionBar详细总结介绍)
menu.xml
<?xml version="1.0" encoding="utf-8"?>
<menu xmlns:android="http://schemas.android.com/apk/res/android" >

    <item
        android:id="@+id/action_websearc"
        android:icon="@drawable/search"
        android:showAsAction="always"
        android:title="search"></item>

</menu>
这样看起来不太美观,所以我们要为左上角添加一个返回图标,而返回图标也是OptionsMenu,所以我们需要在onPrepareOptionsMenu中写代码。
这里我们将actionbar上的图标与drawer结合起来,并通过if语句判断
if (mDrawerToggle.onOptionsItemSelected(item)) {
					return true;
				}
只有通过if判断才可以实现点击左上角实现打开或关闭抽屉
那么现在还有一种效果没有实现,也就是当我点击左上角的图标的时候没有看到有三个横线的那个图标,并且也没有任何动画效果,我们还有最后一步没有实现,就是调用syncState()方法
来看一下总的代码
顺便在list中添加一些功能
list.xml
<?xml version="1.0" encoding="utf-8"?>
<RelativeLayout xmlns:android="http://schemas.android.com/apk/res/android"
    android:layout_width="fill_parent"
    android:layout_height="80dp"
    android:background="@drawable/background"
    android:gravity="center_vertical" >

    <ImageView
        android:id="@+id/home_menu_header_userpic"
        android:layout_width="60dp"
        android:layout_height="60dp"
        android:layout_margin="10dip"
        android:scaleType="centerCrop"
        android:src="@drawable/head" />

    <TextView
        android:id="@+id/home_menu_header_name"
        android:layout_width="wrap_content"
        android:layout_height="wrap_content"
        android:layout_marginTop="10dip"
        android:layout_toRightOf="@+id/home_menu_header_userpic"
        android:text="平安保贤"
        android:textColor="@android:color/white"
        android:textSize="24sp" />

    <TextView
        android:id="@+id/home_menu_header_remark"
        android:layout_width="wrap_content"
        android:layout_height="wrap_content"
        android:layout_alignLeft="@+id/home_menu_header_name"
        android:layout_below="@+id/home_menu_header_name"
        android:layout_marginTop="3dip"
        android:layout_toRightOf="@+id/home_menu_header_userpic"
        android:text="账号:mx123456"
        android:textColor="@android:color/white"
        android:textSize="16sp" />

    <ImageView
        android:layout_width="wrap_content"
        android:layout_height="wrap_content"
        android:layout_alignParentRight="true"
        android:layout_centerVertical="true"
        android:layout_margin="10dip"
        android:src="@drawable/back" />

</RelativeLayout>
package com.abc.example;

import java.util.ArrayList;

import android.app.Activity;
import android.app.Fragment;
import android.app.FragmentManager;
import android.content.Intent;
import android.content.res.Configuration;
import android.net.Uri;
import android.os.Bundle;
import android.support.v4.app.ActionBarDrawerToggle;
import android.support.v4.widget.DrawerLayout;
import android.view.LayoutInflater;
import android.view.Menu;
import android.view.MenuItem;
import android.view.View;
import android.widget.AdapterView;
import android.widget.ArrayAdapter;
import android.widget.ListView;
import android.widget.AdapterView.OnItemClickListener;

public class ExampleActivity extends Activity {
    /** Called when the activity is first created. */
	private DrawerLayout mDrawerLayout;
	private ListView mDrawerList;
	private ArrayList<String> menuList;// 存放ListView集合内容
	private ArrayAdapter<String> adapter;//
	private ActionBarDrawerToggle mDrawerToggle;
	private String mTitle;// 获取得到最初的标题,不可以这样写String mTitle=(String) getTitle();
	// 否则会没有回掉标题
	private View heandrView;
	public void onCreate(Bundle savedInstanceState) {


	super.onCreate(savedInstanceState);
		setContentView(R.layout.main);
		heandrView = LayoutInflater.from(this).inflate(R.layout.list, null);

		mTitle=(String) getTitle();//赋值只能写在onCreate里面,否则回掉时会显示空内容
		mDrawerLayout = (DrawerLayout) findViewById(R.id.drawer_layout);
		mDrawerList = (ListView) findViewById(R.id.left_drawer);
		mDrawerList.addHeaderView(heandrView);
		menuList = new ArrayList<String>();// 初始化集合menuList
		for (int i = 1; i < 7; i++) {//在for循环中添加两个监听事件, 监听ListView的点击事件savedInstanceState

			menuList.add("mx的第" + i + "个公司");
			adapter = new ArrayAdapter<String>(this,
					android.R.layout.simple_list_item_1, menuList);// 初始化adapter,第三个参数为集合menuList进行适配器的数据填充

			mDrawerList.setAdapter(adapter);// 为listview设置adapter

			// 第一部分:监听ListView的点击事件&&&&&&&&&&&&&&&&&&&&&&&&&&&&&&&&&&&&&&&&&&&&&&&&&&&&&&//

			mDrawerList.setOnItemClickListener(new OnItemClickListener() {
				// 为每个listview设置监听事件
				public void onItemClick(AdapterView<?> arg0, View arg1,
						int position, long arg3) {
					// 每当点击一个item的时候动态的插入一个fragment到Framelayout中去
					Fragment fragment = new Fragment_content();// Fragment_content()自己创建的Fragment
					Bundle args = new Bundle();// 为了区分每一个fragment都不一样,让当前的fragment携带上参数
					if (0 == position){
						position = 1;//if判断是否点击个人头像,如果点击使其赋值于第二个
					}
					//这里减一是因为开始的头像占据了第一行
					args.putString("text", menuList.get(position-1));// 当前点击的菜单项的值,等家于menuLists[position-1]
					fragment.setArguments(args);// 让contentFragment携带上这个参数

					FragmentManager fm = getFragmentManager();
					fm.beginTransaction().replace(R.id.content_frame, fragment)
							.commit();
					// R.id.content_frame将当前的fragment填充到那个(主/FrameLayout)视图中
					// contentFragment要插入的fragment
					mDrawerLayout.closeDrawer(mDrawerList);// 点击一个选项之后当前的导航菜单就需要隐藏了
				}
			});
			//第二部分:监听DrawerLayout的监听事件 &&&&&&&&&&&&&&&&&&&&&&&&&&&&&&&&&&&&&&&&&&&&&&&&&&&&&&//


			 mDrawerLayout.setDrawerListener(mDrawerToggle); //为mDrawerToggle设置监听事件,将mDrawerToggle传递进来
			mDrawerToggle = new ActionBarDrawerToggle(this, mDrawerLayout,
					R.drawable.icon_app, R.string.Drawer_Open,
					R.string.Drawer_Close){

				 public void onDrawerOpened(View drawerView) {
						// 打开抽屉的方法
						super.onDrawerOpened(drawerView);
						getActionBar().setTitle("请选择");//动态标题的改变
						//重新对actionbar上的menu进行操作invalidateOptionsMenu
						invalidateOptionsMenu();//当调用此方法的时候系统会自动调用onPrepareOptionsMenu()
					}
					public void onDrawerClosed(View drawerView) {
						//关闭抽屉的方法
						super.onDrawerClosed(drawerView);
						getActionBar().setTitle(mTitle);//关闭drawer后的标题选择最初的标题getTitle()
						invalidateOptionsMenu();
					}
			};

			 //3、使左上角有一个系统自带的返回图标
			//开启actionbar上icon的功能
			     getActionBar().setDisplayHomeAsUpEnabled(true);//q启用actionbar左上角的返回图标
			     getActionBar().setHomeButtonEnabled(true);//使左上角的homebutton图标可用
			}//for循环结束括号


	}
	// 第三部分:显示右上角搜索图标&&&&&&&&&&&&&&&&&&&&&&&&&&&&&&&&&&&&&&&&&&&&&&&&&&&&&&//
		@Override
		public boolean onPrepareOptionsMenu(Menu menu) {
			// 根据drawer是显示或隐藏来显示右上角图标的显示或隐藏
			boolean isDrawerOpen = mDrawerLayout.isDrawerOpen(mDrawerList);
			// 设置右上角图标的可见状态,获取drawelayout的关闭状态
			menu.findItem(R.id.action_websearc).setVisible(!isDrawerOpen);
			return super.onPrepareOptionsMenu(menu);
		}
	@Override
	public boolean onCreateOptionsMenu(Menu menu) {
		// Inflate the menu; this adds items to the action bar if it is present.
		getMenuInflater().inflate(R.menu.menu, menu);
		return true;
	}
	// 第四部分:使搜索图标可用&&&&&&&&&&&&&&&&&&&&&&&&&&&&&&&&&&&&&&&&&&&&&&&&&&&&&&//
	// 2、为搜索图标设置网络链接,调用系统自带的浏览器
	public boolean onOptionsItemSelected(MenuItem item) {
		//将ActionBar上的图标与Drawer结合起来
		// 3的左上角图标也是MenuItem,所以将actionbar上的图标与drawer结合起来
				if (mDrawerToggle.onOptionsItemSelected(item)) {
					return true;// 只有通过if判断才可以实现点击左上角实现打开或关闭抽屉
				}

		switch (item.getItemId()) {
		case R.id.action_websearc:
			Intent intent = new Intent();
			intent.setAction("android.intent.action.VIEW");
			Uri uri = Uri.parse("http://www.baidu.com");
			intent.setData(uri);
			startActivity(intent);
			break;
		}
		return super.onOptionsItemSelected(item);
	}
	// 第五部分:使搜索图标可用&&&&&&&&&&&&&&&&&&&&&&&&&&&&&&&&&&&&&&&&&&&&&&&&&&&&&&//
	// 4、实现左上角三个横杠的图片
			@Override
			protected void onPostCreate(Bundle savedInstanceState) {
			super.onPostCreate(savedInstanceState);
				// 需要将ActionDrawerTaggle与DrawerLayout的状态同步
				// 需要将ActionDrawerTaggle的Drawer图标设置为Home——Button的icon
			mDrawerToggle.syncState();//实现同步
		}

		@Override// 当屏幕旋转/横屏的时候需要调用以下这个方法
		public void onConfigurationChanged(Configuration newConfig) {
			//此方法是google开发文档中极力建议我们写的
			super.onConfigurationChanged(newConfig);
			mDrawerToggle.onConfigurationChanged(newConfig);
		}

}
运行结果图
在你的string.xml中添加如下代码
<string-array name="planets_array">
        <item>E</item>
        <item>Horse</item>
        <item>Panda</item>
        <item>Penguins</item>
        <item>Rabbit</item>
        <item>Tiger</item>

    </string-array>
Fragment_content.java
import java.util.Locale;
import java.util.zip.Inflater;

import android.app.Fragment;
import android.app.FragmentManager;
import android.os.Bundle;
import android.view.LayoutInflater;
import android.view.View;
import android.view.ViewGroup;
import android.widget.ImageView;
import android.widget.TextView;

public class Fragment_content extends Fragment {
private TextView textview;
private ImageView imageview=null;
	@Override
	public View onCreateView(LayoutInflater inflater, ViewGroup container,
			Bundle savedInstanceState) {
		  String ARGS = "text";
	View view=	inflater.inflate(R.layout.fragment_content, container, false);
	textview=(TextView) view.findViewById(R.id.textview);

	//int text=getArguments().getInt(ARGS);//接受传递进来的参数的值
	String text=getArguments().getString("text");//接受传递进来的参数的值
	int text1=getArguments().getInt("text1");//接受传递进来的参数的值
       String arg[]={text};
	//将数组转换成字符串
			textview.setText(text);


	String planet = getResources().getStringArray(R.array.planets_array)[text1]; //Integer.parseInt(text) =[i]

    //查找出 res-drawable资源的id
    int imageId = getResources().getIdentifier(planet.toLowerCase(Locale.getDefault()),
                   "drawable", getActivity().getPackageName());
    imageview=(ImageView) view.findViewById(R.id.one);
    imageview.setImageResource(imageId);

    getActivity().setTitle(planet);

	return view;

	}

}
在这里注释都写的很清楚了,我就不在做详细介绍了,只是有一点需要注意,我们既然想要获取点击的图片,就必须获取点击是第几个按钮,args.putInt("text1", position-1);通过在源码中添加这行代码就可以了
效果图


